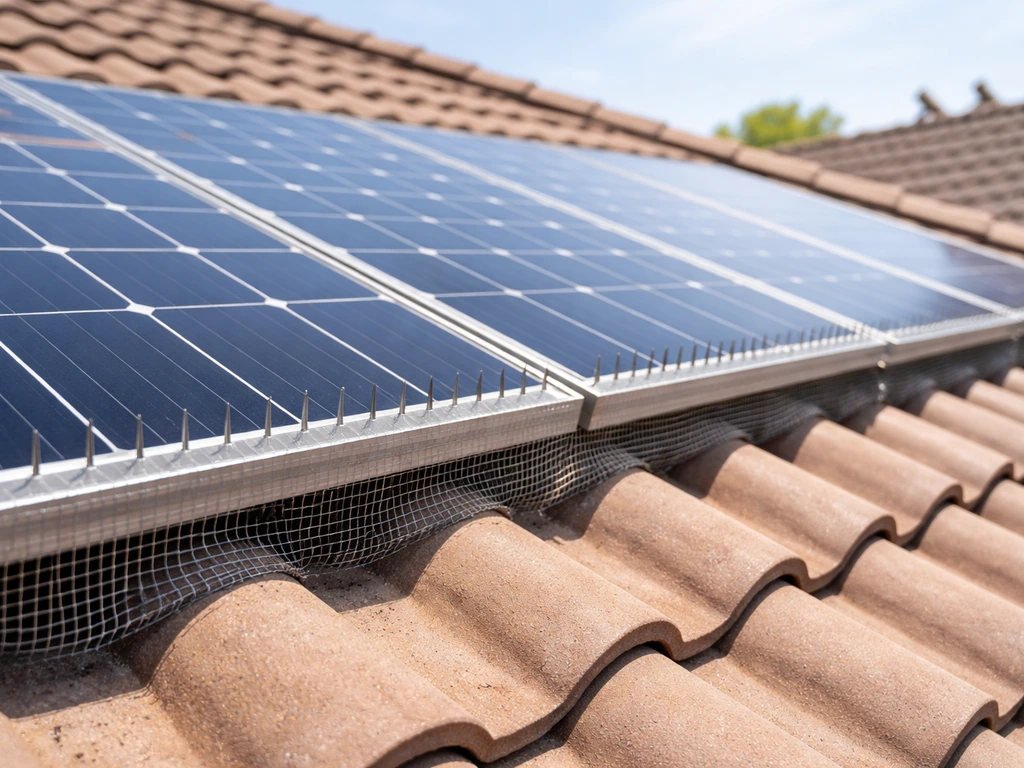
The most effective way to bird-proof solar panels is to combine a physical barrier, specifically a mesh exclusion system clipped around the panel perimeter, with bird spikes along nearby roof edges and ridges where birds land first. That combination stops nesting under the panels and removes the perching spots that draw birds to the roof in the first place. Everything else, reflective tape, ultrasonic devices, decoys, is secondary and works best as a supplement, not a standalone fix.
How to Bird Proof Solar Panels: Step-by-Step Guide

Marcus Weatherby
18 May 2026
Why birds target solar panels and what damage they actually cause
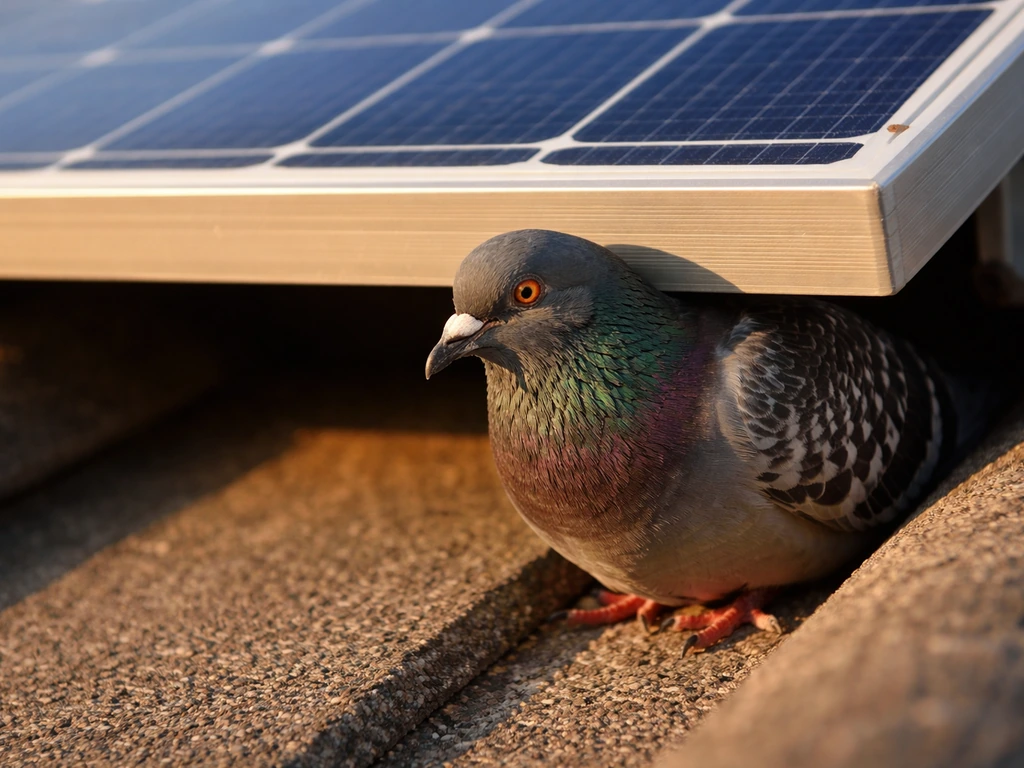
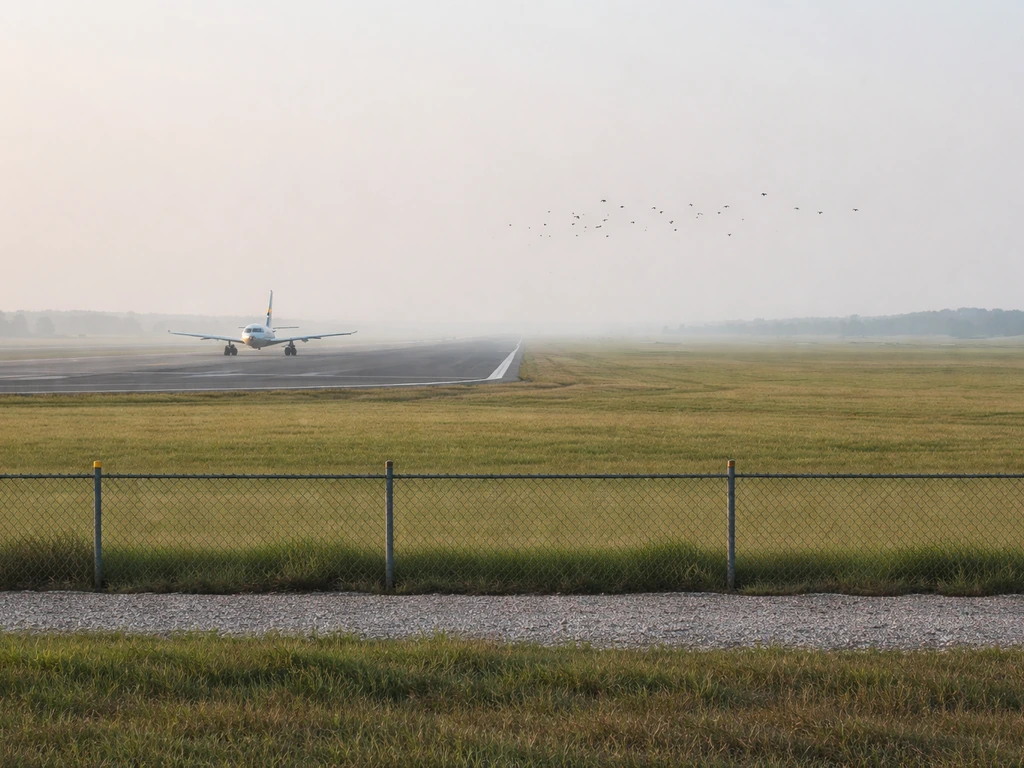
Solar panels give birds exactly what they look for: an elevated, sheltered structure that holds warmth. U.S. research has observed higher bird densities at PV arrays compared with adjacent open grassland, which tells you these installations are genuinely attractive habitat, not just an occasional roosting stop. U.S. airport-related research documented that bird species observed differed between airfield grasslands and photovoltaic (PV) arrays, indicating PV installations can function as attractive habitat higher bird densities at PV arrays compared with adjacent open grassland. Pigeons, starlings, and sparrows are the most common offenders on residential rooftops. They perch on the panel edges, roost beneath the array gap, and if left unchecked, build nests in the cavity between the panel and the roof surface.
The damage adds up fast. Droppings accumulate on panel glass and cause shading that cuts output. Heavy infestations are commonly reported to reduce solar production by 10 to 20 percent, which on a typical residential system can be a meaningful hit to your annual yield. Beyond shading, droppings are acidic and will eventually etch glass and corrode aluminum frames with prolonged exposure. Nesting material under panels is a fire risk and traps moisture against roofing materials. And when droppings block enough of a panel string, bypass diodes can trigger, knocking out entire cell strings rather than just the soiled cells, a problem that doesn't show up until you pull a production report.
Assess your setup before buying anything
Spend ten minutes assessing your specific installation before you order any product. The right solution for a roof-mounted residential array is different from what you'd use on a ground-mounted commercial field, and getting that wrong wastes money.
Roof-mounted arrays
Look at the gap between the bottom edge of the panels and the roof surface. Most residential mounts leave a 4 to 6 inch gap, which is more than enough for pigeons and starlings to enter and nest. Check all four sides: front edge, side edges, and the top edge near the ridge. Also look at the roof ridge itself, any flat cap flashing, gutters, and nearby HVAC penetrations. These are secondary landing zones birds use before moving to the panels. Note whether existing nesting material is already present, because that will affect your legal options (more on that below).
Ground-mounted arrays
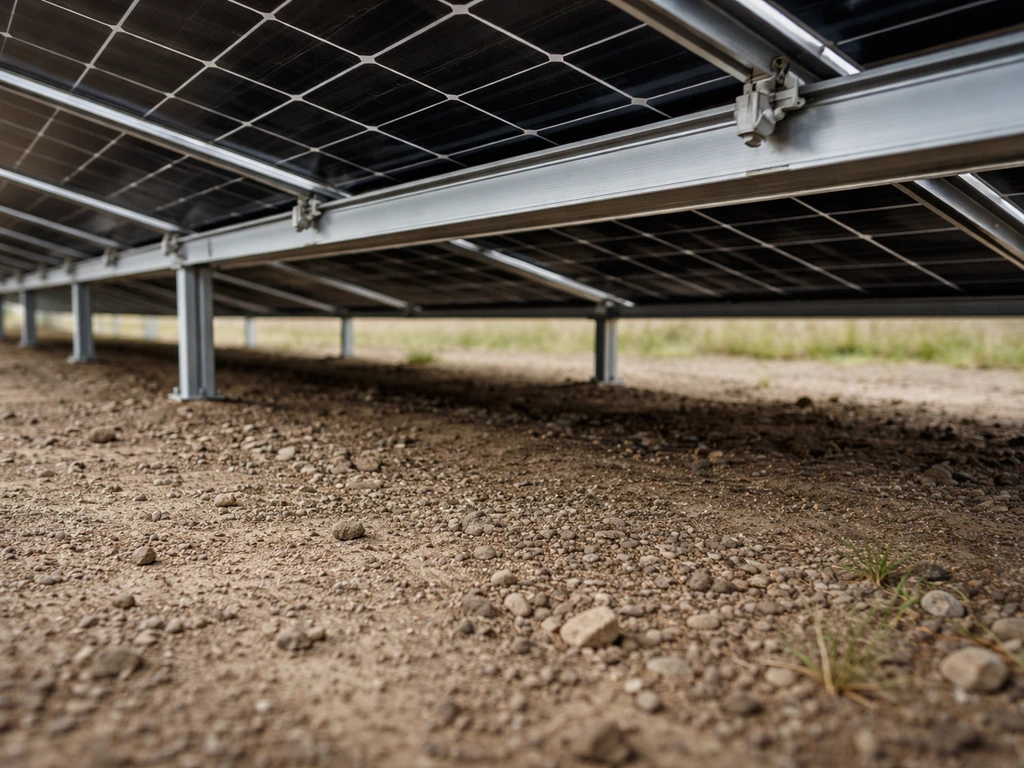
Ground mounts present a different geometry. The underside is much more accessible and the gap from ground to panel can be anywhere from a few inches on low-tilt fixed mounts to several feet on tracker systems. Birds can approach from any direction. For large commercial ground arrays, netting over the entire underside frame is usually the most practical option. For smaller residential ground mounts, a combination of mesh skirting around the frame perimeter and spikes along the top rail works well. Also assess nearby perching structures: fence posts, conduit runs, and adjacent trees all act as staging areas.
Physical deterrents that work on solar panels
Physical barriers are the foundation of any effective solar bird-proofing plan. Bird-proofing is the set of physical, visual, and sensory steps you use to stop birds from nesting, perching, and causing damage on solar panel systems solar bird-proofing plan. They create a permanent, weather-resistant exclusion that doesn't habituate birds the way sound and visual devices do.
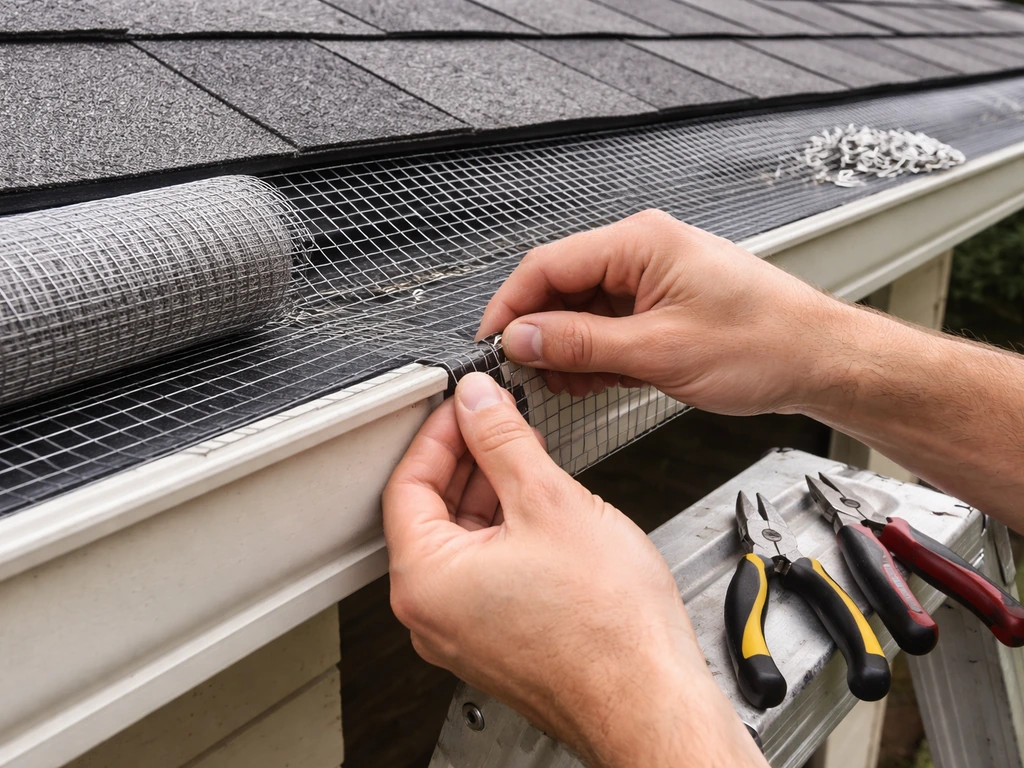
Mesh exclusion systems
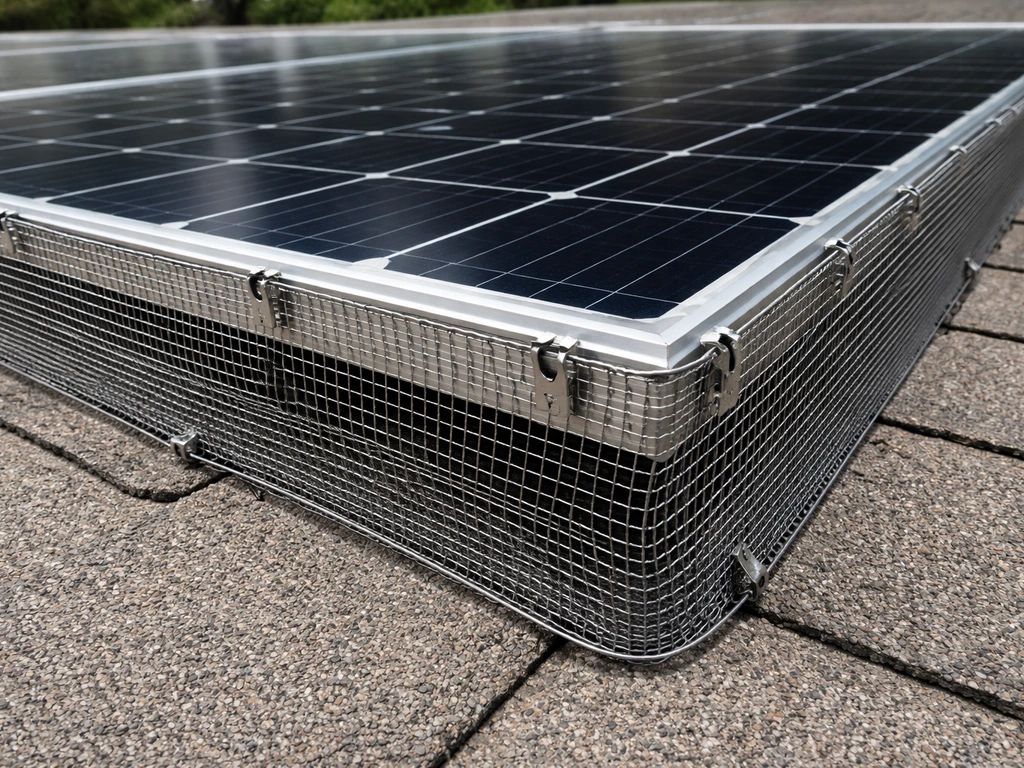
A panel-perimeter mesh system is the gold standard for solar bird exclusion. Products like the Nixalite SolarGuard use a clip-and-wire approach: small clips attach to the panel frame, a tensioned wire runs the perimeter, and a UV-stabilized galvanized or PVC-coated wire mesh hangs from that wire to cover the gap between panel edge and roof. The mesh is sized to block birds while maintaining airflow underneath, which matters for panel cooling and therefore efficiency. When installed correctly, nothing gets in from any side. The mesh should be 19-gauge or heavier for durability and sized at about half an inch opening to exclude sparrows as well as pigeons.
Bird spikes
Spikes belong on the panel top edges, roof ridge, and any nearby ledge or cap flashing where birds land before moving to the panels. Products like Bird-X Stainless SPIKES use stainless steel projections on a UV-protected polycarbonate base. They're non-lethal: they simply remove flat landing space. On solar panels specifically, attach spikes along the top frame rail and any exposed mounting rail that extends beyond the panel edge. Do not attach spikes directly to the glass or to any rail in a way that could trap debris or restrict water drainage. Space strips end to end with no gaps, because birds will find and use a two-inch gap.
Angled panel guards
Some installers use angled plastic or aluminum perch guards along the top rail. These work on the same principle as spikes but present a sloped surface instead of projections. They're tidier looking and good for installations where aesthetics matter. Effectiveness is comparable for larger birds but less reliable for small sparrows that can grip the edge of an angled surface.
Netting for large or commercial arrays
For commercial roof or ground installations where dozens of panels span a large continuous area, full exclusion netting tensioned over the array or its underside is often more practical than clipping mesh to every individual panel. Use 19mm (3/4 inch) or 50mm (2 inch) knotted polyethylene netting depending on target species. This is almost always a professional installation job because tensioning large net spans correctly requires specialized hardware and training.
Visual and sensory deterrents: what actually works and what doesn't
Sensory deterrents can supplement a physical barrier program, but they have real limitations you should understand before spending money.
Reflective and visual scare devices
Reflective tape, mylar flash tape, and spinning reflective discs create unpredictable light patterns that startle birds. They work best in the first few weeks of deployment. Birds, especially pigeons and starlings, are intelligent and habituate quickly, often within two to four weeks, if the visual cue doesn't vary or move. If you use reflective tape along panel edges or above arrays, plan to reposition it regularly. Predator decoys like owl figures have a similar story: effective for a short period, then ignored. A moving decoy on a pivot pin performs better than a static one but still requires rotation to maintain pressure.
Sonic deterrents
Audible sonic units that broadcast distress calls or predator calls can be effective, particularly for species-specific calls matched to the nuisance bird. They work best in open areas with line-of-sight coverage and are better suited to commercial ground arrays than residential rooftops, where neighbors and local noise ordinances are a real constraint. Use them on a timer so the pattern stays unpredictable.
Ultrasonic devices
Skip these for outdoor solar applications. Scientific review of efficacy studies consistently fails to support ultrasonic sound devices as effective long-term bird deterrents, and the research is clear: birds simply don't respond reliably to frequencies outside their hearing range in an outdoor setting where ambient noise is variable. Save that budget for mesh or spikes.
Chemical repellents: when they make sense near solar hardware
Chemical repellents are rarely the right first choice for solar panel bird-proofing, but there are specific situations where they add value.
Methyl anthranilate (MA) fogging repellents, like EcoBird 4.0, work as a contact irritant: birds exposed to the haze find the sensation unpleasant and leave the area. MA is derived from grape extract and is generally considered low-toxicity for non-target animals. It's used in agriculture and at airports for bird dispersal. For solar applications it makes most sense as a temporary dispersal tool during initial installation of physical deterrents, not as a permanent standalone solution, because it dissipates and requires repeated application.
Gel repellents applied to rails or ledges are another option. They create a sticky, uncomfortable surface. However, on solar panels there are real compatibility concerns: gel can trap dirt and debris, smear onto panel glass if applied too close, and degrade in UV exposure, leaving a residue that's difficult to remove from aluminum frames. If you use gel, keep it strictly on non-panel surfaces like mounting rails, roof edges, and parapet walls, and check compatibility with your specific rail coating.
One firm rule: never apply any chemical repellent directly to panel glass or on a surface where runoff could reach panel glass. Any film on the glass surface creates a shading and cleaning problem that negates your solar output.
How to install bird-proofing on solar panels
Here's how to approach the installation from start to finish, whether you're doing it yourself or overseeing a professional. Follow the steps below for how to install bird guard on solar panels, from assessing your setup to confirming coverage after installation start to finish.
Tools and materials checklist
- Panel-perimeter mesh exclusion kit (clips, wire, mesh) sized for your panel frame thickness
- Wire cutters and needle-nose pliers for clip installation
- Stainless steel bird spike strips for ridge and top-rail perching zones
- UV-resistant zip ties or panel-safe adhesive for supplementary attachment
- Rubber mallet and drill with appropriate bit for any required pilot holes in rails
- Non-slip footwear, a properly rated roof ladder or standoff ladder, and fall protection harness if pitch exceeds 4:12
- Safety glasses and gloves for handling wire mesh and spike strips
- Measuring tape and chalk line for consistent spacing
Step-by-step installation
- Clear the area first. Remove any existing nesting material (see legal note below before touching active nests), sweep panels clean, and inspect the frame for corrosion or damage that needs repair before sealing birds out.
- Attach mesh clips to the panel frame. Follow the kit instructions for your specific product: most clip systems snap or screw onto the panel frame every 12 to 18 inches around the perimeter. Do not drill into the panel itself, only into the frame rail.
- Run the perimeter wire through the clips at consistent tension. Check that the wire sits flush against the frame edge all the way around with no sagging sections.
- Cut mesh to length and attach it to the wire. The mesh should extend from the wire down to the roof surface or as close as mounting clearance allows. Overlap corner sections and secure with additional wire ties to close any gaps.
- Install bird spike strips along the top panel rail and roof ridge. Press the base firmly and secure with panel-safe adhesive or UV-resistant zip ties. Ensure strips butt end-to-end with zero gaps.
- Check all four sides of every panel for any access point larger than half an inch. Stuff foam backer rod into unavoidable gaps before the mesh goes on, then cover with mesh as normal.
- Do a final walk-around inspection from ground level and from the rooftop to confirm full coverage.
DIY vs professional installation
For a standard residential roof-mounted array with a moderate pitch (under 4:12) and no active nests, this is a manageable DIY project for someone comfortable on a roof. Budget two to four hours for a typical 10 to 20 panel system and expect material costs in the range covered separately in the bird-proofing cost guide. For detailed pricing by roof type and system size, refer to the bird-proofing cost guide for typical DIY and professional ranges.
If you're planning the budget, the total cost usually depends on panel size, roof accessibility, and whether you choose mesh, spikes, or full netting bird-proofing cost guide. For anything on a steep pitch, a large commercial array, a multi-story building, or a system with active nesting birds requiring permits, hire a licensed pest control or bird-control specialist.
A dryer vent bird guard installs in a similar step-by-step way, so you can plan coverage and fit before mounting anything steep pitch. Roof falls are among the most serious DIY hazards, and a professional crew will have the right access equipment and carry liability coverage.
If you're considering professional help, look for contractors experienced specifically in solar bird exclusion rather than general pest control. The installation guide for solar panel bird guards covers the technical steps in more detail for those who want to go deeper on the install side.
Legal note on active nests
Before you touch any nest, check whether it's active. In the U.S., most bird nests are protected under the Migratory Bird Treaty Act. It is illegal to destroy, move, or disturb an active nest containing eggs or chicks without a federal permit. Permits are generally only granted when a nest poses a direct human health or safety hazard. House sparrows and European starlings are not protected under the MBTA, but most other species are. If in doubt, contact a licensed wildlife control operator or your state wildlife agency before proceeding.
Testing effectiveness and handling persistent birds
Install your deterrents and then give it two to three weeks before evaluating. If you are also dealing with birds entering your home through openings, the best bird proof dryer vent can be a related option to check alongside your solar bird-proofing gaps. Check for new droppings, feathers, or debris accumulating along the mesh edges. Fresh activity after installation almost always means a gap was missed. Go back up and do a physical inspection of every section. For dryer vent openings, a high-quality bird guard can reduce the chance that birds nest in vents and find easy entry points.
What to do when birds keep coming back
Persistent return behavior after a physical barrier is installed usually has one of three causes: a gap in coverage, a secondary landing zone nearby that wasn't addressed, or a species that is particularly motivated by an established nesting site. For gaps, inspect the mesh system methodically and close any opening larger than half an inch. For secondary landing zones, extend spike coverage to the gutter line, nearby pipe penetrations, and adjacent roof features. For highly motivated nesters returning to a site they've used before, add a visual deterrent like a moving reflective spinner near the previously nested location while your physical barriers deny access.
Ongoing maintenance schedule
- Inspect mesh and spikes visually from ground level every 4 to 6 weeks during active bird seasons (spring and fall are peak nesting and roosting periods)
- Do a hands-on rooftop inspection twice per year: check clip tension, mesh integrity, and spike base adhesion
- Clear gutters and nearby debris at least twice per year, as accumulated leaf litter creates additional nesting appeal
- Reposition any reflective or visual deterrents monthly to prevent habituation
- Clean droppings from panel glass with a soft brush and clean water after any infestation to restore full output; avoid abrasive materials on panel glass
Tailoring your approach by bird species
| Species | Primary behavior | Most effective deterrent |
|---|---|---|
| Pigeons | Nesting under panels, heavy droppings | Mesh exclusion on all panel edges plus spikes on top rail |
| Starlings | Roosting in flocks, messy but less nesting | Mesh exclusion plus sonic distress calls during roost build-up |
| House sparrows | Nesting in tight gaps, small entry points | Half-inch or smaller mesh, foam backer in any remaining gaps |
| Seagulls (commercial coastal) | Perching on top rail, droppings | Heavy-gauge spikes on top rail plus visual deterrents |
| Crows/ravens | Occasional perching, intelligent and adaptive | Rotating visual deterrents plus spikes; habituation is fast so vary tactics |
Prevention planning to stop return behavior long-term
Birds return to sites where they previously roosted or nested because of scent memory and learned behavior. After you've installed barriers and cleared any previous nesting material, clean the area thoroughly, including the underside of panels and the roof surface below, to remove pheromone markers. Apply a wash with a diluted enzyme cleaner if heavy nesting material was present. A complete physical exclusion combined with site cleaning gives you the strongest long-term prevention. Maintenance is non-negotiable: a mesh system with a failed clip and a two-inch gap will be found and exploited within a season.
FAQ
Can I bird-proof solar panels if there’s already a nest underneath?
If you already have an active nest under or against the array, do not install barriers over it immediately. In the U.S., you typically need a permit to remove or disturb active nests, so the safer path is to pause, confirm whether it is active, and contact a licensed wildlife control operator or your state wildlife agency before you close any gaps.
What’s the most common coverage gap people miss when bird-proofing panels?
Aim for a coverage check that matches bird access points, not just the front edge. Birds often enter from the sides or from the roof feature they land on first, so verify the underside gap across all panel edges plus the top edge near the ridge, and then recheck any penetrations (vent boots, conduit sleeves) where the mesh may not seal.
Is it okay to attach spikes or guards directly to the panel glass or right next to it?
Yes, but only on frames where runoff cannot reach the glass. If you are using spikes or perch guards, choose versions designed to mount on rails or the frame rather than on the panel laminate, and keep all barrier edges and screws away from paths where wind-driven debris could snag and block drainage.
How often should I inspect the mesh and spikes after installation?
After installing mesh, do not wait for birds to fail first. Plan a first inspection at 2 to 3 weeks, then again after the first heavy rain or strong wind event, because clips can loosen and wire tension can relax, opening gaps wider than your target exclusion size.
How does bird-proofing differ for ground-mounted solar panels?
Ground-mounted systems are harder because birds can approach from multiple directions and the underside is exposed to more staging perches. The practical rule is to treat the underside as a complete perimeter to deny entry, either with netting over the underside frame for larger areas or with perimeter skirting plus top-rail anti-perch on smaller setups.
Do ultrasonic bird deterrents work for solar panel arrays on rooftops?
You should not rely on ultrasonic devices for long-term solar protection, especially outdoors with variable ambient noise and line-of-sight changes. If you want sound-based help, use it only as a supplement, and time it on a schedule while you prioritize physical exclusion since that is what actually blocks entry and nesting.
Can methyl anthranilate (MA) fogging replace installing mesh and spikes?
Yes, but treat it as temporary and use it only during the initial week or two while your physical barriers are going in. MA fogging can help during dispersal, but you should expect to reapply if birds are still around, and you should never let fogging replace mesh and spikes once installation is complete.
What should I do if birds keep returning after I install the barrier system?
If birds persist after barriers, focus on three categories: a gap in the exclusion (including clip failures or torn mesh), a nearby staging landing zone (gutters, ledges, pipes) that leads them to the array, or repeated use of a previous nesting location. The fastest fix is to do a targeted “gap hunt” plus extend spike coverage to the gutter line and roof features birds use.
If I can identify the bird as not protected, can I remove a nest myself?
In many regions, house sparrows and European starlings are not protected, but most other species are. Because species identification can be tricky, the decision aid is to assume you may need a permit if you see eggs or chicks, and if you are uncertain, contact a licensed wildlife professional before touching anything.
What’s the safest way to clean and protect panels after bird-proofing work?
Do a production-risk check by planning a no-glass-film rule and a post-install cleaning plan. Even small residues on panel surfaces can reduce output, so avoid any gel application near panels, and after installation remove any dust or debris that may have landed on glass while working at height.
Next Articles
What Is Already Being Done to Prevent Bird Collisions
Learn what’s already used to prevent bird collisions, from airport safeguards to building glass and humane deterrents, p

Best Bird Strike Prevention: Practical Steps That Work
Step-by-step best bird strike prevention: remove attractants, use exclusion and deterrents correctly, and maintain resul
How to Prevent Bird Strikes: Practical Steps and Prevention Plan
Learn how to prevent bird strikes with layered steps, deterrent setup, maintenance, and when to hire pros.