Bird spikes stop working (or never worked in the first place) because of a small number of very fixable problems: incomplete coverage, poor mounting, wrong spike size for the bird species, or gaps at edges and corners that birds quickly learn to exploit. Before you give up on spikes entirely, it's worth spending 20 minutes on a proper inspection, because in most cases the fix is straightforward.
Bird spikes not working: Troubleshooting and fixes

Marcus Weatherby
27 May 2026
What 'bird spikes not working' actually looks like in practice
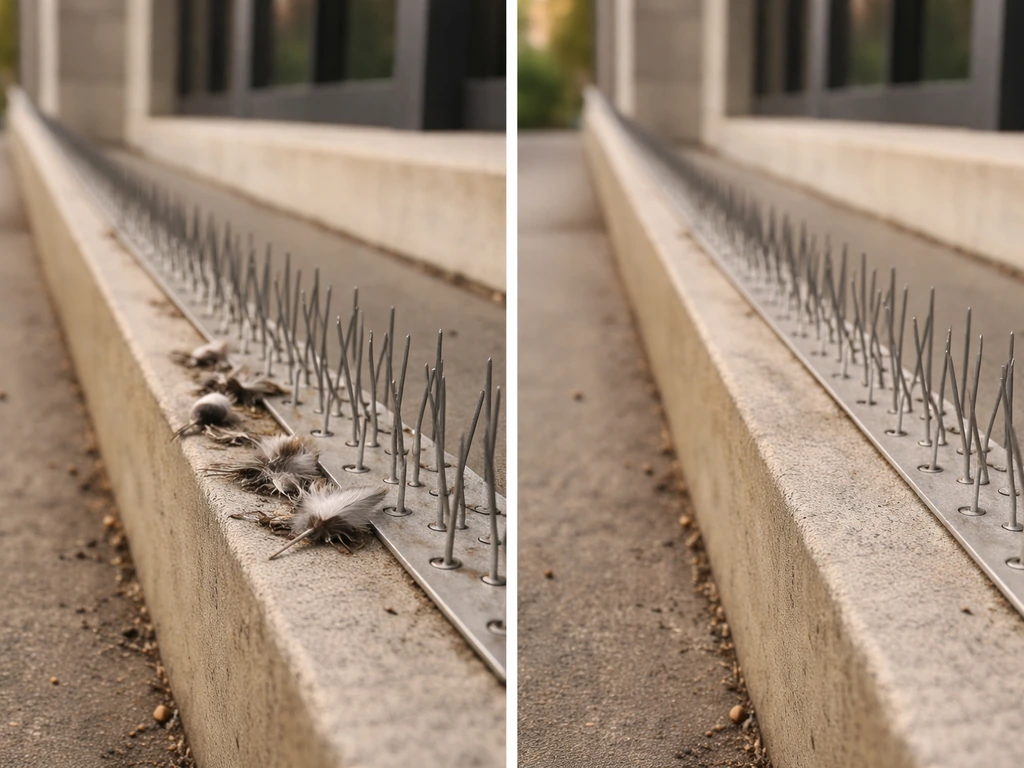
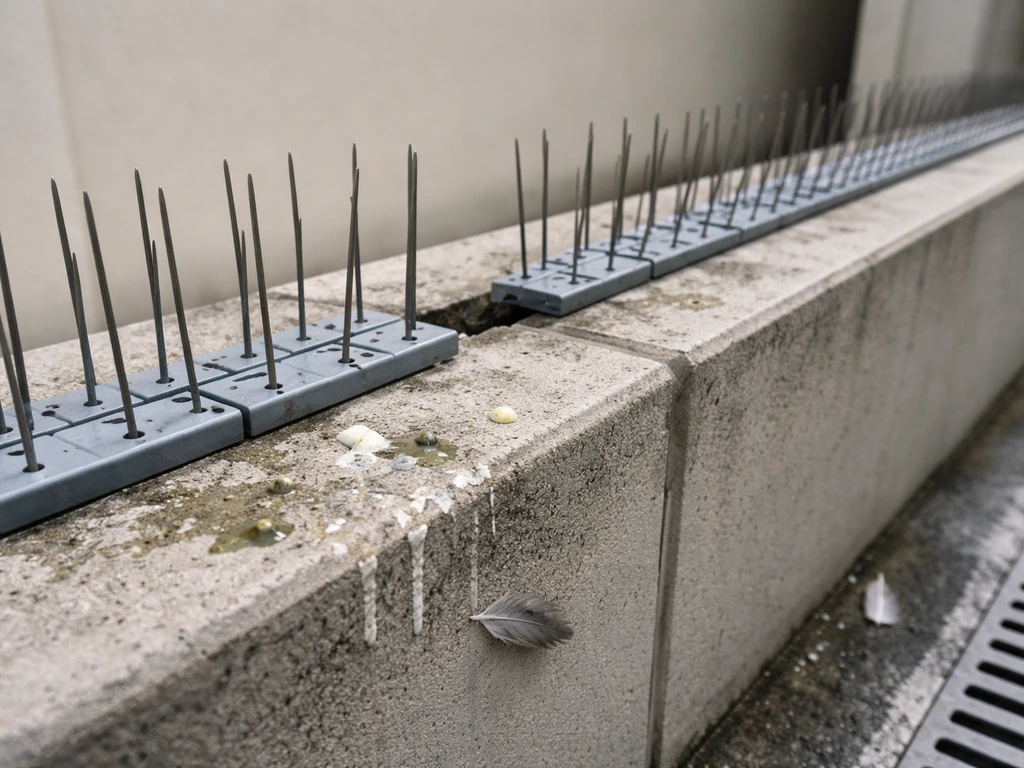
When spikes fail, it almost never means the product itself is defective. What it usually means is that birds have found a gap, an edge, or a nearby surface that lets them get close enough to roost comfortably, even with spikes present. Pigeons are especially persistent. They'll use a 2-inch strip of unprotected ledge at the end of a spike run, a pipe or bracket next to a spiked beam, or a section of parapet that wasn't covered.
Smaller species like sparrows can land between widely spaced rods because the spike geometry was designed for larger birds. Starlings will use debris that has accumulated between spike rows as a platform. All of these are installation or coverage problems, not product failures.
The practical result looks the same regardless of the cause: droppings, feathers, and nesting material appearing in areas you thought were protected. Birds may be landing right on top of the spikes, to the side of them, or on adjacent surfaces that were never treated. Knowing which one is happening tells you exactly what to fix.
Quick diagnosis: find exactly where the birds are bypassing the spikes
Walk the protected area and look for droppings or feather debris. That's where birds are landing. Then cross-check each of these common failure points:
- Edge gaps: Are the spike strips flush with or slightly overhanging the outer edge of the ledge? A rule of thumb used by multiple spike manufacturers is that the rods should overhang the outer ledge edge by at least 1/2 inch. If the spikes are set back even a few inches, birds can land on the unprotected front lip.
- End-of-run gaps: At the end of each spike run, is there an open space? Any gap between the last spike strip and a wall, corner, or transition point gives birds a landing spot. Strips should be cut or butted up to eliminate these.
- Row spacing: On wide ledges needing multiple rows, are the rows too far apart? Manufacturer specs typically allow no more than 2 to 2.5 inches between spike tips across rows. Over-gapping creates a perch between the rows.
- Wrong spike width: A single row of narrow spikes on a 12-inch ledge leaves the back half of the ledge completely unprotected. A 12-inch one-sided ledge generally needs two rows of wide-format spikes to achieve full coverage.
- Adjacent unprotected surfaces: Pipes, sign brackets, vents, expansion joints, and parapets directly next to spiked areas are frequent bypass points. Birds don't need much space.
- Debris accumulation: Leaves, twigs, and droppings packed between spike rows lift birds above the rods. The spikes are still there, but they're no longer in contact with anything landing on them.
- Loose or detached strips: Adhesive fails on dirty, porous, or crumbling substrates. Mechanical fasteners loosen over time, especially on wood or weathered concrete. Check whether any strips have shifted or lifted.
- Wrong spike for the species: Heavy-gauge spikes designed for pigeons do very little to stop sparrows or starlings, which can land between the rods without difficulty.
Mark every problem spot before you start fixing anything. It's easy to miss a second or third bypass point when you're focused on the most obvious one.
On-site fixes you can do today
Surface prep first
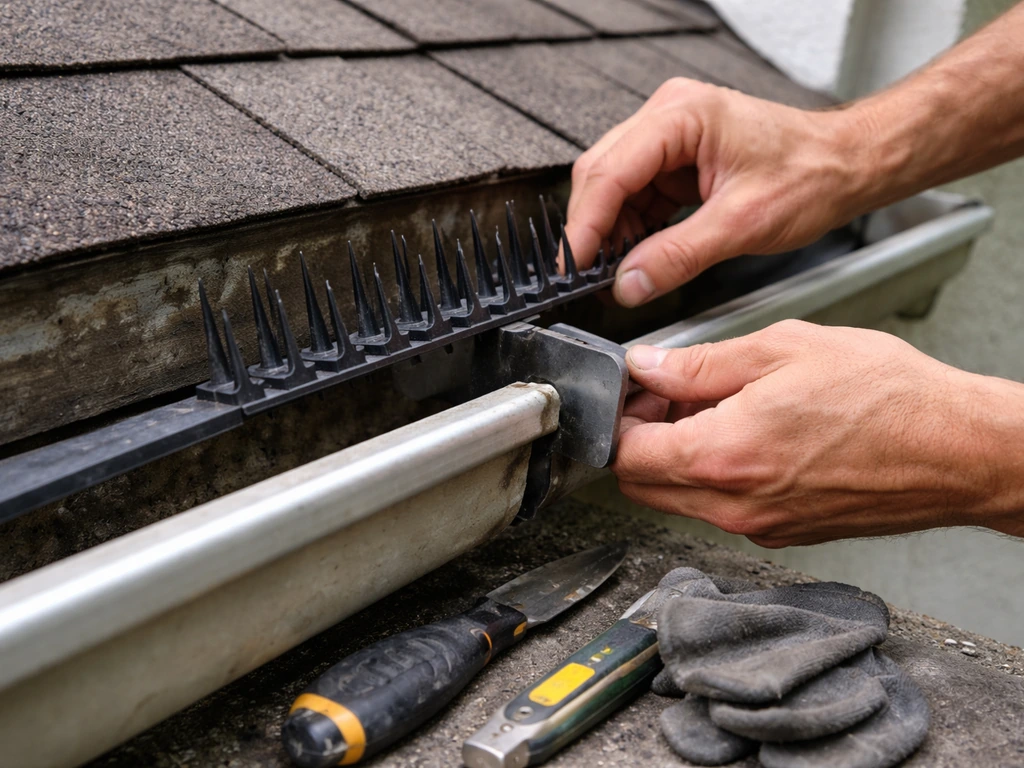
If you're re-mounting spikes or adding new strips, clean the surface thoroughly before doing anything else. If you're mounting spikes on a gutter line, follow the same prep-and-dry-through approach described in how to install bird spikes on gutters so the adhesive bonds and the run stays secure. Adhesive failure is one of the most common reasons spikes loosen over time, and it almost always traces back to a dirty or damp substrate at installation.
Wire-brush any loose material, degrease with a suitable cleaner, and let the surface dry completely. On crumbling concrete or brick, fill and stabilize the surface before applying adhesive. This step is boring but it's what makes the difference between a fix that lasts two months and one that lasts two years.
Fixing edge and end-of-run gaps
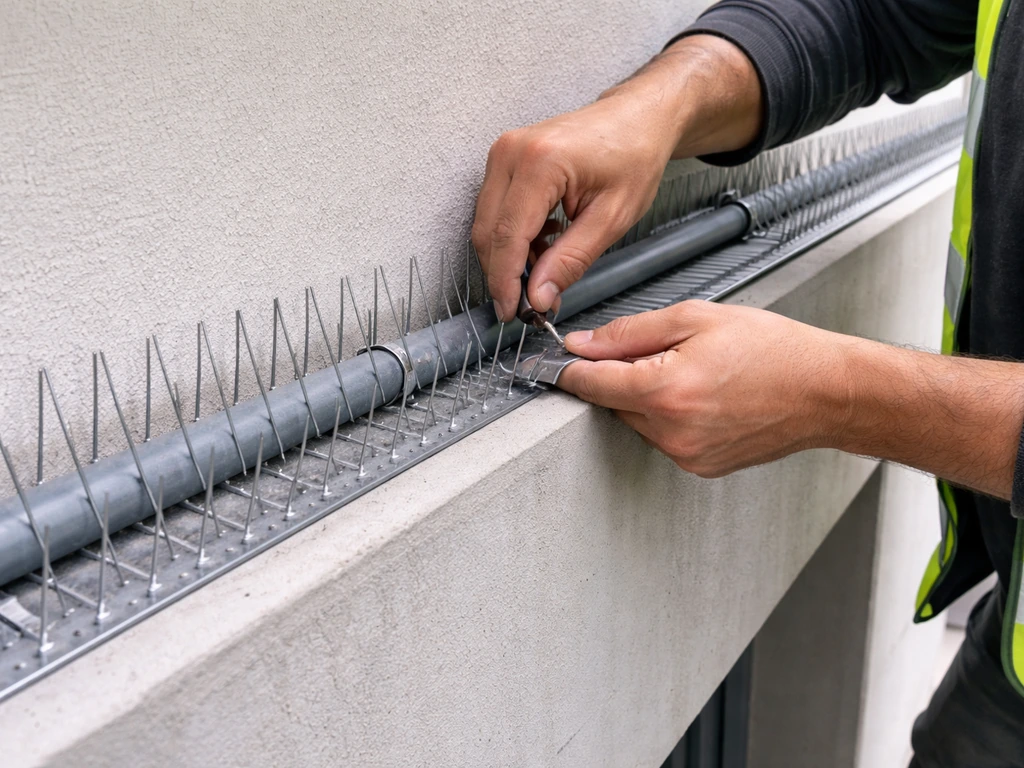
Reposition existing strips so the rod tips overhang the outer ledge edge by at least 1/2 inch. If you're working on a balcony, follow these same edge and end-of-run gap fixes for clear, effective bird protection how to install bird spikes on a balcony. At the end of each run, cut a strip to fill the remaining gap right up to the wall or corner transition. On ledges with a back wall, tips can sit up to 2 inches from the wall itself, but the outer edge must be covered. Don't leave any section of the leading edge unprotected.
Adding coverage to missed areas
Go back to every bypass point you marked and add spikes. Common missed areas include pipes and conduits running horizontally near spiked beams, sign and light brackets, expansion joints, parapet tops and corners, and the tops of short walls adjacent to a main spiked ledge. Any surface larger than about 1 inch that a bird can balance on needs to be treated. If the surface is too narrow or irregular for standard strips, cut strips down or use a flexible base product that conforms to curved surfaces.
Mounting methods by substrate
| Surface | Recommended mounting method | Notes |
|---|---|---|
| Concrete or masonry ledge | UV-stabilized adhesive plus mechanical anchor screws every 24 inches | Clean and dry surface is critical; adhesive alone may fail on porous concrete |
| Metal beam or rail | Stainless steel tie wire or zip ties plus adhesive pad | Adhesive alone works on clean painted metal; add ties for security |
| Brick parapet | Adhesive in joints plus masonry screws through base | Avoid drilling into mortar-only joints on historic masonry |
| Timber/wood | Stainless screws through base every 12 to 16 inches | Adhesive is secondary; wood expands and contracts seasonally |
| Flat roof membrane | Non-penetrating adhesive pads rated for EPDM/TPO | Check membrane warranty before drilling; some require specialist products |
| Gutters | Clip-on or screw-mounted base designed for gutter profile | Standard adhesive rarely bonds reliably to aluminium gutters long-term |
Re-check the whole perimeter, not just the problem spots
Once you've fixed the obvious gaps, walk the entire protected area again. Birds adapt fast, and if you close two of three bypass points, they'll simply shift to the third. Treat it as a closed system: every landing surface within the birds' flight path needs to be addressed before you'll see a real reduction in activity.
When spikes still aren't enough: physical barriers and alternatives
Some locations genuinely aren't suited to spikes, and some bird pressure is heavy enough that spikes alone can't handle it. If you're wondering what bird spikes on a building are, they are a physical deterrent designed to stop landing and roosting on ledges and other perching surfaces. In those cases, it makes sense to look at other physical barrier options rather than just adding more spikes.
Bird netting
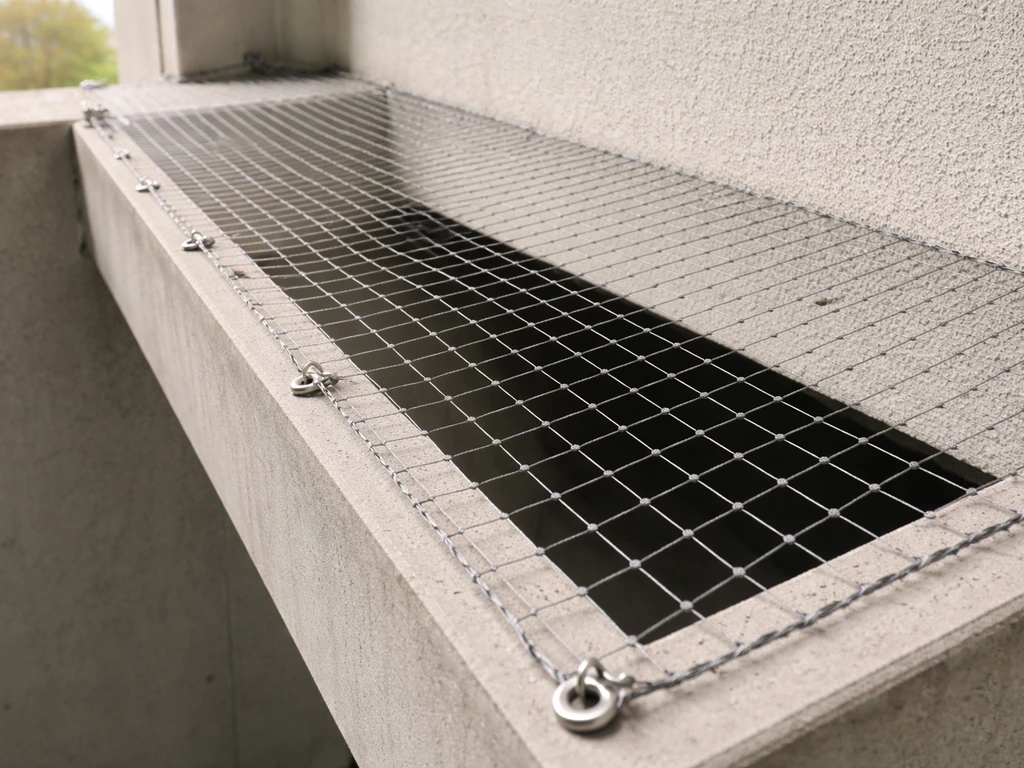
Netting is the most comprehensive physical exclusion method available. It completely blocks access to a protected area rather than just making landing uncomfortable. It works well for large roof areas, courtyards, loading docks, and structural voids where birds are nesting rather than just roosting. The trade-off is cost and complexity: netting systems require proper tensioning hardware, regular inspection, and professional installation for large spans.
GSA’s technical procedure for bird netting systems notes that installations should be approved after mock-ups or test installations, and that netting systems can be time-consuming and expensive while obscuring detailing regular inspection, and professional installation for large spans. Poorly installed netting can sag, create trapped bird situations, and damage facade detailing.
For listed or historic buildings, netting design needs particular care to minimize visual and structural impact.
Post-and-wire (birdwire) systems
Stainless steel wire systems stretched across ledges at a set height create an unstable landing surface that most birds abandon after a few attempts. They're nearly invisible from ground level, which makes them a popular choice for historic buildings and commercial facades where aesthetics matter. Like spikes, they need to cover the complete ledge, not just the perimeter, and the first wire row should nearly overhang the outer edge. They tend to be more expensive than spikes per linear foot but are often the preferred solution where spike aesthetics are a concern.
Architectural blocking
For persistent roosting problems in recessed areas like beams, sign cavities, and HVAC enclosures, physically blocking access with mesh, foam fillers, or purpose-made excluder panels is often more reliable than any surface deterrent. This is especially effective for nesting birds that are returning to an established site year after year.
Sensory and visual deterrents that pair well with spikes
Sensory deterrents work best as a supplement to physical measures, not a replacement. Used alongside well-installed spikes or netting, they can reduce pressure from birds that are still testing the protected area during the transition period.
Visual deterrents
Reflective tape, holographic flash tape, and predator decoys (hawk or owl silhouettes) can deter birds from approaching a treated zone initially. Be realistic about their longevity: most birds habituate to static visual deterrents within a few weeks unless they are moved regularly. They're most effective in new problem areas where birds haven't yet established a strong site attachment, or as a short-term measure while a more permanent physical solution is being installed.
Sonic and ultrasonic systems
Sonic deterrents that broadcast predator calls or distress calls can be genuinely effective for open outdoor areas, particularly for species like starlings and pigeons that respond to flock alarm signals. They work less well in enclosed spaces where sound bounces unpredictably, and they do affect other wildlife and nearby people, so they're not suitable for every location. Ultrasonic devices marketed specifically for birds have a poor track record in independent testing; most birds don't respond to frequencies above human hearing range in the way these products claim. If you invest in a sonic system, choose one with species-specific distress call libraries and programmable broadcast schedules to reduce habituation.
Pairing deterrents strategically
A realistic integrated approach for a persistent problem site might look like this: well-installed spikes covering every landing surface, bird netting over any open structural voids, reflective deterrents during the first few weeks post-installation, and a sonic system for the wider roof or courtyard area. Successful bird dispersal almost always involves a combination of tools rather than a single method, and timing matters too. Addressing the problem before birds establish nesting or strong site attachment makes every method more effective.
Safety, legal, and humane considerations across different settings
Residential settings
For homeowners, the main legal issue to be aware of is the Migratory Bird Treaty Act in the US, which protects the nests, eggs, and young of most wild bird species. This means you cannot remove an active nest without a permit, and permits are generally only issued when nests pose a direct human health or safety risk. The practical rule: install spikes and barriers before birds nest, not during the breeding season.
If you do choose bird spikes, use the right bird spikes for top of fence to match the species and fully cover edges and corners. If you are thinking about putting bird spikes on your fence, make sure you install them before nesting season so you stay within the law and avoid harming active nests install spikes and barriers before birds nest.
In the UK and much of Europe, similar protections apply under national wildlife law, typically covering the period from February through August. Timing your installation outside this window is both the ethical and legally safe approach.
Commercial and industrial settings
Facility managers dealing with large commercial buildings need to factor in a few additional constraints. On historic or listed buildings, both netting and spike installations may require planning consent or approval from a heritage body before work begins. Any chemical repellents used as part of a broader bird management program need to comply with local pesticide regulations and may require a licensed applicator. Electrical deterrent systems (electrified track systems) are a legitimate professional-grade option for high-pressure commercial sites, but they must be installed and maintained by qualified contractors and clearly signed as a deterrent to avoid liability.
Aviation environments
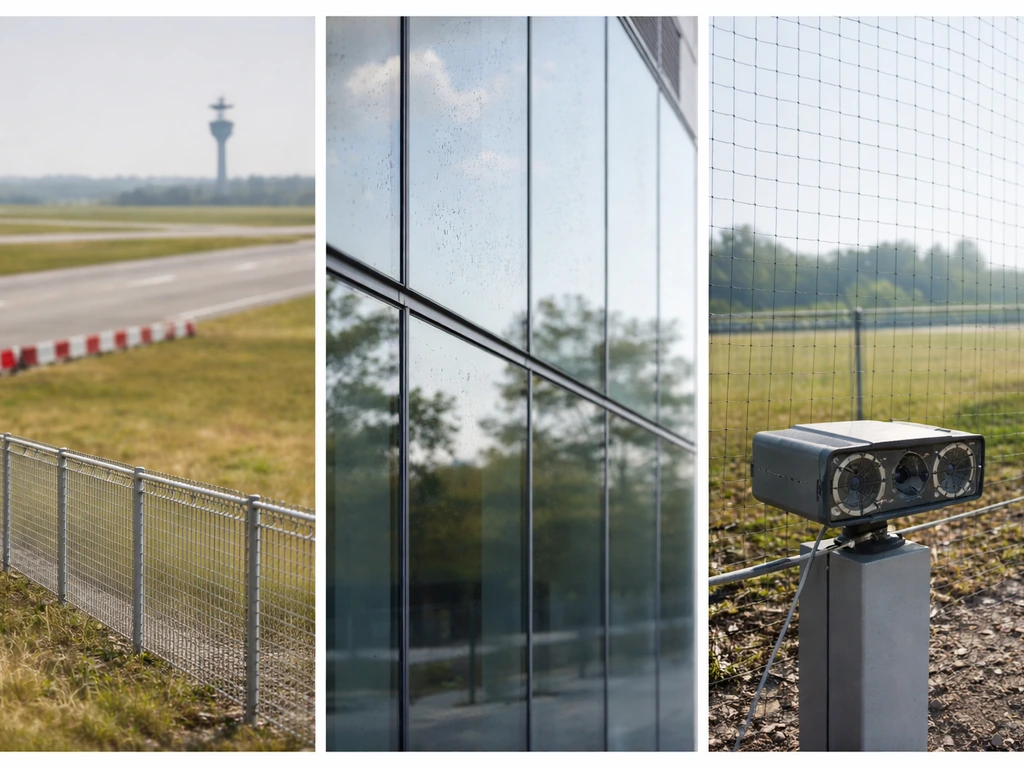
Airports operate under specific wildlife strike mitigation programs, and bird control at or near airfields is not a DIY situation. The FAA recognizes bird spikes and perching excluders as legitimate tools for deterring birds from perching on airfield equipment and structures, but any wildlife management activity near runways needs to be coordinated with the airport wildlife hazard management team. Improvised or incomplete spike installations near active airfield areas can actually create new congregation points for birds if gaps are left, which is counterproductive to safety. At airports, a documented integrated wildlife management plan typically drives all decisions about what methods are used and where.
When to call a professional bird control contractor
There are situations where a professional assessment will save you significant time and money. Call a specialist if any of the following apply:
- You've done a full installation review and still can't identify where birds are getting through
- The problem involves an active nest of a protected species (stop work and call a wildlife consultant)
- The area to be protected is large, high, or structurally complex and requires access equipment
- You're in an aviation, listed building, or regulated commercial environment where specific compliance requirements apply
- You've tried spikes and one additional deterrent method and birds are still landing in the treated area
- The problem involves species like raptors, herons, or other less common birds that require specialist knowledge and potentially different control approaches
When you contact a bird control contractor, give them as much specific information as possible: the species involved, the surfaces being used, what's already been installed and how it's been mounted, and photos of the bypass points. A good contractor will want to do a site survey before recommending anything, and should be able to explain exactly which failure points they've identified and why they're recommending a specific solution. Be cautious of anyone who quotes a job without visiting the site.
A site assessment from a qualified contractor typically covers species identification, a structural survey of all potential landing and roosting surfaces (not just the ones you've already noticed), a review of any existing installations, and a written proposal with options at different price points. For commercial properties dealing with persistent problems, this kind of systematic approach almost always produces better results than incremental DIY fixes, especially when the bird pressure involves multiple species or a site with complex geometry.
If you're deciding between fixing your current spikes and switching to a different method entirely, the guidance on plastic versus metal spikes, installation techniques for specific surfaces like gutters or balconies, and how to correctly fix or re-mount existing spike strips are all worth reviewing before you spend money on a complete system change. In most cases, the existing spikes are salvageable once the coverage gaps are properly addressed.
FAQ
How can I tell if bird spikes are failing because of installation, not the product?
Wait until the surface is fully dry and you have rechecked coverage the day after rainfall or heavy dew. If you install on a damp substrate, the adhesive can fail even if the spikes look secure initially. Also confirm the leading edge and end-of-run gaps are still sealed after the first weather cycle, since minor shrinkage can reopen bypass points.
How do I figure out where birds are getting in when spikes still look intact?
Look at the exact landing zone. If you find droppings on the rods themselves or right next to them, birds are landing on top and need tighter spacing, correct rod height, or a different strip orientation for that ledge profile. If the droppings are on adjacent surfaces (pipe brackets, the back wall edge, or the underside of a neighboring trim), add spikes to those bypass surfaces rather than reworking only the main ledge.
What should I do if smaller birds can land between the spike rods?
If birds are landing between rods, the most common cause is using spike geometry designed for larger perching species. Measure the available landing width, then compare it to the spike spacing and base configuration you installed. In practice, you usually solve it by switching to a configuration with narrower effective spacing or adding a second row so there is no usable gap to balance on.
Can I reuse my existing spike strips, or do I need new ones?
Yes, but only if the substrate and mounting method match the conditions. For adhesive-mounted runs, you need clean, degreased, completely dry surfaces, and on crumbling masonry you should stabilize and fill before sticking anything down. For screw or bracket systems, check that fasteners are going into solid material, not loose brick or soft mortar.
Why do birds start using spikes after some time, even if I installed them correctly?
Remove or permanently cover any debris that accumulates between rows, including seeds, leaves, nesting fiber, and sticky grime. Birds can use packed debris as a platform, so regular cleaning within the first few weeks can make a big difference. After that, revisit 2 to 4 weeks later because debris tends to return at the same bypass zones.
What’s the best way to inspect for all the bypass points during troubleshooting?
Use a systematic “grid” pass rather than walking only the obvious perimeter. Start at one end and check every edge, corner, transition, and any parallel surfaces within reach (pipes, conduits, brackets, sign backs, expansion joints, parapet tops). Mark spots first, then fix, then re-walk the entire treated area to confirm no new landing surface was missed.
How much overlap or coverage do spikes need at corners and ends?
In most cases you should place spikes at least so the outer leading edge is blocked along the full length, then ensure the ends and corners are capped with cut strips to reach the wall transition. If you have to stop short of a corner or leave a narrow unprotected lip, birds will exploit that exact strip area. When in doubt, extend the run and trim to fully cover the leading edge.
What are signs that adhesive mounting failed, and how should I fix it?
If you suspect the adhesive line is failing, test a small section first and check whether the spike base lifts with reasonable force or whether the bond line peels away from the surface. A weak bond is usually caused by dirty or damp substrate, so the practical fix is to clean, degrease, let dry thoroughly, and remount or refit with the correct prep steps rather than just pressing the base back down.
Will sonic or reflective deterrents work if my spikes are only partially successful?
Sonic deterrents can help as part of a broader plan, but they are not reliable in enclosed or acoustically reflective areas. If you’re using one near a balcony, soffit, or recessed façade, expect reduced performance and potential habituation. The safer approach is to ensure physical exclusion first, then use sonic or reflective measures only as short-term supplements.
How long do reflective tape, decoys, or other visual deterrents last before birds get used to them?
Most birds habituate to static visual deterrents unless you move them or change the pattern regularly. If you use reflective tape, predator decoys, or flash tape, treat it as temporary support during the transition period, not the long-term solution. Plan to reposition them frequently and only after you have closed the physical bypass gaps.
When should I stop troubleshooting and hire a bird control contractor?
A professional assessment is especially worth it when you see multiple species, complex ledge geometry, nesting activity in voids, or repeated “come back” behavior after DIY fixes. Also consider it if the site involves heritage constraints, large roof coverage, or any uncertainty about how birds are accessing the area. A good contractor can identify all landing and roosting surfaces, not just the ones you noticed first.
What information should I collect before a contractor comes to assess bird spikes not working?
Prepare before the site visit with clear photos from ground level and from close up, plus a list of where droppings are found and what has already been installed. Identify the exact ledges, edges, corners, pipes, and cavities in the problem zone, and note whether birds are roosting versus actively nesting. This helps the contractor quickly match species behavior and recommend the right coverage layout.
What should I do if I discover an active nest while troubleshooting spikes?
If you already installed spikes during a period when birds may be nesting, check local wildlife protection rules and stop work if you find an active nest. The safest plan is to use barriers that prevent landing while complying with protected-season requirements, and only remove or alter nests with the appropriate permits. If you are unsure, contact a qualified local wildlife professional before making changes.
Next Article
What Is Already Being Done to Prevent Bird Collisions
Learn what’s already used to prevent bird collisions, from airport safeguards to building glass and humane deterrents, p