Bird spikes work by making it physically uncomfortable for birds to land or roost on a surface. The spikes don't injure birds. They just make every potential landing spot feel unstable, so birds move on. If you want to build your own or buy affordable strips and install them yourself, you absolutely can. This guide walks you through exactly how to do it, from materials to placement to checking whether your setup is actually working.
Do It Yourself Bird Spikes: DIY Guide, Build and Install

Marcus Weatherby
11 Apr 2026
What bird spikes are for and where they actually work
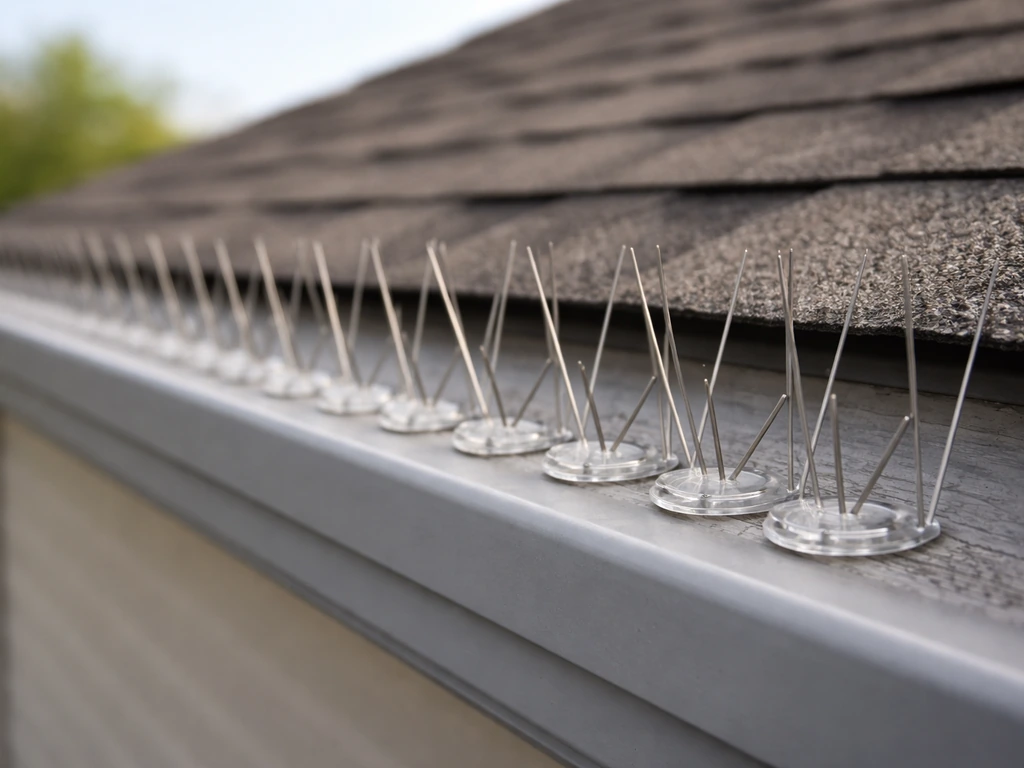
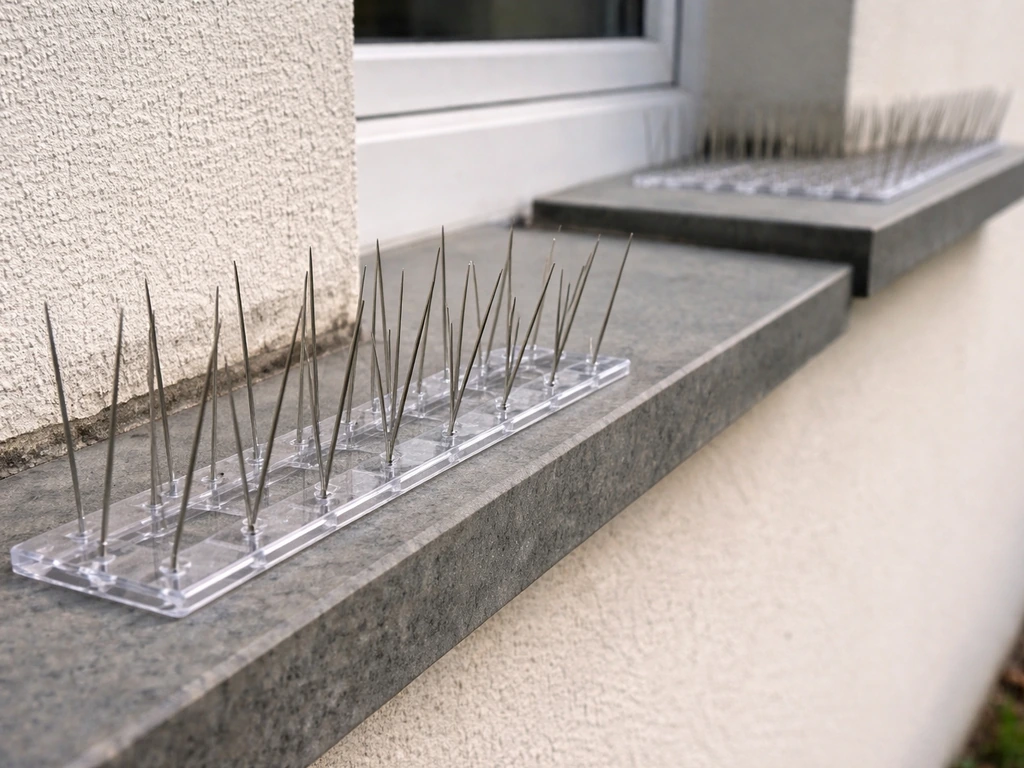
Bird spikes are physical deterrents, not traps or weapons. Commercial versions typically consist of stainless steel needle-like rods mounted on a polycarbonate base. When a bird tries to land, the rods make a stable footing impossible. The bird gets a light prick at most, then leaves. That's the whole mechanism.
Spikes work best against pigeons, gulls, and crows. They're less reliable against sparrows and starlings, which are small enough to sometimes nest between the rods. If those are your main problem birds, you'll want to combine spikes with other methods, which I'll cover later.
The surfaces where spikes perform best include roof edges and ridgelines, window sills and ledges, gutters, fence tops, patio covers and pergola beams, AC units, and solar panel frames. Flat or gently curved surfaces are ideal. Very narrow surfaces (under an inch wide) rarely need spikes at all since birds can't land there comfortably anyway.
Keep in mind that spikes are best suited for medium to light bird pressure. If you have a heavy infestation where birds are actively trying to squeeze past deterrents, spikes alone may not be enough and you'll need to layer in netting or other controls.
DIY materials and tools for making bird spikes
You have two real paths here: buy pre-made spike strips and install them yourself, or build something from scratch. I'll be honest with you. Building truly effective spikes from scratch is harder than it looks. The commercial strips use precisely spaced stainless steel rods through pre-drilled polycarbonate bases, and replicating that geometry at home with random hardware takes a lot of trial and error. That said, if you want to DIY the construction itself, here's what you need.
Option 1: Build your own from scratch
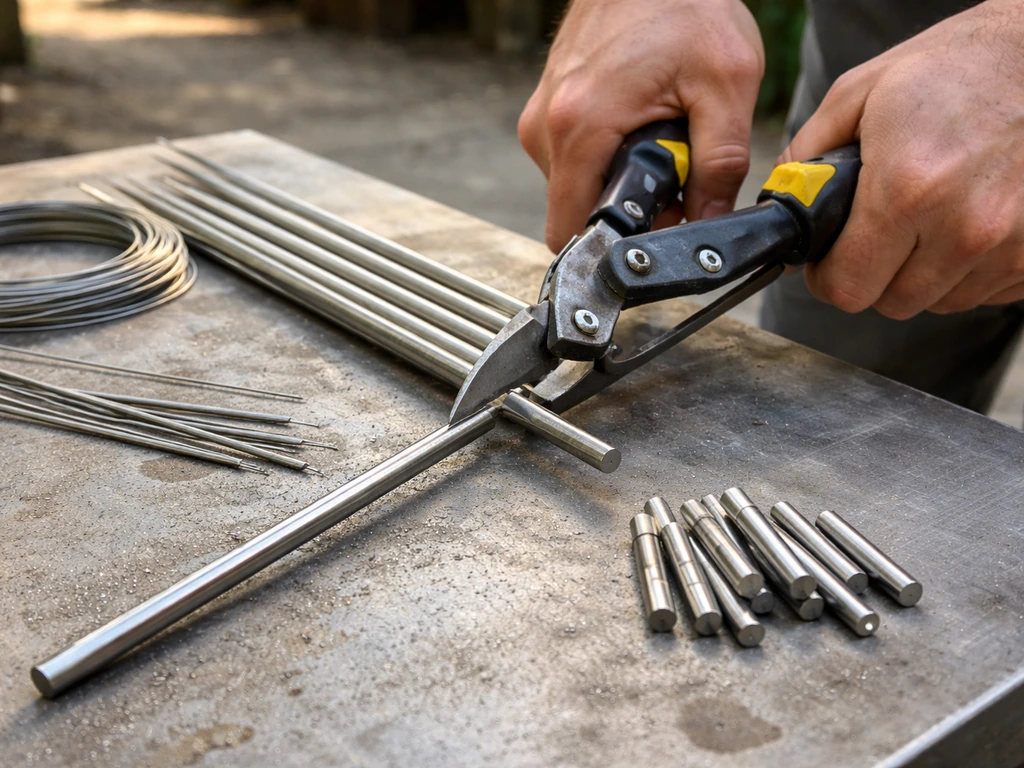
- Stainless steel wire or rod (18–20 gauge, cut to 4–5 inch lengths). Stainless resists rust far better than galvanized or aluminum outdoors.
- A rigid base: a strip of UV-resistant polycarbonate, aluminum bar stock, or dense PVC trim board works. Avoid regular plastic or wood since they degrade quickly outdoors.
- A drill with a small bit (sized to snugly fit your wire diameter)
- Epoxy or waterproof construction adhesive to anchor the rods into the base holes
- Wire cutters or tin snips for cutting rods to length
- A hacksaw for cutting the base strip to length
- Measuring tape and a marker for consistent spacing
- Safety gloves (cut-resistant) since wire ends are sharp
Option 2: Buy strips and install them yourself (the smarter DIY)
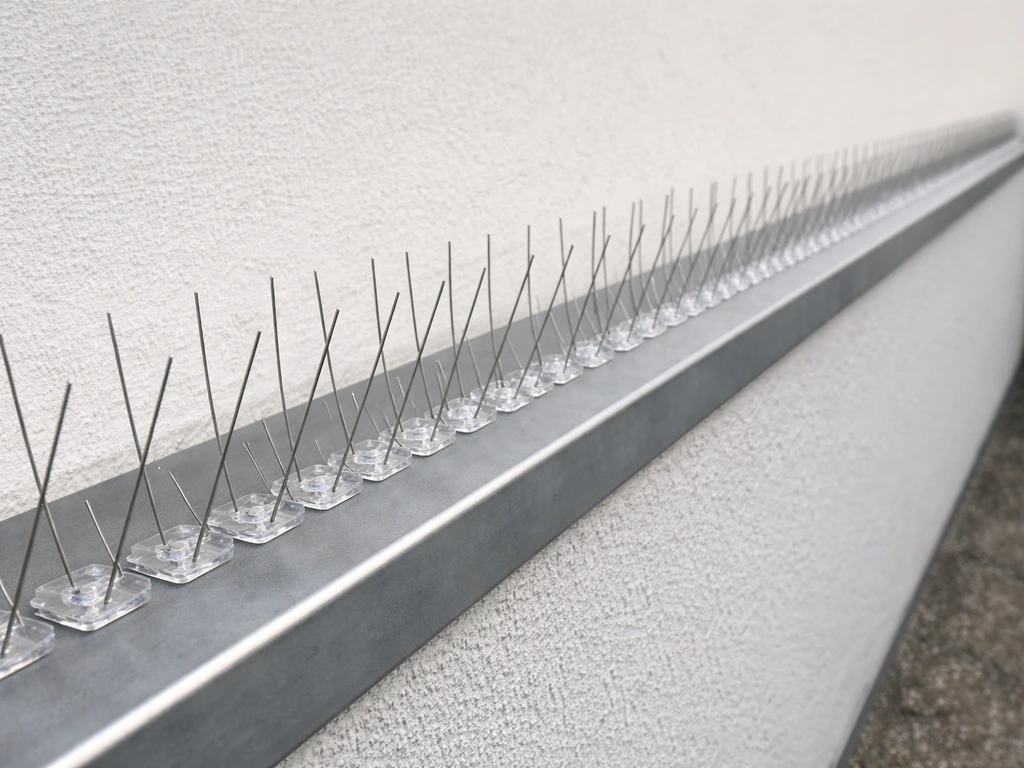
Buying purpose-built strips and handling your own installation is genuinely the most practical DIY approach. Pre-made stainless steel spike strips run roughly $10–$25 per linear foot depending on width and quality. A 10-foot stainless steel strip typically costs around $49 from commercial suppliers, while plastic narrow strips can run as low as $24–$25 for a 10-foot section. For most residential jobs, you're looking at 20–50 linear feet of coverage, so budget accordingly.
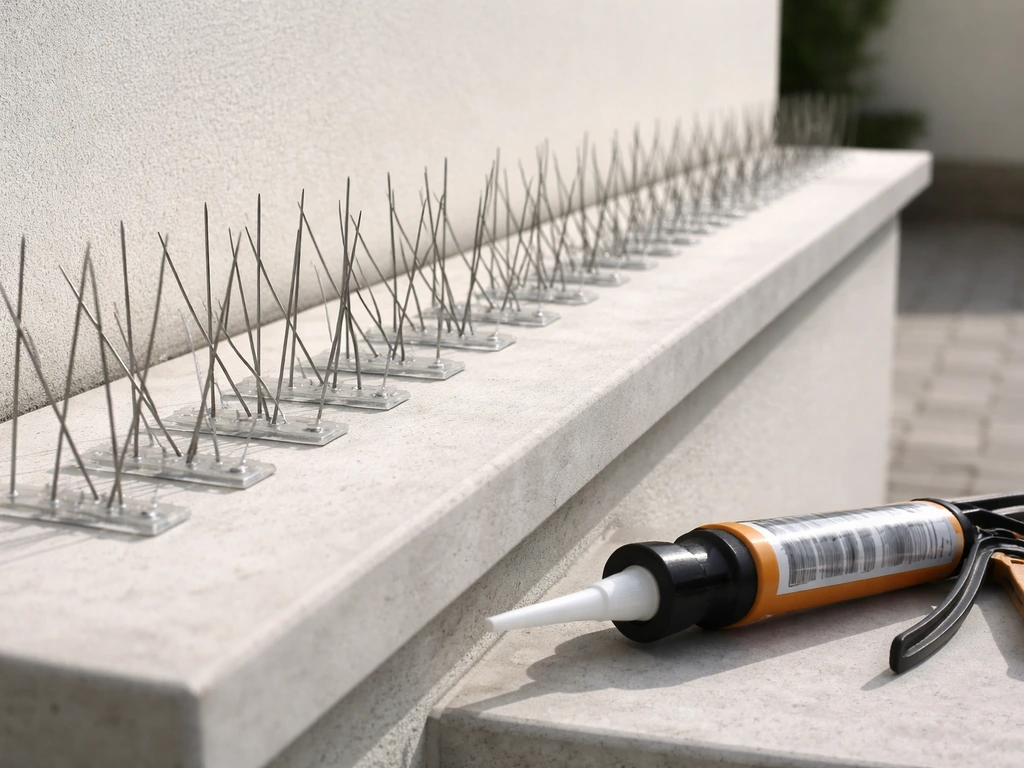
For installation, you'll need: construction adhesive or a dedicated bird spike adhesive (sold by most spike manufacturers), 1/8-inch nails or stainless screws, a caulking gun if using adhesive in tube form, a tape measure, a pencil or chalk line, and a hacksaw to cut strips to fit corners. If your surfaces are hard (brick, concrete, metal), add a hammer drill with masonry bits.
Step-by-step: how to make and install bird spikes at home
Whether you're building from scratch or installing purchased strips, the sequence is essentially the same.
- Measure the area. Walk your property and measure every linear foot of roosting surface you want to protect. Add 10% for waste at corners and cuts.
- Clean the surface. Remove any bird droppings, debris, or loose paint. Adhesive won't bond to a dirty surface, and any existing organic material will hold moisture under the strip and cause it to fail faster. Use a stiff brush and mild cleaner.
- Cut strips to length. Use a hacksaw to cut base strips so they fit flush from edge to edge. Stainless steel strip bases cut cleanly with a hacksaw. Don't leave gaps at corners since birds will find them.
- If building from scratch: drill evenly spaced holes in your base material at 1–1.5 inch intervals. Insert your stainless rods and set each one with a small drop of waterproof epoxy. Let it cure fully (follow the epoxy's instructions, usually 24 hours) before installing.
- Mark your mounting line. Use chalk or a pencil to mark a straight line along the surface where the inner edge of the strip will sit. This keeps rows aligned, especially on longer runs.
- Apply adhesive or pre-drill for fasteners. For adhesive installs, run a bead of construction adhesive or purpose-made bird spike adhesive along the base of the strip. For screw or nail installs, use the pre-drilled holes in the base to mark and then drill pilot holes into the mounting surface.
- Press or fasten the strip firmly in place. Hold it for 30–60 seconds if using adhesive. For nails, use 1/8-inch nails and a nail set to drive them flush. For screws, stainless screws are best for outdoor durability.
- Add nylon ties where needed. On pipe rails, gutters, or thin surfaces, threading nylon zip ties through the base holes and around the surface is often the cleanest and most secure method.
- Inspect the installation. Walk the whole run and check for any gaps, loose sections, or spots where the strip doesn't sit flush with the edge of the surface.
If you want a deeper dive into the general installation process beyond what's covered here, the full walkthrough in this guide on how to install bird spikes covers additional surface-specific tips in detail.
Placement tips and spacing for effective bird deterrence
Placement is where most DIY installs fail. People put up spikes in the obvious spot and leave gaps that birds immediately exploit. Here's what actually works.
Align strips flush with the outer edge
The most common mistake is mounting strips too far back from the edge of a ledge or sill. Birds approach from the outside, so the spikes need to cover the outer edge first. Set the front edge of your spike strip as close to the outer lip of the surface as possible.
Use multiple rows on wide surfaces
A single row of spikes on a wide ledge or parapet wall is almost useless. If the surface is wider than about 5 inches, birds will simply land behind the spikes. Use multiple parallel rows, spaced so there is no open landing area between them. A standard 4.5-inch-wide spike strip covers one row; on a 10-inch ledge, you'd need two rows running parallel.
Spacing between strips
When running strips end-to-end along a linear surface, keep gaps between strips to an absolute minimum. The practical guideline is no more than 6–8 inches of unprotected gap between any two spike sections. Any more than that and birds will identify it as a usable landing spot. At corners, miter your cuts or overlap strips slightly rather than leaving an open angle.
Surface-specific notes
Roofs and ridgelines need particular attention because the pitch and wind exposure make installation trickier. For detailed advice on that specific surface, this article on how to install bird spikes on roof goes into the ridge and eave specifics you'll need. For AC units specifically, which have a different geometry and vibration exposure, there's a dedicated guide on how to install bird spikes on AC units that covers fastener choice and spacing around the cabinet how to install bird spikes on roof. For AC units specifically, which have a different geometry and vibration exposure, there's a dedicated guide on how to install bird spikes on AC units that covers fastener choice and spacing around the cabinet.
For gutters, zip ties through the base holes and around the gutter lip are usually cleaner than adhesive since gutters flex and adhesive bonds can crack over time. For solar panel frames, check with your panel manufacturer before drilling anything; adhesive-only installs are typically the safer choice there.
Extra tall spikes for gulls
Standard spike height works for pigeons and most medium birds. If gulls are your problem, look specifically for extra-tall spike strips designed for larger birds. Gulls can step over standard-height spikes if they're determined enough.
Safety, legal, and humane considerations
Ladder and roof safety
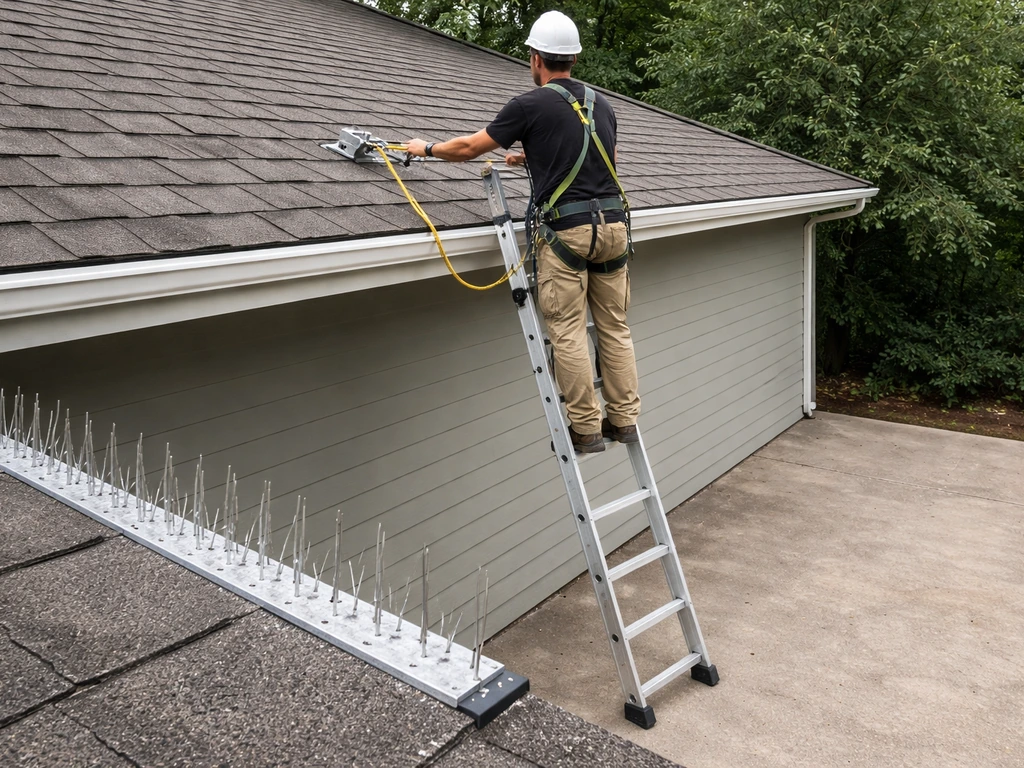
Most spike installs require working at height. Falls are the biggest risk in any DIY roofing or ledge work, period. Always place ladders on stable, level, firm surfaces. Secure the top of the ladder to prevent sliding. Watch for morning condensation on metal or painted surfaces since it makes ladder feet slip even on seemingly solid ground. For any work at roof level, use a safety harness if you're going above a single story. Don't improvise ladder positioning to reach an awkward spot. If a location isn't safely reachable, it's worth hiring someone for that section.
Material durability outdoors
If you're building your own spikes, material choice matters a lot for longevity. Stainless steel rods resist corrosion and UV exposure far better than galvanized wire, which will rust and weaken within a season or two in wet climates. Your base material needs to handle UV as well. Untreated wood will warp and crack. Standard PVC can become brittle. UV-stabilized polycarbonate or aluminum bar stock are the best choices for the base if you're fabricating your own strips.
Humane use and legal compliance
Bird spikes are considered humane because they deter without injuring. However, the legal picture around bird control is more complicated than most people expect. Under the Migratory Bird Treaty Act, the governing legal text is codified at 16 U.S.C. Chapter 7, Subchapter II blank" rel="noopener noreferrer">legal picture around bird control is more complicated. In the US, blank" rel="noopener noreferrer">the Migratory Bird Treaty Act protects most wild bird species. The birds that are not protected under state or federal law are house sparrows, European starlings, and pigeons. If you're dealing with any other species, you'll want to check with your local wildlife authority before taking action beyond basic deterrents. Illinois Department of Public Health guidance, for example, explicitly advises checking local rules before attempting control on any protected species. The bottom line: spikes are generally legal for any species since they don't harm birds, but it's still worth knowing which birds you're dealing with.
Keeping spikes clean
Over time, debris, leaves, and droppings can accumulate at the base of spike strips and actually create a platform birds can stand on. Check your installation every few months and clear any buildup. This is especially common in gutters and on flat ledges where material collects.
Comparing DIY build vs. buying strips and self-installing
| Approach | Upfront Cost | Time Required | Effectiveness | Durability | Best For |
|---|---|---|---|---|---|
| Build from scratch (wire + base) | Low ($10–$20 for materials) | High (several hours) | Variable (depends on execution) | Lower unless using stainless + UV base | Experimental/budget builds; small test areas |
| Buy strips, self-install | Medium ($25–$50 per 10 ft) | Low to Medium (1–3 hours for most jobs) | High if installed correctly | High (stainless + polycarbonate) | Most homeowners and property managers |
| Hire professional installation | High ($10–$25+ per linear foot installed) | None for homeowner | High | High | Large commercial jobs or hard-to-reach surfaces |
For most readers, buying pre-made strips and self-installing is the right call. The cost is manageable, the effectiveness is proven, and you avoid the engineering guesswork of DIY fabrication. If you're curious about what professional installation would run you as a comparison point, this breakdown of how much it costs to install bird spikes gives a solid picture of the full price range.
How to test your results and adjust if birds keep coming back
Give your installation about two weeks before evaluating. Some birds will test the spikes repeatedly before giving up. After two weeks, walk the perimeter and look for fresh droppings. Fresh droppings directly on or around the spike strips mean birds are still landing near them, which tells you something is wrong with your coverage.
Common fixes
- Droppings behind the spikes: add a second row further back from the edge
- Droppings at ends of strips: extend coverage to close gap at corners or transitions
- Droppings between strips: close the gap or add a strip section
- Birds nesting at the base of strips: clear debris and consider switching to a wider strip with tighter rod spacing
When spikes alone aren't enough
If birds are still getting through after you've fixed coverage gaps, it's time to layer in other deterrents. Bird netting is the most effective physical barrier for enclosed areas like under eaves, around solar panels, or over garden beds. Visual deterrents (reflective tape, predator decoys, or flash tape) work well in open areas where birds are scouting for new roosting spots. Sonic and ultrasonic devices can help discourage birds from an area entirely before they commit to a roosting spot.
For particularly persistent birds or heavy pressure situations, chemical repellents applied to surfaces (non-toxic sticky gels or taste-based repellents) can be added on top of or alongside spikes. The combination of a physical barrier plus a sensory deterrent is generally more effective than either alone, especially for starlings and sparrows where spikes alone have limited reliability.
The key principle is this: spikes close off specific landing surfaces, but birds that are strongly motivated to roost in an area will search for any unprotected spot. A layered approach covers the gaps that spikes can't address on their own, and it's how serious bird control programs are built whether at a residence or a commercial property.
FAQ
Do it yourself bird spikes actually hurt birds, or is it just uncomfortable?
They are designed to deter by making footing unstable, the bird typically gets only a brief, light contact and then leaves. To stay humane, avoid sharp improvised parts, and make sure the rods are firmly fixed so birds do not get snagged or pushed into moving hardware.
Can I use regular nails, screws, or random hardware if I’m doing it myself?
You can use nails or screws, but use corrosion-resistant fasteners (stainless is best outdoors) and a consistent spacing pattern. If the rods can wiggle, birds will test longer and may find a gap, so prioritize a rigid base and a clean, straight mounting line.
How close should DIY spike strips be to the edge of a ledge or roof lip?
Aim to cover the outermost landing edge first. If you leave a small “approach” area uncovered, birds often land on the unprotected zone and roost behind the strips, even when the rest looks correctly installed.
What’s the most common mistake that makes do it yourself bird spikes fail?
Big gaps, especially at strip ends, corners, or where sections meet. Birds use those breakpoints as deliberate landing spots, so keep end-to-end gaps to only a small amount and overlap or miter at corners rather than leaving an exposed angle.
Do it yourself bird spikes work on small birds like sparrows and starlings?
They’re less reliable because small birds can nest or step between rods. If you mainly have sparrows or starlings, plan on pairing spikes with another method (like netting for enclosed areas or a secondary visual deterrent) instead of expecting spikes alone to solve the problem.
How do I tell whether my DIY bird spikes setup is working?
After about two weeks, check for fresh droppings near and directly on the spike line. Fresh droppings right around the rods usually means birds are still landing close by, which indicates a coverage gap or that the strips are not positioned at the outer landing edge.
How often should I inspect and clean spike installations?
Check every few months and remove debris, leaves, and droppings at the base. Buildup can create a new surface birds can stand on, especially on flat ledges and inside gutter runs where material collects.
Will spikes still work if snow, ice, or heavy debris builds up on ledges?
Snow and heavy debris can temporarily cover rods and restore a usable landing surface. If your area gets frequent snow or wind-driven buildup, build a maintenance schedule during winter and clear the area when conditions allow, so the spikes remain exposed.
Can I install DIY bird spikes over painted surfaces or on gutters with adhesive?
You can, but gutters flex, and adhesive bonds can crack over time. For gutters, mechanically fastening with appropriate ties or fasteners is often cleaner and more durable than relying on adhesive alone.
Are do it yourself bird spikes legal for all bird species?
In many places (including the US), most wild birds are protected, even if deterrents are non-injurious. Spikes are generally considered humane, but you still need to identify the species and check local rules for any species that may be protected before doing more than basic deterrents.
What species should I plan for if gulls are involved?
Use extra-tall spike strips for gulls, since standard height can be stepped over. Also expect more persistent attempts, so verify gaps at transitions around rooftop edges and other gull landing routes.
Is it worth building spikes from scratch instead of buying pre-made strips?
For most homeowners it’s usually not. Replicating the precise rod spacing and stable base geometry at home is harder than it sounds, and inconsistent spacing can reduce effectiveness. If you build, choose corrosion-resistant rods and UV-stable base material to avoid early failure.
What’s the safest way to work at height when installing DIY spikes?
Use stable, level ladder placement and secure the top of the ladder to prevent sliding. Watch for condensation on metal or painted surfaces, and if you are working above a single story, use a proper safety harness rather than trying to reach awkward spots.
If birds keep getting through, what’s the best next step after fixing gaps?
Layer deterrents. For open areas, add visual tools, and for enclosed or high-target areas like under eaves or around solar panels, add netting or a more complete barrier. You can also combine spikes with non-toxic sensory repellents for stubborn cases.
Next Article
How to Install Bird Spikes: Step-by-Step Guide
Step-by-step how to install bird spikes on patios, roofs, windows, ledges, and solar frames with secure, gap-free mounti