You can install bird spikes on a roof yourself in an afternoon. You glue or screw the spike strips to the ridge, parapet, or any flat surface where birds are landing, butt the sections together so there are no gaps, seal any penetrations so you don't create a leak, and you're done. The tricky parts are picking the right spike width, knowing how tile roofs differ from shingles, and not creating new water problems in the process. This guide walks through all of it.
How to Install Bird Spikes on Roof: Shingles vs Tile

Marcus Weatherby
14 May 2026
Materials and tools you'll need before you start
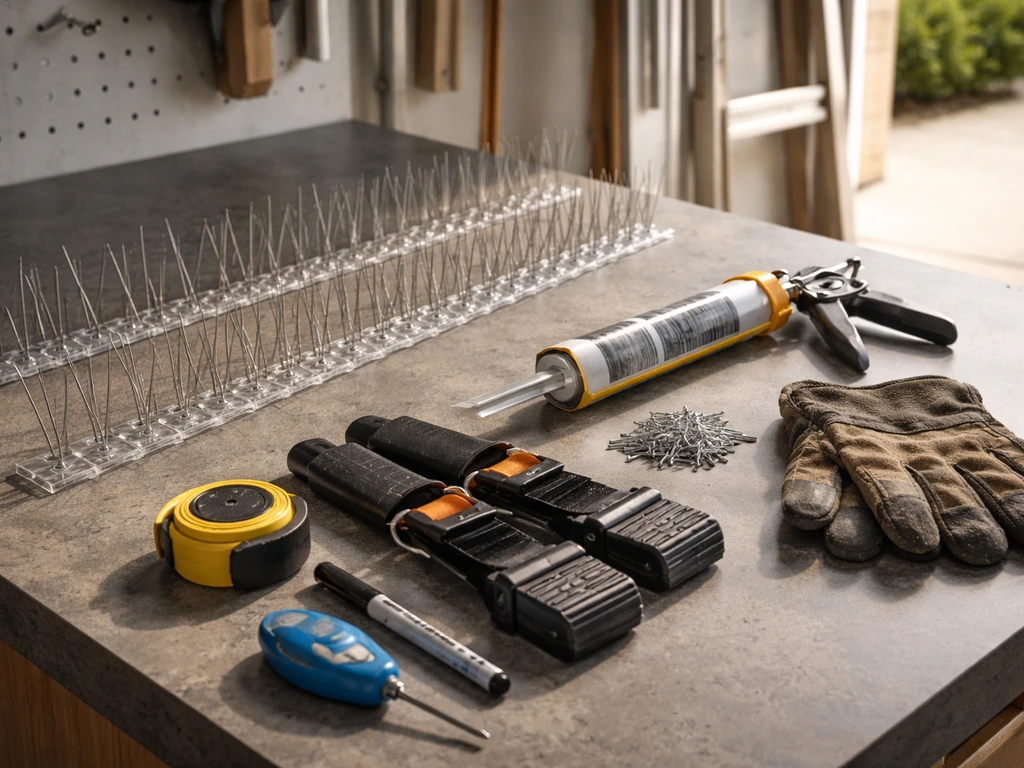
Getting everything on the roof in one trip saves you a lot of frustration. Measure your ridge and perimeter first so you know how many linear feet of spike strip to buy. Spikes typically come in 3-foot sections, so divide your total linear footage by 3 and add 10% for waste and cuts.
- Bird spike strips: stainless steel or UV-stabilized polycarbonate base with stainless needles (3-foot sections are standard)
- Adhesive: construction-grade bird spike adhesive such as Bird Barrier Bond (2-hour set) or Bird Barrier Super Bond (1-hour set), or a compatible polyurethane construction adhesive
- Screws: stainless steel screws sized for your substrate, if you plan to mechanically fasten (9 screws per 3-foot section is the standard recommendation)
- Caulk/sealant: clear or color-matched roofing silicone to seal screw holes and base edges
- Wire brush or stiff bristle brush for surface cleaning
- Isopropyl alcohol or degreaser for cleaning smooth surfaces before adhesive
- Tape measure and chalk line or pencil for layout
- Tin snips or a hacksaw for trimming spike strips to length
- Caulk gun
- Drill and appropriate bits if screwing into substrate
- Safety harness, roof anchor, and non-slip footwear
- Work gloves (the needle tips are sharp)
- Ladder rated for your height and load
For most residential ridge or parapet jobs, adhesive alone is fast, strong, and avoids punching holes in roofing materials. Bird Barrier specifically calls adhesive both faster and more secure than screws for many situations. That said, on vertical surfaces like fascia or gutters, screws with sealant over the heads are often the better choice.
Choosing the right spike type and planning your layout
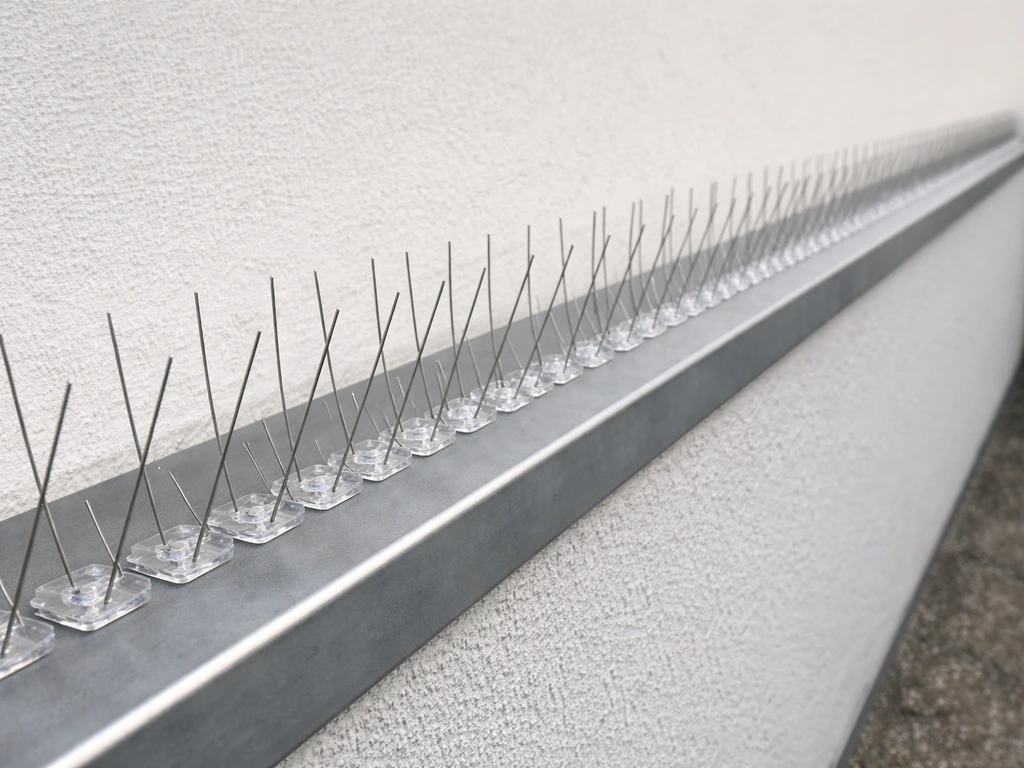
Not all spikes are the same width, and width is what determines whether a bird can land in front of or behind the strip. A single row of standard pigeon spikes covers roughly 7 inches of exposed surface. If your ridge cap or parapet is wider than that, you need multiple rows side by side, and you cannot stretch the spacing between them. Birds are very good at finding the exact gap you left.
Spike material: stainless steel vs polycarbonate base
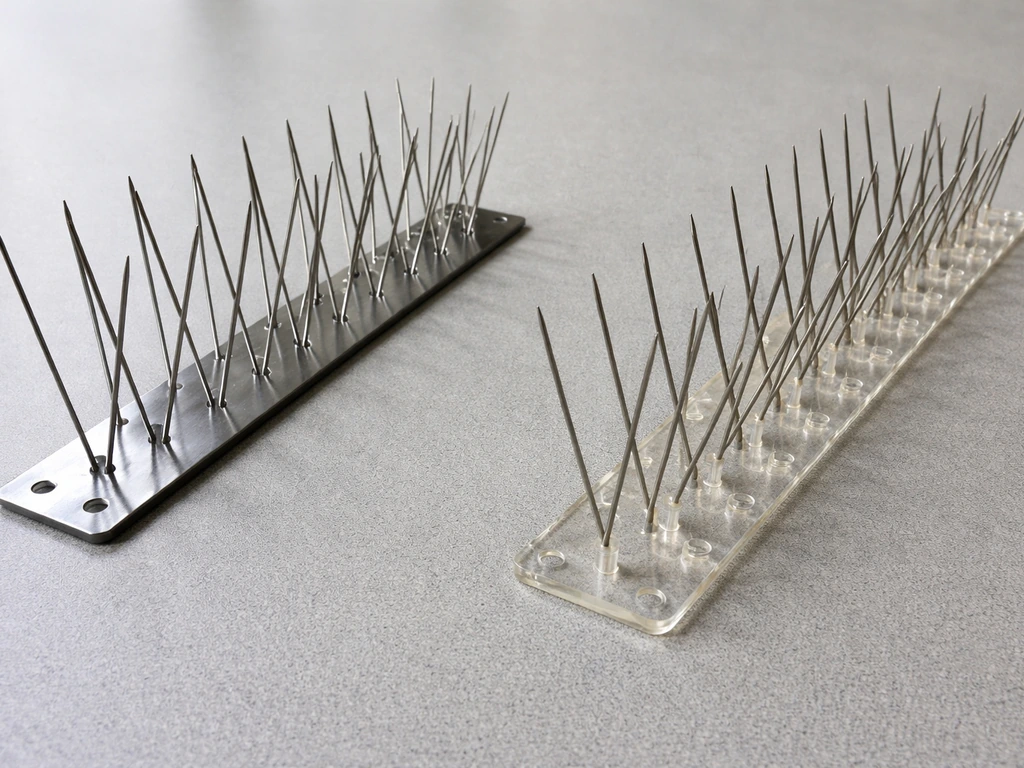
| Feature | Stainless steel needles + stainless base | Stainless needles + polycarbonate base |
|---|---|---|
| Durability | Excellent, fully corrosion-resistant | Very good; UV-stabilized base resists fading |
| Visibility on roof | More visible from street | Nearly transparent base, less noticeable |
| Best attachment method | Screws, nails, adhesive, or ties | Adhesive preferred; screws possible |
| Flexibility | Moderate | Base is flexible, easier to follow curved surfaces |
| Cost | Higher upfront | Generally lower |
| Maintenance | Minimal | Minimal |
For most residential roofs, a stainless needle strip with a polycarbonate base works well and stays low-profile. If you're dealing with a commercial building, a high-corrosion environment, or want maximum longevity without any plastic, go full stainless. Either way, buy commercial-grade, not the thin budget versions sold at some hardware stores.
Planning your coverage so birds can't sneak back in
Map out every surface where birds land or roost, not just the obvious ones. Birds will shift to a nearby ledge, vent cap, or parapet edge the moment you block their favorite spot. Install spikes on all adjacent surfaces too. Also think vertically: if birds are landing on a lower area and you only spike that area, they may perch above it and drop nesting material down into the spikes, which clogs them over time. Bird-X advises installing spikes on all existing and potential roosting areas, including surfaces directly above currently infested areas, so birds cannot drop debris into the spikes drop nesting material down into the spikes.
When laying out sections, butt them end to end with zero gap between strips. Any space left between the end of one section and the start of the next is a landing opportunity. For corners and angles, cut sections at 45 degrees with tin snips so they meet cleanly.
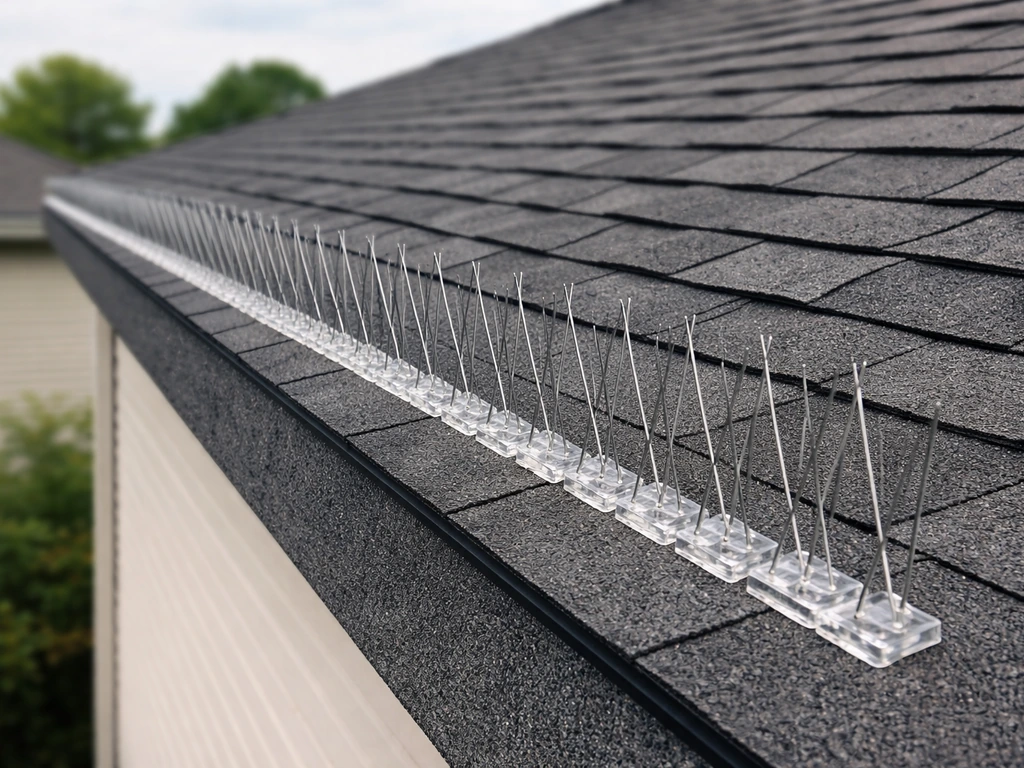
Installing bird spikes on asphalt shingles: step by step
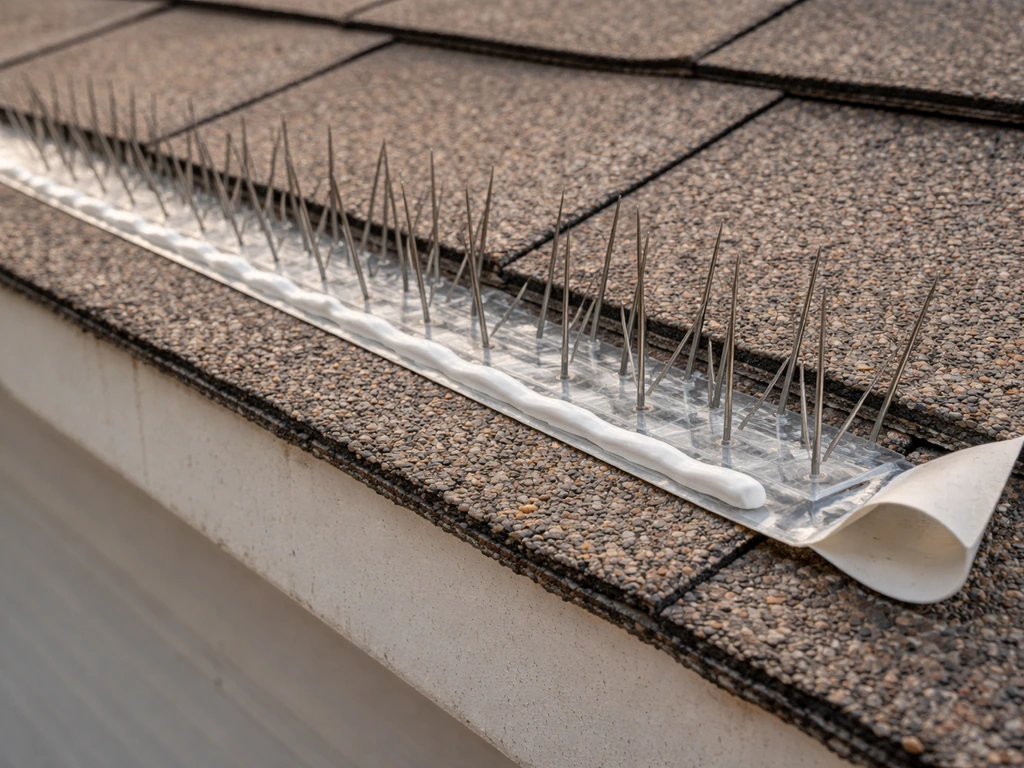
Asphalt shingles are the more forgiving of the two roof types because the surface is relatively flat and consistent. The main risk is punching holes that can leak, so you need to seal every penetration carefully. If you also need the full walkthrough, start with how to install bird spikes on your specific roof type install spikes.
- Get on the roof safely. Set up your ladder on solid, level ground, anchor it at the top, and clip into your harness before you step onto the slope. Work during dry, calm weather.
- Identify the exact ridge line or perimeter edge where birds are landing. Look for droppings, feathers, or worn shingle surfaces as evidence of the perch zone.
- Clean the surface. Use a stiff brush to remove all debris, droppings, moss, and loose granules from the area where the base will sit. If you're using adhesive, wipe down with isopropyl alcohol and let it dry completely.
- Dry-fit your spike sections. Lay them out without adhesive first to confirm your layout, check that sections butt together cleanly, and mark any cuts needed.
- Cut sections to length with tin snips. Always cut from the base, not through the needle assembly.
- If using adhesive: apply a generous, continuous bead of Bird Barrier Bond or compatible roofing adhesive to the underside of the spike base. Press firmly onto the shingle surface and hold for 30 to 60 seconds. Allow the full set time (1 to 2 hours depending on product) before the installation gets any stress.
- If adding screws for extra security: pre-drill pilot holes through the base into the shingle and decking below. Use stainless steel screws. The recommended rate is 9 screws per 3-foot section, spaced evenly. Do not skip holes.
- Seal every screw hole and the perimeter of the base with roofing silicone immediately after fastening. Apply sealant over the screw heads too. This step is not optional on a shingle roof.
- Repeat for each section, butting them together with no gap.
- Step back and visually inspect the full run. Look for gaps at joints, any lifted base edges, and areas where the strip may be sitting on a shingle hump rather than lying flat. Press down and re-seal as needed.
One thing to watch on shingles: the ridge cap shingles are often narrower than you expect. If your spike strip is wider than the ridge cap, you'll need to either use a narrower spike model or split coverage across two narrower strips placed on either side of the peak.
Installing bird spikes on a tile roof: step by step
Tile roofs, whether concrete or clay, need a different approach. Individual tiles can crack under point loads, and screwing directly through a tile is asking for trouble unless you know exactly where the battens are underneath. Adhesive is strongly preferred here.
- Walk carefully. Step only on the lower third of each tile where it overlaps the tile below and is supported. Stepping on the middle or upper exposed area of a tile can crack it. Use a roof walkboard if you have one.
- Identify the ridge cap or flat surface area. On tile roofs, the ridge cap is usually a row of rounded or angled tiles mortared in place. The top flat surface of the ridge cap is where spikes typically go.
- Clean the surface. Brush off debris, moss, and any loose mortar. If the ridge cap surface is glazed tile, scuff it lightly with coarse sandpaper before applying adhesive so the bond holds.
- Dry-fit your sections as with shingles. The curved or uneven tile surface may mean you need to use a spike strip with a flexible base so it conforms without rocking.
- Apply a heavy, continuous bead of adhesive to the underside of the spike base. On rounded ridge tiles, apply extra adhesive to fill the contour gap between the flat base and the curved tile surface. Press firmly.
- Do not screw through tile unless you have confirmed batten locations below and use appropriate tile screws with rubber washers. If you do drill, use a masonry bit, go slow, and apply roofing sealant into the hole before inserting the screw, then cap the screw head with sealant after.
- Seal the perimeter of the base to the tile surface with roofing silicone rated for tile, especially at the upslope edge where water could run underneath the base.
- Allow full adhesive cure time before rain. Most products need at least 1 to 2 hours to set; check the label for your specific product.
- Inspect from the ground and from the roof. Look for any section that isn't fully bonded or has an edge that has lifted. Press down and re-seal immediately.
On tile roofs, adhesive is not just easier, it's genuinely the better technical choice. You avoid cracking tiles, you avoid creating new water paths, and a good polyurethane or silicone-modified adhesive bond on a clean tile surface is strong enough to hold through years of weather cycles.
Attachment methods, sealing, and waterproofing
The most common mistake people make with roof spike installs is creating a new leak in the process of solving a bird problem. Here's how to avoid it. If you want a ballpark number before you buy, the installation cost depends mostly on your roof size, layout, and whether you use adhesive-only or a screw-and-sealant method how much to install bird spikes.
Adhesive-only installs
Adhesive is the cleanest method for roofs because no holes are made. Use a purpose-made bird spike adhesive or a high-quality polyurethane construction adhesive rated for outdoor and roofing use. Apply a continuous bead, not dots, because gaps in adhesive create gaps in the seal. Press the base firmly and hold it for at least 30 to 60 seconds. For curved or uneven surfaces, apply more adhesive to fill any contour gaps between the base and the surface, because voids in the bond will fail first under thermal expansion.
Screw or nail installs with sealant
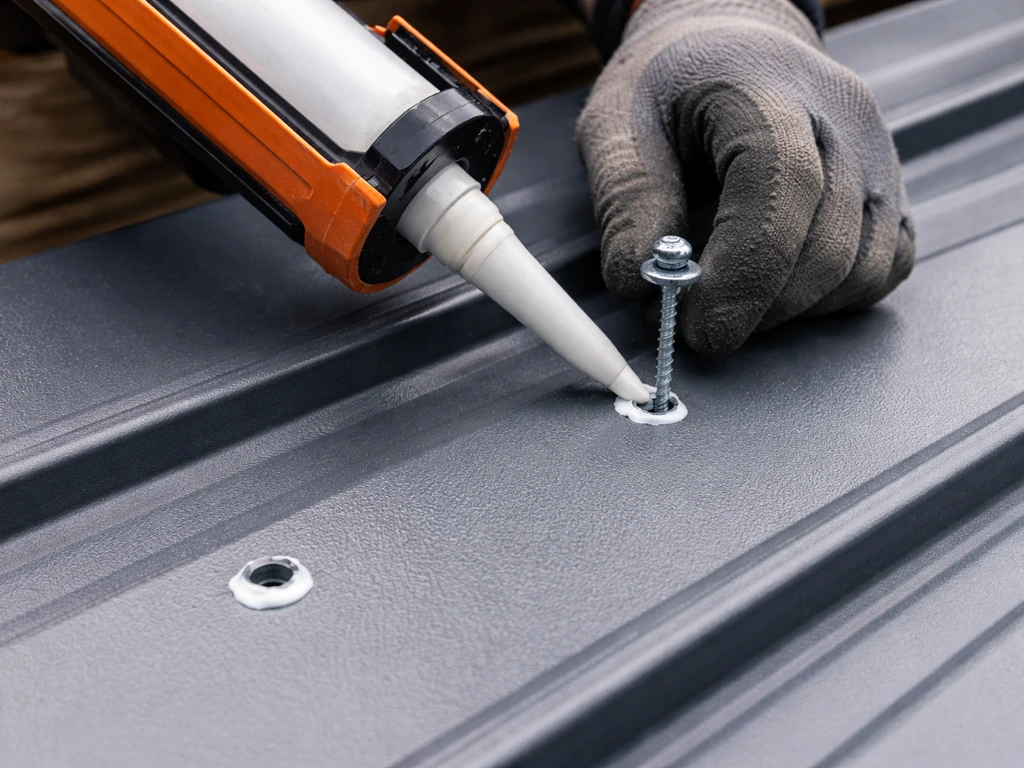
When mechanical fasteners are used, the sealant step is non-negotiable. Apply sealant into each pre-drilled hole before the screw goes in, then add more sealant over the screw head after fastening. The goal is to fill any gap between the fastener shaft and the roofing material that water could travel down. Use a roofing-grade silicone or polyurethane sealant, not interior caulk. Also run a bead of sealant along the upslope edge of the spike base where it meets the roof surface, so water doesn't wick underneath.
Combined method for high-wind areas
In areas with strong, sustained winds (coastal regions, open hilltops), the most reliable approach is adhesive plus screws. Glue the base first, let it set, then add screws through the base into solid decking. Seal all penetrations as described above. This is also worth doing on ridge sections that experience a lot of thermal movement, where adhesive alone might fatigue over years.
Flashing and gutters
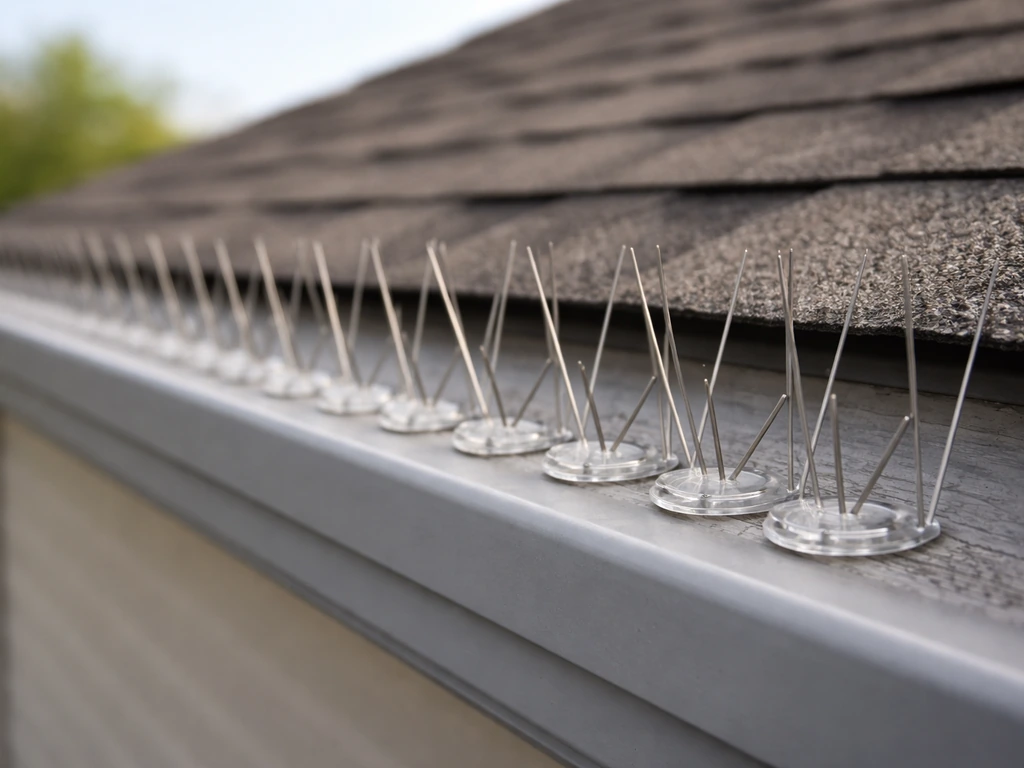
Roof flashing, gutters, and light fixtures are all valid spike installation surfaces and respond well to caulking-based installs. Run your caulk bead, press the base, and finish with a sealant bead along the edges. Avoid over-caulking into gutters in a way that blocks drainage. On gutters specifically, some installers prefer stainless ties or clip-on mounting hardware so the gutter itself isn't damaged and the spikes can be removed for gutter cleaning.
Safety, local rules, and when to call a pro
Roof safety basics
Falls are the real risk here, not the birds. A personal fall arrest harness anchored to a certified roof anchor is the right setup for any pitch above about 4:12. Wear rubber-soled, non-slip shoes. Work on dry days, never when frost, dew, or wet leaves are on the roof. Have someone with you, or at least tell someone where you are and what you're doing. Don't rush the job; the adhesive set time is actually a useful excuse to slow down and work carefully.
Permits and local regulations
Physical bird deterrents like spikes generally don't require a permit for residential installs, but it's worth checking with your local municipality if you're modifying a commercial property or if your HOA has rules about visible modifications to roof lines. Some HOAs have restrictions on visible deterrents from the street, which is a practical reason to choose low-profile, polycarbonate-base spikes. In the US, bird control targeting certain species (like migratory songbirds) is governed by federal law, but pigeons, starlings, and house sparrows are not protected under the Migratory Bird Treaty Act, so spikes are legal to use on those species without permits.
When to hire a professional instead
Some jobs are genuinely better left to a pro. If your roof pitch is steep (above 6:12 or 7:12 and you don't have fall protection experience), the installation area is near a fragile skylight or old tile that could shatter, or the job requires working around high-voltage equipment like rooftop HVAC units, call a pest management or bird control professional. The same applies if the infestation is large enough that it involves active nesting inside the roofline, which is a different problem from birds perching on top. A pro can also handle installations that require scaffolding or boom lifts on commercial properties.
What to expect after installation, and how to keep it working
How well do spikes actually work?
Properly installed stainless steel spikes are one of the most effective permanent bird deterrents available. When the coverage is complete with no gaps, birds cannot land on the treated surface and will move on. The key phrase is "no gaps." A single missed joint or a strip that came loose on one end is enough for birds to find their old perch and start using it again. The installation quality matters far more than the brand of spike.
Maintenance schedule
Check your installation twice a year, ideally in spring and fall. Look for sections that have lifted or shifted, joints that have opened up, sealant that has cracked or pulled away, and debris or nesting material that has accumulated in the spike field. Remove any debris: pine needles, leaves, and dirt can build up in spikes over time and eventually give birds enough material to nest on top of them. Trim back any tree branches that overhang the treated area, since birds use branches as staging points and debris from branches feeds the clogging problem.
Troubleshooting common problems
- Birds still landing on the treated area: check every joint for gaps, look for sections that have shifted out of alignment, and check whether birds have moved to an adjacent untreated surface and are then dropping down into gaps
- A section has come loose: clean the surface, reapply adhesive, press and hold, then re-seal the perimeter edge; if using screws, add sealant into the existing holes before refastening
- Nesting material accumulating in spikes: remove it manually, check that you've covered all surfaces above the spike zone, and consider whether a wider coverage area is needed
- Sealant cracking or pulling away at the base edge: scrape out the old sealant, clean the surface, and apply fresh roofing silicone; this is a normal maintenance item every few years depending on climate
- Spikes look damaged or bent: individual spike sections can be replaced without redoing the whole run; just pry up the affected section, clean the surface, and install a new one
If you're tackling this as a DIY project, it fits naturally alongside related jobs like installing spikes on AC units, gutters, or other ledges around the property. The same materials and techniques apply, just scaled to the surface. The roof-specific considerations covered here, mainly the waterproofing steps and the tile vs shingle differences, are what make this install different from a standard ledge or fence job.
FAQ
Do bird spikes work on a ridge if birds are nesting near the roofline, not just perching?
Spikes mainly stop landing and roosting, they do not remove an active nest. If you see nesting activity inside the roofline or birds acting alarmed at the same entry points, address exclusion and nest removal first, then install spikes across the full access routes so they cannot re-perch and drop nesting material into the treated area.
How long should I wait after installing before birds test the spikes?
Adhesive needs proper set time before exposure to wind-driven movement. After pressing and holding the base (and after any specified cure period on the adhesive), do a quick visual check for edge lift, then avoid disturbing the area for at least a day. If you used screws and sealant, recheck the sealant bead at the fastener heads for any shrink gaps.
What’s the best way to handle a gap at the end of a ridge cap or parapet section?
Do not leave any uncovered transition between two runs. If you cannot match length cleanly, cut a new section so the overlap is zero-gap, then seal the joint edge along the upslope side with a thin sealant bead to prevent water paths and prevent birds from using the seam as a landing point.
Can I install spikes over existing sealant, paint, or roofing tar without cleaning the surface?
Usually no. Adhesive and sealant bonds fail first on dirty or chalky surfaces. Clean the bonding area (remove grit, moss, and loose debris), let it dry fully, and avoid applying adhesives directly over flaking coatings or heavy roofing tar unless the product label allows it.
Do I need to remove the spike field during gutter cleaning?
If spikes are installed on the gutter face, removable mounting hardware (such as clips or stainless ties) can make maintenance easier and reduce gutter damage. If you glued the base directly with a full seal, you may need to work around the spikes or plan for partial disruption when cleaning, so consider accessibility during layout.
How do I choose spike width or number of rows for a wide ridge or broad parapet?
Use the expected exposed coverage per row as your starting point, then verify visually that birds have no landing ledge directly in front of or behind the strip. If the surface width exceeds one row’s coverage, add parallel rows side by side, do not stretch spacing, and check both ends and corners where coverage often thins.
What should I do if I accidentally puncture a shingle or create a small leak while fastening?
Stop the install and address it immediately. For shingle roofs, any penetration should be treated like a roof fastener, pre-seal the hole, set the screw, then fully seal around the fastener head and the upslope edge of the base. If water already pooled or you see wet decking after rain, you may need a pro to inspect for underlying damage.
Are spikes safe for tile roofs if the tiles are old or brittle?
Even with adhesive preference, brittle tiles can still crack if the surface is contaminated or uneven. Make sure you are bonding to a clean, stable tile face, and if tiles are loose or hairline-cracked where you plan to mount, repair or stabilize the area first before installing spikes.
Will spikes prevent droppings if birds switch to roosting on nearby vents or walls?
They can, but only if you treat the adjacent landing options too. Birds commonly relocate to vents, vent caps, and nearby ledges when the original perch is blocked, so include nearby vertical and adjacent horizontal surfaces within the same sightline and access pattern.
How often should I inspect and what exact signs mean it’s time to re-seal or replace?
Inspect twice yearly. Replace or re-seal when you see any lifted base edges, opened joints between strip ends, cracked or missing sealant around fastener points, or debris buildup that lets birds perch on top. Also check after major storms, because wind can shift edge sections first.