Installing bird spikes is straightforward once you know the rules: the spikes need to overhang the outer edge of the surface, sections need to overlap at the joins, and there can be zero gaps where a bird could squeeze in and perch. Get those three things right and the spikes will work. Miss any one of them and you'll still have birds. This guide walks you through every step, from picking the right product to troubleshooting a failed install.
How to Install Bird Spikes: Step-by-Step Guide

Marcus Weatherby
11 Apr 2026

Bird spike basics: when they work and where to use them
Bird spikes work by making a surface physically uncomfortable to land or perch on. They don't harm birds; they just remove the flat, stable footing that pigeons, starlings, sparrows, and similar species need to settle. They're best suited to narrow, defined surfaces where birds habitually roost or loaf, such as ledges, window sills, roof ridges, eaves, balcony railings, parapet walls, gate tops, and the frames of solar panels or AC units.
They're not a full exclusion barrier, so they won't stop birds from accessing a large open area like a rooftop or a cavity under eaves. For that kind of problem, netting or other exclusion methods work better. Spikes are specifically an anti-landing, anti-roosting device, and they perform best when installed on every perchable surface in the problem zone, with no exploitable gaps left uncovered.
Common use cases include: roof ridges and gutter lips, window ledges and sills, balcony and patio borders, tops of fences, gates, and railings, AC unit housings, parapet walls, and solar panel frame edges. If you're dealing with birds on a roofline specifically, installing bird spikes on a roof involves a few extra considerations around pitch and surface material that are worth reviewing before you start.
Choose the right spike type and mounting method for your surface
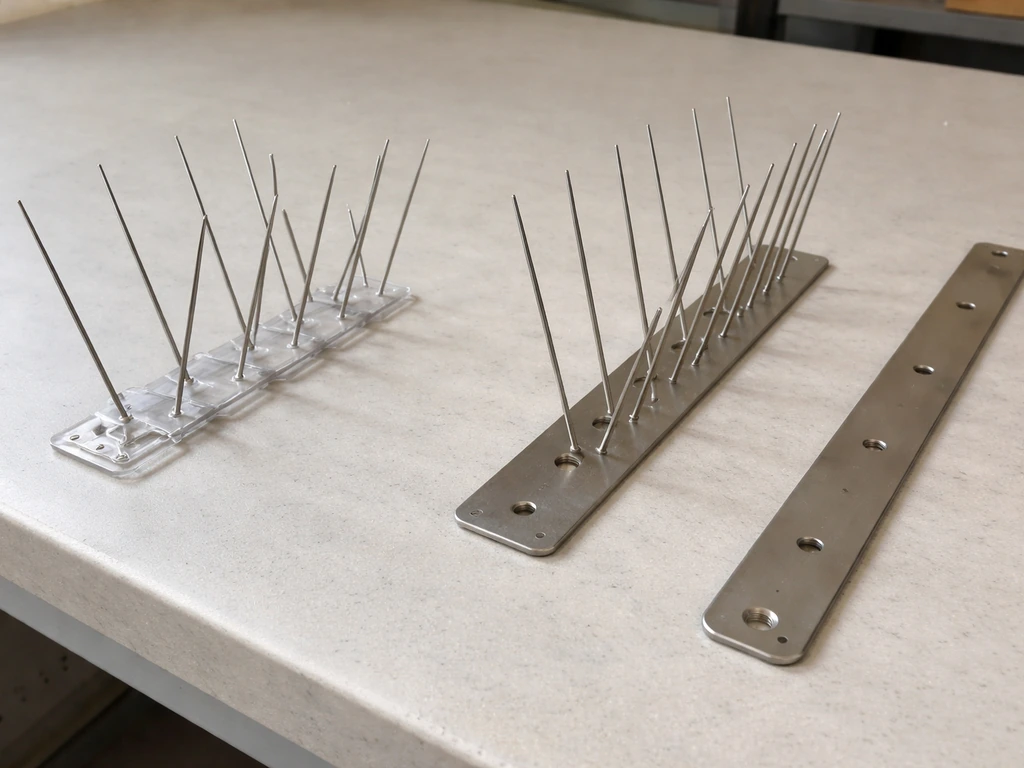
There are two main spike types: stainless steel rods in a plastic or metal base, and all-stainless steel systems where both the base and the rods are metal. For most residential and light commercial jobs, a stainless-rod-with-plastic-base system works well. The plastic base is UV-resistant and lightweight, which makes it easier to cut and fit around corners. All-stainless systems like those from Nixalite are more durable over the long term and hold up better in harsh or coastal environments, but they cost more and are a bit heavier.
Spike width matters too. Most products come in 3-inch, 5-inch, and 7-inch wide bases. A narrow 3-inch spike covers a ledge used by small birds like sparrows. For pigeons on a wider ledge or parapet wall, you'll likely need two rows side by side, or a wider-base product. If you're only using a single row and birds are still sheltered from wind or visual deterrents, that under-coverage is one of the most common reasons installs fail.
Once you've chosen the spike, you need to decide how to attach it. There are three main methods: adhesive only, mechanical fasteners only (screws, nails, or cable ties), or a hybrid of both. Your surface dictates the choice.
| Surface | Recommended Method | Notes |
|---|---|---|
| Masonry, brick, concrete | Adhesive or adhesive + screw | Use polyurethane construction adhesive; pre-drill for screws |
| Wood (eaves, fence tops, timber beams) | Screws or adhesive + screw hybrid | 3 or more wood screws through base holes per strip |
| Metal (AC housing, solar frame, railing) | Adhesive + cable ties or screws | Clean surface thoroughly; polyurethane adhesive bonds well to metal |
| Plastic or UPVC (gutter lip, window trim) | Gutter clips or cable ties | Avoid screws that could crack plastic; clips designed for gutter edges work best |
| Tile or slate (roof ridge) | Adhesive (polyurethane) + screw hybrid | Avoid over-drilling tile; adhesive-first is often preferred |
On adhesive: Bird B Gone is explicit that construction-grade polyurethane adhesive works on most surfaces, and that silicone adhesives are not recommended. Silicone doesn't bond as well to spike bases and can allow strips to peel off over time. Some manufacturers sell their own spike adhesive formulated for their specific base material, which is worth using if it's available for your product. One tube of adhesive is typically enough to cover about 10 feet of spikes, which is a useful number when planning your supply.
If you want a deeper look at what a fully DIY approach looks like end to end, including the tools and materials you'd buy yourself, the do it yourself bird spikes guide covers product selection and sourcing in more detail.
Tools, materials, and safety prep (including working at height)
Before you touch the surface, gather everything you need. Running up and down a ladder to get a forgotten item wastes time and creates safety risk.
- Bird spike strips (measure the total linear footage first, then add 10% for wastage and cuts)
- Polyurethane construction adhesive and a caulking gun
- Screws or cable ties appropriate to your surface (see table above)
- Drill with appropriate bit for your substrate
- Tape measure and chalk line or pencil
- Angle grinder or hacksaw (for cutting metal-base spikes) or heavy scissors/snips (for plastic-base strips)
- Wire brush or stiff-bristle brush for surface cleaning
- Bucket, water, and detergent (or enzymatic cleaner for areas with heavy droppings)
- Safety gloves (spike rods are sharp)
- Safety glasses
- Ladder stabilizer or standoff bracket if working on a roof or eave
- Non-slip footwear
Working at height deserves real attention, not a quick mention. If you're working above about 6 feet, use a stabilized ladder that's rated for your weight plus your tools. Never overreach to the side; move the ladder instead. On a roof, wear rubber-soled shoes and ideally use a roof anchor and harness if the pitch is steep. Wet or frost-covered surfaces make this work dangerous. If the job involves a significant run of ridge tiles or a tall commercial parapet, it's worth asking a professional installer to quote before committing to a solo DIY job.
Surface prep is not optional. Adhesive fails on dusty, greasy, or dropping-covered surfaces. Use a wire brush to remove loose debris, then wash the area with water and detergent. For areas with heavy bird droppings, an enzymatic or disinfectant cleaner is important for health reasons as well as for adhesion. Nixalite specifically recommends neutralizing droppings before installation for exactly this reason. Let the surface dry fully before applying any adhesive.
Step-by-step installation: how to attach, fit, and secure bird spikes
This sequence works for the majority of installations. Adjust the fastener type based on the surface table above, but the positioning and spacing logic stays the same.
- Measure the full run you need to cover. Write down the total length and note any corners, curves, or obstacles. Divide by the length of one spike strip (typically 1 foot or 3 feet per section) to get your strip count.
- Clean and dry the surface completely as described above.
- Do a dry run first. Lay the strips in position without adhesive to check fit, confirm overhang, and plan your join points. This is the step most DIYers skip, and it's where gaps and misalignment get caught before they're glued in permanently.
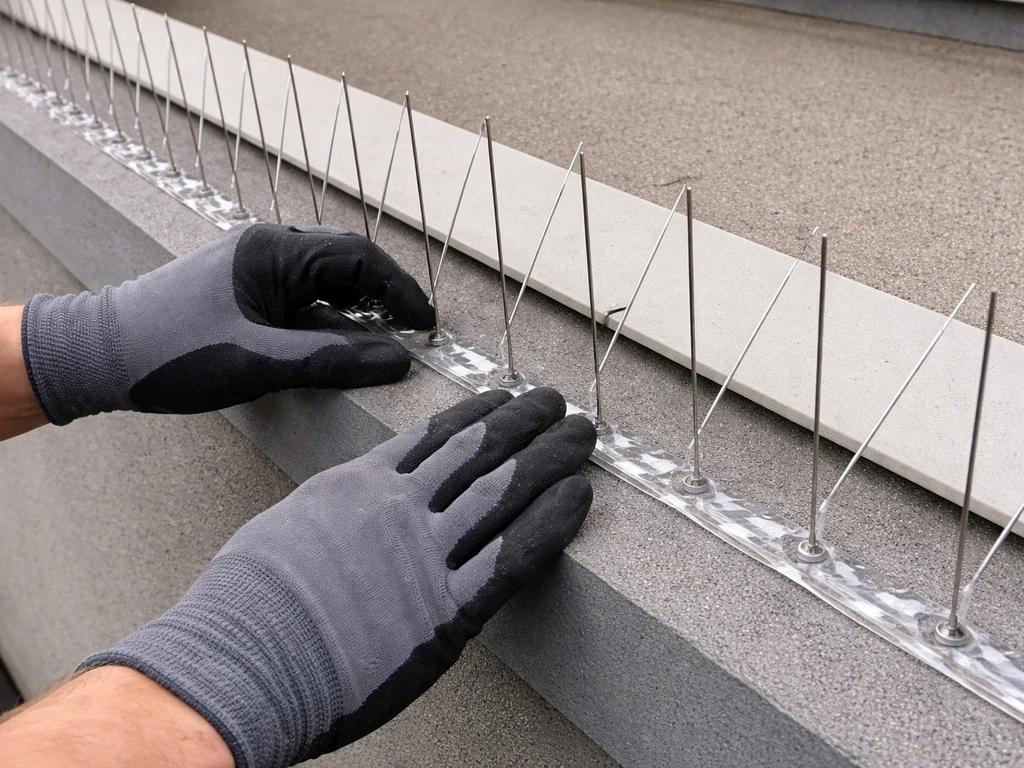
- Position each strip so the spike rods overhang the outer edge of the surface by at least 1/4 inch. Bird-Flite's instructions call for at least 1/2 inch of overhang. The principle is the same: if the rods don't extend past the edge, birds can land on the front of the base itself.
- Keep the back of the base strip within 1 inch of any adjacent wall or raised surface behind it. A gap larger than 1 inch between the wall and the strip leaves enough flat space for a small bird to perch.
- For adhesive installation: apply 4 to 5 quarter-sized dabs of polyurethane adhesive along the underside of each strip base. Don't use a single bead down the center; the dabs create a better mechanical bond and allow slight flex.
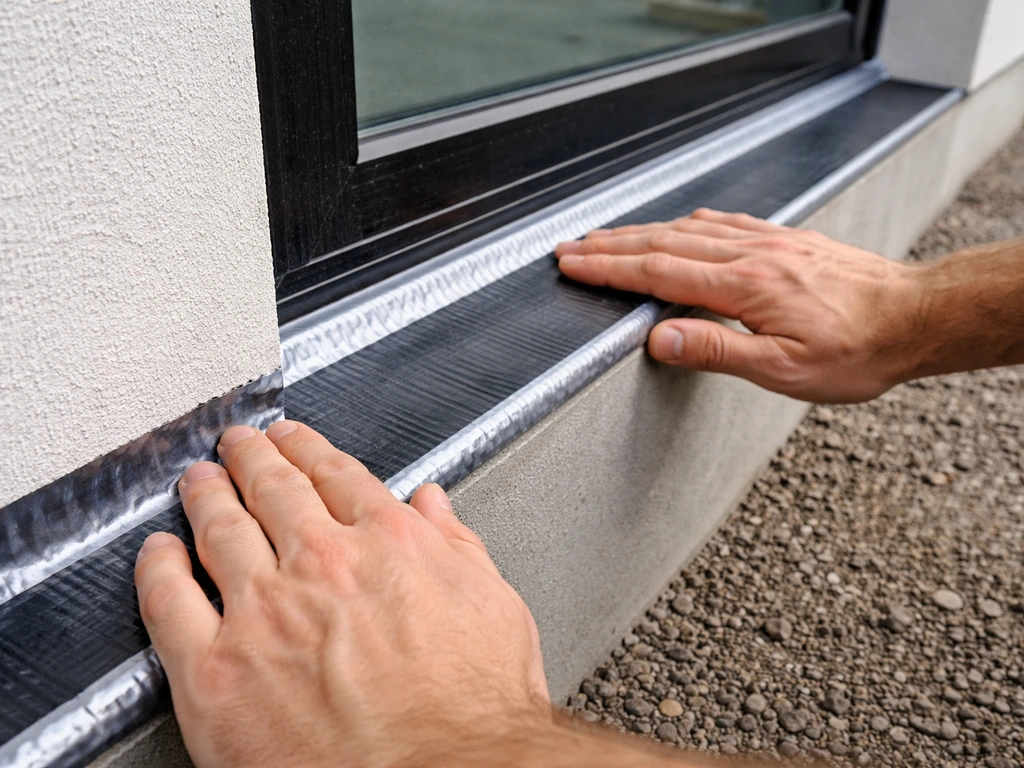
- Press the strip firmly down onto the surface and hold for 10 to 15 seconds. Check alignment before the adhesive starts to grab.
- For screw installation: use the pre-drilled holes in the base (most strips have them). Use 3 or more screws per strip. Pre-drill masonry or tile to avoid cracking.
- For a hybrid approach: apply adhesive dabs first, press and position the strip, then drive screws through the base holes while the adhesive is still wet. This gives you the best of both methods.
- Allow adhesive to cure fully before exposing the installation to wind, rain, or bird activity. Most polyurethane adhesives take 24 hours to reach full cure. Don't rush this step.
- Once cured, walk the full run and check every join, corner, and end for gaps.
For gutter installations specifically, the process is slightly different. Position the strip on the inside of the gutter lip rather than the top face, and use dedicated gutter clips instead of adhesive. The correct assembly order is to clip the gutter clips onto the spike strip first, then hook them onto the gutter edge. Clip at the ends of each strip and at any join point to prevent the strip from lifting or shifting.
If you're fitting spikes on an air conditioning unit, the metal housing and the need to avoid blocking ventilation add a few extra steps. The guide on how to install bird spikes on an AC unit walks through those specifics.
Corners, edges, and gaps: covering the tricky spots
Corners are where most DIY installs fall apart. Birds are good at finding the one spot where a strip ends 2 inches before a corner and using that as a landing zone. The rule for outside corners is to run each strip at least 4 inches past the corner point before meeting the adjoining strip. That overlap ensures the corner itself has continuous coverage and no perchable flat spot.
At joins between strips, overlap the sections by at least 1 inch. Butt-jointing two strips end-to-end with no overlap leaves a small flat gap at the seam. It doesn't look significant, but sparrows in particular will find it. The 1-inch overlap eliminates that gap entirely.
On curved surfaces like curved eaves or rounded parapet cappings, place the strip far enough down the curve that the front rods still extend past the outer edge. Flat-base strips don't naturally conform to curves, so you may need to score the base slightly or use shorter sections to get them to sit flush without rocking. If a strip is rocking on the base, it won't bond reliably with adhesive and birds may be able to depress the base and perch alongside the rods.
For wide ledges or parapet walls where a single row of spikes doesn't cover the full depth, run multiple rows side by side. Position the rows so the back edge of the front row slightly overlaps or abuts the front edge of the rear row, eliminating the channel between them. Unevenly spaced rows leave a usable landing strip down the middle, which defeats the purpose.
Around architectural details like beams, downpipes, or cable runs that cross a ledge, cut strips to fit tightly on either side. Don't leave the section around the obstruction uncovered just because it's awkward to fit; birds actively use those sheltered spots.
Testing effectiveness and troubleshooting common mistakes
After the adhesive has cured, do a physical check of the whole installation. Press on each strip to confirm it's fully bonded and not rocking. Sight along the run from one end to check alignment. Look at every join and corner from a bird's-eye angle (get close and low) to spot any gap you might have missed from standing height.
If birds are still landing after installation, run through this checklist before assuming the product has failed:
- Gaps at joins or corners: the most common cause. Add a short infill section or overlap piece to close any gap larger than about half an inch.
- Insufficient coverage width: a single row on a ledge deeper than about 4 inches may not deter birds from landing at the back of the ledge, behind the spike rods. Add a second row.
- Spikes not flush with the outer edge: if the base is sitting 1 to 2 inches back from the edge, birds can land on the front lip of the surface in front of the base. Reposition the strip forward so the rods overhang the edge.
- Adhesive failure: if strips are peeling or have shifted, the surface was likely not clean enough or silicone adhesive was used. Remove, re-clean, and reattach with polyurethane adhesive.
- Inadequate curing time: if the installation was disturbed within the first 24 hours, the adhesive bond may be weak even if it looks fine. Re-check all strips for movement.
- Missing areas around obstacles: check pipes, cable brackets, and any architectural detail that crosses the treated surface.
Misalignment (strips not sitting flush with the outer edge) and insufficient coverage are consistently the top two failure causes according to professional installers. Both are preventable with a careful dry run before committing to adhesive.
Maintenance, seasonal checks, and when to call a pro
Bird spikes are low-maintenance, but they're not zero-maintenance. Do a visual check twice a year, ideally in spring before nesting season and in autumn after leaf fall. Look for strips that have partially detached, rods that have bent or been pushed down, and debris (leaves, nesting material, droppings) that has accumulated in the base and is bridging the spikes. Packed debris can essentially turn a spike strip into a flat platform that birds can stand on.
Clearing debris is simple: use a stiff brush or compressed air to flush out any material from between the rods. Don't use a power washer directly on adhesive-only installations at high pressure; it can force water under the base and weaken the bond over time.
Check fasteners and adhesive bonds after any significant weather event, particularly heavy frost or strong winds. Thermal expansion and contraction on metal surfaces can gradually work adhesive bonds loose over several seasons, especially on south-facing metal surfaces that heat up significantly in summer. Reapply adhesive to any section showing movement.
Stainless steel rods are corrosion-resistant but check plastic bases for UV degradation after a few years in strong sunlight. A base that has gone brittle may crack at screw holes or joints. Replace any section where the base is visibly degraded before it fails completely.
As for when to call a professional: if the area to be treated is at significant height (above single-story), involves complex curved architectural surfaces, requires multiple rows across a wide commercial parapet, or is part of a bird management plan for a larger building, a professional installer will save time and almost certainly produce a better result. If you're weighing up the cost difference, the guide on how much it costs to install bird spikes gives realistic price ranges for both professional and DIY installations so you can make an informed call.
FAQ
How much overhang do bird spikes need on the outside edge to work properly?
Aim for each rod to extend beyond the outer edge enough that a bird cannot keep its feet on the surface while landing. Practically, measure so the rod tips sit past the “bird-facing” edge, not just the base. If you can see the rods stop flush with the edge after installation, you likely need a different base width or to reposition the strip.
Can I install bird spikes directly over existing dirt, droppings, or mildew?
No, not if you want long-term adhesion. Loose debris and droppings prevent the base from bonding and can also create a hygiene issue. Remove buildup with a wire brush, clean with detergent, use an enzymatic or disinfectant cleaner for heavy droppings, then let the surface dry completely before applying any adhesive.
What should I do if I’m missing a small amount of adhesive or I run out mid-run?
Do not leave a gap or unbonded section waiting for later. Instead, plan the job so each strip is fully placed and adhered in one continuous work window where possible. If you must pause, remove the partially cured adhesive, clean the area, and reapply so the base bonds as a continuous strip.
Why do birds sometimes keep landing right after installation, even when the spikes are correct?
Birds may still test the area while they adjust, especially if the spikes were installed partially or if there is debris bridging the rods. Give the install time to work, but also do a quick “gap and coverage” sweep from a low angle and clear any leaves or nesting material that could create a flat stance.
Will silicone adhesive work for bird spikes if polyurethane is not available?
Silicone is generally a poor choice for spike bases because it tends to bond weakly and can peel as the strip is stressed by weather and movement. Use construction-grade polyurethane or the manufacturer’s recommended adhesive for your exact base material when available.
Can I use nails or screws instead of adhesive on every surface?
Not always. Some spikes are designed to be adhesive-first, and screw placement can fail if the substrate is weak, curved, or prone to cracking. If you do mechanical fastening, choose the fastener type sized for the substrate and seal any penetration appropriately, then confirm the strip cannot rock under hand pressure.
How do I prevent strips from lifting at the ends?
Clip or fasten ends as required by your method, and do not leave ends short of coverage. For adhesive installs, ensure full contact by pressing along the full length during placement and re-checking corners and end sections after cure. For gutter clips, clip at each strip end and at joins to stop shifting.
What’s the best way to handle outside corners so birds cannot land on the corner?
Extend each strip on both sides past the corner point, then overlap into the adjoining strip so rods run continuously over the bird-facing edge. If you stop too early and meet the other strip without overlap, the seam becomes a perchable landing zone.
How can I tell if my rows on a wide ledge are leaving a channel?
Look for a consistent “middle gap” where the back edge of the front row does not meet the front edge of the rear row. Install multiple rows so they overlap or closely touch (with no channel down the depth), and confirm the rods still extend past the outer edge of the overall ledge.
Is it okay to butt-joint spike strips end-to-end?
No, butt joints commonly leave a small flat seam that birds can exploit. Use the required overlap between strips, typically at least about 1 inch, so the junction cannot create a perchable flat spot.
How do I fit spikes on curved surfaces without them rocking or losing bond?
Place the strip far enough down the curve so the rods still extend past the outer edge. If the base does not sit flush, you may need to slightly score or adjust the base, or use smaller sections to prevent rocking. A rocking strip won’t bond reliably and can be depressed by birds alongside the rods.
What should I check after a heavy frost or strong wind?
Inspect for movement at every join and corner, check whether any strip has partially detached, and confirm rods are not bent or pushed down. If anything shifts, re-adhere or re-secure that section, since thermal expansion and contraction over seasons can loosen bonds.
Can I power wash near or over adhesive bird spikes?
Avoid blasting water at high pressure directly on adhesive-only installations. Forced water can work into the base, weaken the bond, and let strips lift over time. Use gentle cleaning methods and remove debris with a brush or compressed air instead.
How long should I wait before assuming the adhesive is fully cured?
Follow the adhesive manufacturer’s cure guidance for the specific product and temperature conditions. In practice, do not load the area, press repeatedly, or disturb strips during the initial set. After curing, do a physical check by pressing along each strip to confirm it is firmly bonded and not rocking.
When do I need to replace a section rather than re-glue it?
Replace any section where the base has become brittle, cracked, or visibly degraded, especially on UV-exposed plastic bases after several years. Also replace if rods or bases no longer maintain their intended angles or cannot be bonded securely because the substrate has deteriorated.
Do bird spikes work for birds inside roof cavities or under-eave gaps?
Typically not. Spikes are anti-landing and anti-roosting for defined edges. If the issue is access into cavities or large open rooftop areas, netting or another exclusion method is usually required to physically block entry, not just deny perching on the surface.
Next Article
Best Bird Strike Prevention: Practical Steps That Work
Step-by-step best bird strike prevention: remove attractants, use exclusion and deterrents correctly, and maintain resul
