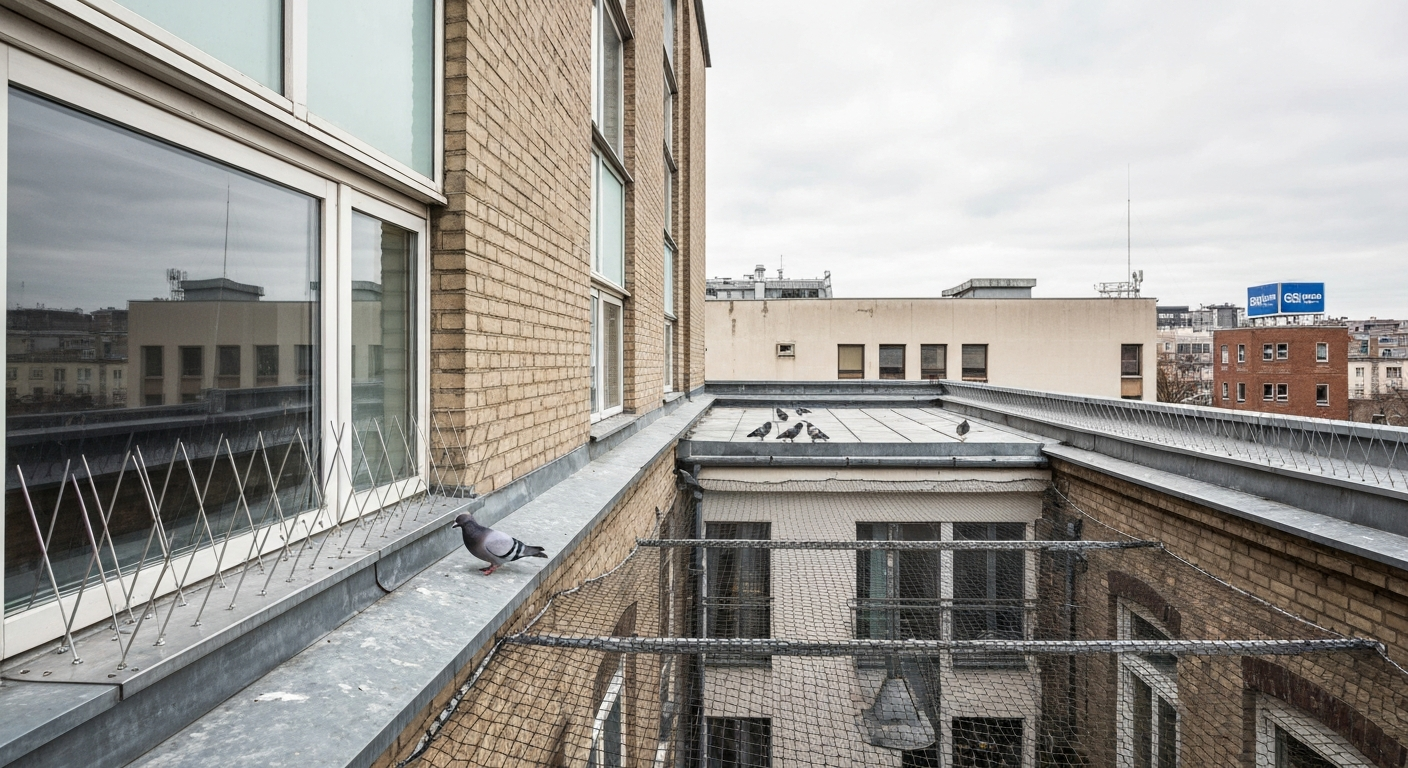
The most effective nuisance bird control combines physical exclusion, targeted sensory deterrents, and habitat management rather than relying on any single product. See our practical guide to bird deterrent methods for a side-by-side comparison of options and when to use each one. For ledges and rooflines, stainless steel or polycarbonate spikes stop pigeons and starlings from landing. For enclosed areas like courtyards, eaves, and solar panel gaps, fully sealed netting is the gold standard. Sensory devices (visual decoys, distress-call playback, sonic units) work best as short-term supplements rotated regularly to reduce habituation. Lethal methods require federal permits in the US for most species under the Migratory Bird Treaty Act, so humane exclusion and deterrence are both the legal default and the practical starting point.
Nuisance bird control methods: Practical, humane solutions

Who this guide is for and what it covers
Nuisance bird problems look very different depending on where you sit. A homeowner dealing with pigeons on a patio railing needs fast, budget-friendly options. A commercial property manager protecting a warehouse roof or a retail facade needs durable, scalable systems that stay compliant with local codes. An airport or industrial operator faces a different challenge entirely: bird strikes are a documented safety and cost risk, and the FAA requires Wildlife Hazard Assessments plus formal Wildlife Hazard Management Plans for airports that experience significant wildlife activity.
This guide walks through every major category of nuisance bird control: physical barriers (spikes, netting, wire systems), sensory deterrents (visual decoys, reflective materials, sonic and ultrasonic devices, wind-powered repellents), and active hazing (pyrotechnics, falconry, border collies). For each method you'll find honest effectiveness data drawn from peer-reviewed field studies and agency evaluations, practical installation steps, cost ranges, and notes on regulatory compliance. The goal is to help you match the right tool to your specific species, site, and budget, not to sell you on the most expensive product.
Nuisance bird control methods at a glance
The table below summarizes the main method categories. See our comprehensive guide to bird control methods for detailed comparisons, costs, and installation advice. Costs are approximate retail or contractor estimates as of mid-2026 and will vary by region, site complexity, and species pressure.
| Method | Effectiveness | Best for | Typical cost | Maintenance | Key limitation |
|---|---|---|---|---|---|
| Bird spikes (passive) | High for ledges/rails | Pigeons, starlings, gulls on ledges | $1–$5 per linear ft (DIY); $5–$15 installed | Annual inspection; clear debris | Birds can nest over poorly maintained gaps |
| Netting (fully sealed) | Very high when sealed | Enclosed courtyards, eaves, solar panels, roofs | $3–$10 per sq ft installed | Bi-annual inspection for tears, gaps | Expensive; requires precise fitting |
| Anti-roost wire/track | High | Ledges, parapets, signage | $4–$12 per linear ft installed | Annual tension check | Visible; some aesthetic objection |
| Electrified track/spikes | Very high | Heavy-pressure commercial/industrial ledges, solar arrays | $15–$30+ per linear ft installed | Regular electrical safety checks | Professional install required; higher cost |
| Visual decoys (owls, hawks) | Low–moderate, short-term | Gardens, small patios | $10–$60 per unit | Must be moved every 1–3 days | Rapid habituation if static |
| Reflective/flash tape | Low–moderate, short-term | Gardens, balconies, small areas | $10–$30 per roll | Replace when weathered | Habituation within days to weeks |
| Sonic distress call devices | Moderate, short-term | Open areas, yards, agriculture | $50–$300+ per unit | Update call libraries; rotate timing | Habituation without variation; noise-ordinance risk |
| Ultrasonic devices | Low/unreliable | Indoor enclosed areas only (limited) | $30–$150 per unit | Periodic testing | Most bird species do not reliably respond |
| Wind-powered repellents (windmills) | Low–moderate | Gardens, small open areas | $15–$80 per unit | Seasonal inspection; lubrication | Ineffective in calm conditions; habituation |
| Propane cannons/pyrotechnics | High, short-term dispersal | Agriculture, large open areas, airports | $300–$1,500+ per unit | Gas refill; timed rotation | Noise ordinances; habituation without variation |
| Falconry/raptor hazing | Very high when sustained | Airports, landfills, large commercial sites | $500–$2,000+ per session (contractor) | Ongoing sessions (3+ per week) | Labor-intensive; costly; not DIY |
| Habitat/food source modification | High (foundational) | All sites | Variable (project-specific) | Ongoing | Requires behavioral change by site users |
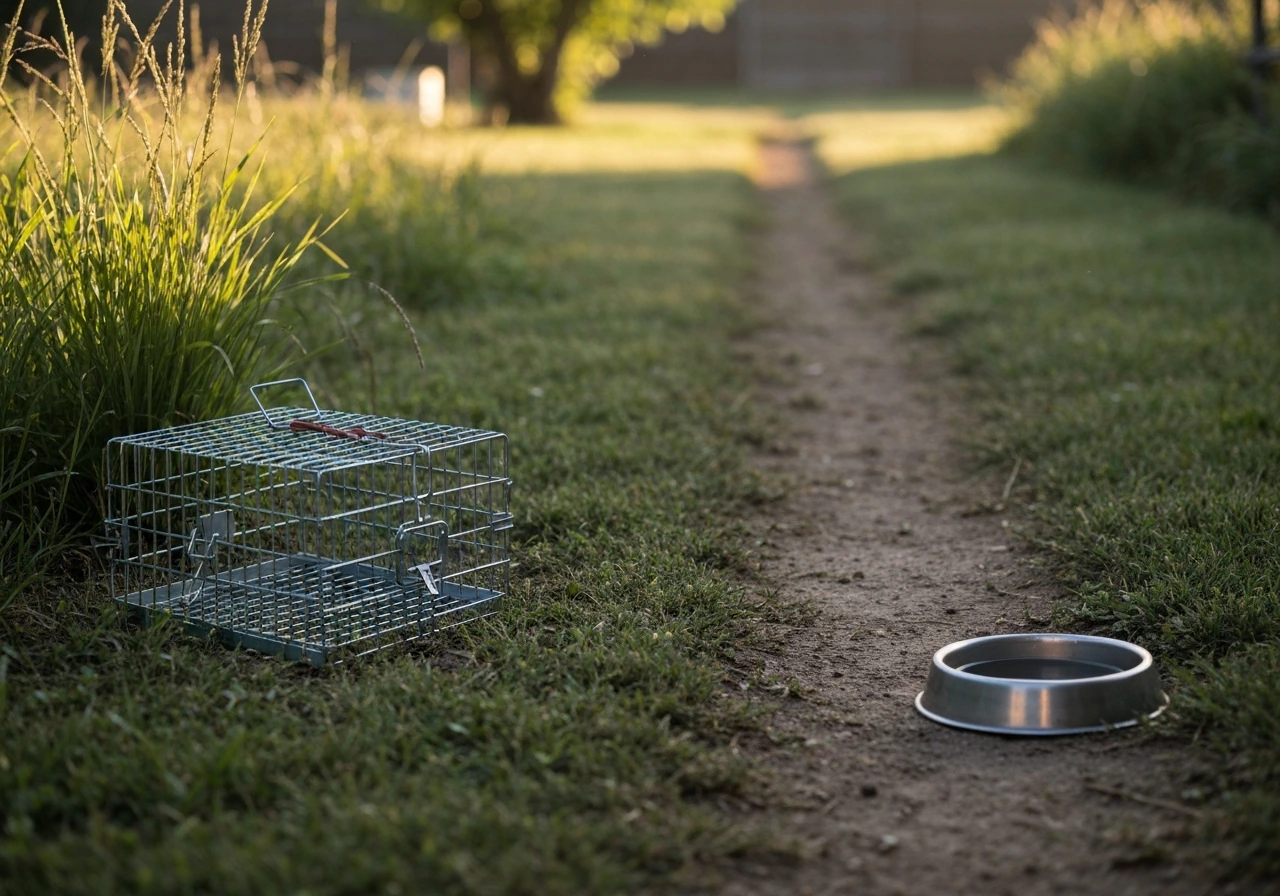
| Trapping and relocation/removal | Moderate for feral species | Invasive, non-protected species only | $50–$200+ per trap; permits may apply | Daily monitoring legally required | MBTA permits required for most native species |
How to choose the right method for your situation
Before spending money on any product, work through six criteria. Getting these right upfront saves a lot of frustration.
Species identification
The bird species you're dealing with determines almost everything else. Feral pigeons and European starlings are not protected under the MBTA (they are non-native invasive species), so you have more options including trapping without a federal permit. Native species like gulls, swallows, Canada geese, and most songbirds are MBTA-protected, meaning you cannot legally disturb active nests, destroy eggs, or trap and kill them without a USFWS Depredation Permit (form 3-200-13). Misidentifying your target species can turn a control action into a federal violation.
Site type and bird behavior
Roosting birds on a narrow ledge need a different fix than nesting birds inside an open warehouse eave or foraging gulls on a flat commercial roof. Roosting problems on ledges and rails are the most straightforward case for spikes and wires. Nesting inside enclosed gaps (behind solar panels, inside ventilation recesses, under bridges) needs full perimeter exclusion with netting or mesh. Foraging birds on open ground or rooftops respond better to hazing, habitat modification, and sensory deterrents.
Severity and flock size
A pair of pigeons on a window ledge is a DIY job. A flock of 200 starlings roosting on a commercial warehouse roof or a persistent gull colony at an airport is not. Large-scale infestations with established roosting or nesting behavior require an integrated approach and often professional assessment. Trying to address them with a single off-the-shelf product rarely works and can waste several months of effort.
Budget
Passive physical exclusion has a higher upfront cost but very low ongoing maintenance costs. Sensory devices are cheaper upfront but require more active management and replacement to stay effective. Hazing and falconry contracts are the highest-cost option but are appropriate for high-risk commercial or aviation settings where long-term solutions justify ongoing operational spend.
Safety and regulatory constraints
In the US, check MBTA status before any action involving capturing, killing, or disturbing nesting birds. See The Migratory Bird Treaty Act (MBTA): Selected Legal Issues (Congressional Research Service) for details on MBTA prohibitions, enforcement, and species coverage administered by the U.S. Fish & Wildlife Service. Airports must follow FAA advisory circulars and maintain documented Wildlife Hazard Management Plans. Noise ordinances affect where and when you can use sonic cannons, propane hazing devices, or even high-output distress call speakers, especially in residential or mixed-use zones. Electrified track systems require professional electrical installation and periodic compliance checks. Always verify local and state regulations alongside federal ones, as state wildlife agencies may add additional protections.
Environmental responsibility
Humane, non-lethal methods are both legally safer and operationally smarter for most sites. Chemical repellents (methyl anthranilate, polybutylene gel) are registered options for some applications but need label compliance under EPA regulations and should be used where birds won't be harmed. Trapping and lethal removal should be last resorts reserved for unprotected invasive species or situations covered by an active depredation permit.
Physical exclusion and barrier systems
Physical exclusion is the most consistently effective long-term strategy across the research literature. When a barrier is properly installed and maintained to close all gaps, it provides near-total exclusion for the target site. The key word is 'maintained': barriers with gaps, sagging sections, or accumulated debris lose effectiveness quickly.
Bird spikes
Spikes are rows of stainless steel or UV-stabilized polycarbonate pins mounted on a base strip. They work by denying birds a flat surface to land and balance on. They do not injure birds. Commercial spike strips (such as those from Bird-X) typically have pins around 4.3 inches tall, are sold in 1-foot sections, and carry material warranties of around 10 years for UV-inhibited polycarbonate bases. Stainless steel pins are more durable in coastal or high-humidity environments. A peer-reviewed two-year field study at the University of South Africa found bird spikes produced the highest reduction in pigeon indices on building ledges compared to other visual and physical measures tested.
Spikes are most effective on narrow ledges (under 8 inches wide), window sills, parapets, railings, and signage tops. On wider surfaces, you may need multiple rows with no gap between them. The documented failure mode is birds nesting in accumulated debris on top of spike strips when they are not cleaned annually. Electrified spike variants (low-voltage pulsed) are available for commercial sites with heavy pressure from gulls or pigeons and provide a stronger deterrent but require professional installation. See manufacturer specifications for Stainless Steel Bird Spikes & electrified variants (Bird-X product/specification pages) for details on low-voltage pulsed systems, professional installation requirements, and suitable applications for signage, rails, and solar arrays.
Bird netting
Heavy-duty polyethylene or polypropylene netting with UV stabilization is the go-to solution for enclosed spaces where spikes cannot work: the undersides of bridges, open courtyards, warehouse loading areas, ventilation recesses, and the gaps behind solar panels. Net mesh sizes are matched to the target species: 75mm mesh for pigeons and gulls, 50mm for starlings and jackdaws, and 19mm for sparrows. The critical installation requirement is a fully sealed perimeter. Any gap larger than the target bird's head width is a failure point. Research consistently shows that professionally installed and maintained netting with fully sealed edges provides near-total exclusion for pigeons, starlings, and similar-sized species.
Anti-roost wires
Tensioned stainless steel wire systems (sometimes called parallel wire or post-and-wire systems) are installed in rows across ledges to prevent birds from landing. The wires are typically 6–8 inches above the ledge surface and spaced 3–4 inches apart. They are low-profile and aesthetically less intrusive than spikes, making them popular on heritage buildings and high-visibility facades. They require periodic tension checks to maintain effectiveness.
Mesh for specific applications
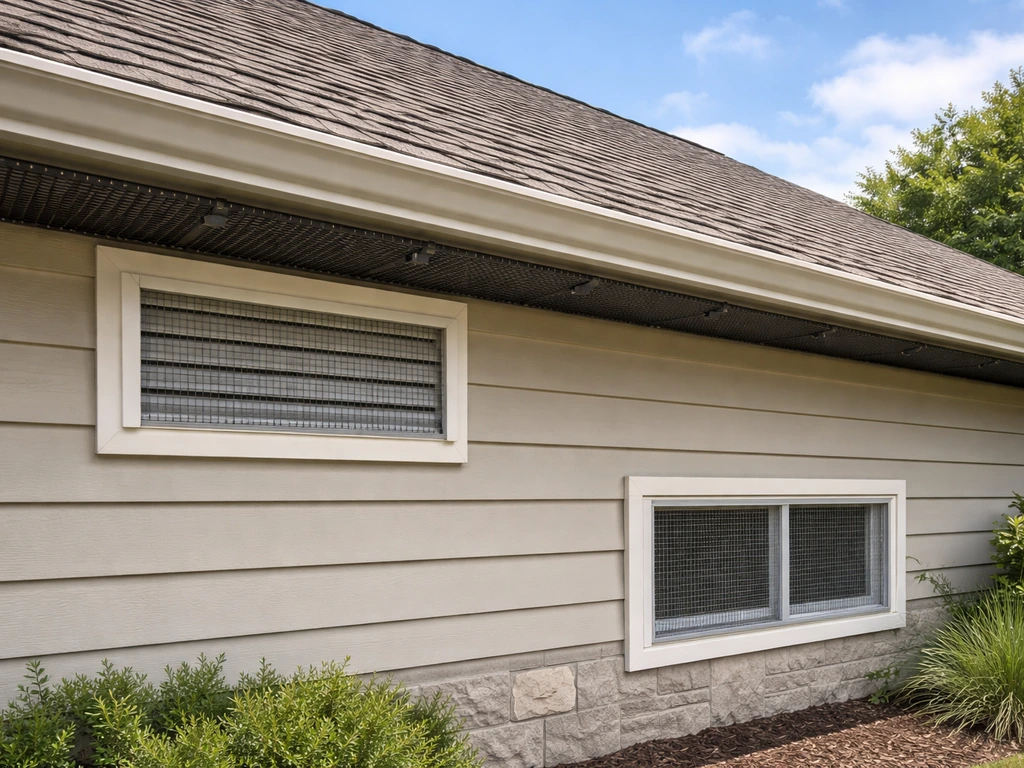
Hardware cloth (galvanized welded mesh, 1/2-inch or smaller) is useful for blocking ventilation openings, ridge tile gaps, and under-eave cavities where birds nest. It is a one-time fix for entry-point exclusion. Always check that no birds or active nests are inside before sealing.
Step-by-step: installing physical barriers yourself
DIY installation of spikes, netting, and wire systems is practical for homeowners and property managers on straightforward sites. Complex multi-story, heritage, or large commercial installations are better handled by professionals, but the following steps apply to typical residential and small commercial jobs.
Installing bird spikes
- Measure the total linear footage of the ledge, sill, or rail you need to cover. Add 10% for waste and overlap at corners.
- Clean the surface thoroughly: remove droppings, nesting material, and debris. Wear a P100 respirator and gloves — dried bird droppings can contain histoplasma spores.
- Allow the surface to dry completely if you plan to use adhesive.
- Choose your fixing method: construction adhesive (suitable for most masonry, concrete, and metal surfaces), stainless steel screws through the base holes (best for wood and hollow surfaces), or cable ties (for wire rails and pipes). Screws and ties are preferred for permanent installations; adhesive works well on smooth stone and concrete.
- Apply a bead of UV-resistant construction adhesive (like Sikaflex or equivalent) along the center of the base strip if using adhesive, or pre-drill pilot holes if screwing.
- Press or screw each section firmly in place. Start from one end and work to the other, butting sections together with no gaps. On corners, cut the base with tin snips or a hacksaw and angle the strip to follow the corner.
- On ledges wider than the spike strip, install multiple rows side-by-side with no gap between them. A single row on a 12-inch-wide ledge leaves roosting space alongside it.
- Inspect the full run for gaps, especially at corners, joints, and where different surfaces meet (e.g., where a ledge meets a wall). Fill structural gaps with a weatherproof sealant or foam backer rod where appropriate.
- Check and clean the installation at least once a year. Clear any debris that accumulates between pins, as pigeons will build nests on compacted debris over spike strips.
Installing bird netting
- Measure the full width, length, and any depth of the area to be netted. For courtyards and eaves, sketch the perimeter and note all anchor points (walls, beams, fascia boards).
- Select the correct mesh size for your target species: 75mm for pigeons and gulls, 50mm for starlings, 19mm for sparrows.
- Install anchor hardware (eye bolts, stand-off brackets, or perimeter cable/wire) around the full edge of the area. Anchor points should be no more than 6 feet apart to prevent sag.
- Run a perimeter cable or attach netting clips to the anchor hardware. This gives you a firm mounting line to attach the net to.
- Cut the netting to size with scissors or a utility knife, leaving a 6-inch overhang on each side to fold and clip.
- Attach the net to the perimeter cable or clips, working around the full edge. Keep the net under moderate tension to prevent sagging, which creates gaps and bird access points.
- Seal every edge completely. Where the net meets a wall or beam, use a netting staple tool or cable clips every 4–6 inches. A single unsealed gap larger than the target bird's head width will be found and exploited.
- Before sealing the final section, confirm no birds or active nests are trapped inside.
- Inspect every 6 months for tears, UV degradation, and any gaps where anchoring hardware has pulled loose.
Installing anti-roost wire systems
- Mark post positions along the ledge at 12–18 inch intervals. Post height should place the wire 6–8 inches above the ledge surface.
- Drill pilot holes and secure stainless steel posts with stainless screws or appropriate masonry anchors. Use a level to keep post heights consistent.
- Thread stainless steel wire (1.5mm–2mm gauge) through the eye of each post. Start with the wire hand-tight.
- Use a tensioning tool or turnbuckle at one end to tension the wire until it is taut with minimal deflection when pressed mid-span.
- Install two to four rows of wire side by side if the ledge is wide enough to allow birds to land between a single wire and the wall.
- Check tension annually and re-tension any sagging sections.
General installation best practices
- Always work from a stable platform: use scaffolding or a rated ladder with a stand-off bracket. Do not lean a ladder directly against gutters.
- Wear PPE when clearing bird droppings: P100 respirator, disposable gloves, and eye protection.
- Check for active nests before installation. In the US, disturbing an active nest of a MBTA-protected species without a permit is a federal offense.
- Use stainless steel fixings in coastal, industrial, or high-humidity environments to prevent corrosion and failure.
- Document your installation with photos. This helps during annual inspections to spot changes quickly.
- On heritage or listed buildings, check with your local planning or historic preservation authority before drilling or adhering anything to the facade.
Sensory deterrents: visual, sonic, and ultrasonic options
Sensory deterrents work by making a site feel threatening or uncomfortable to birds through sight or sound. They are almost universally less effective than physical exclusion for long-term control, but they have a genuine role as supplements, especially for large open areas where exclusion is impractical: open rooftops, gardens, agricultural fields, and airport perimeters. The single biggest challenge with all sensory deterrents is habituation: birds learn that a static, predictable stimulus poses no real threat, usually within days to a few weeks.
Visual deterrents
Plastic owl and hawk decoys are the most widely sold visual deterrents. Field evidence is consistent: they produce some initial deterrence for smaller birds but habituation is rapid, especially when the decoy is mounted in a fixed position. To extend their useful life, move them to a different location every one to three days and pair them with another stimulus (distress-call playback, for example). Three-dimensional, realistically painted models that incorporate movement (rotating head, flapping wings) perform better than static versions but still require relocation.
Reflective mylar tape and holographic flash tape create light patterns and motion that birds find unsettling. They are cheap and simple to deploy on garden beds, balcony railings, and near windows where bird strikes are a concern. Like decoys, their effectiveness drops off with familiarity. Use them as a short-term measure while you install a more permanent physical solution, or rotate placement regularly. Replace tape when it becomes dull or weathered, as degraded tape loses its reflective effect.
Hawk kites and predator silhouettes on poles are more effective than flat decoys because movement is built in, but they still carry the same habituation risk. They work best in combination with other deterrents and in areas where birds have not already established a strong nesting or roosting association.
Sonic and distress-call devices
Bio-acoustic devices play recorded bird distress calls and alarm calls through weatherproof speakers. Research shows strong initial dispersal responses, particularly for gulls and some corvids, but effectiveness declines with repeated exposure unless you vary the call library, timing, and volume. Pairing distress-call playback with a mobile predator model significantly delays habituation. For best results: use devices that can be programmed with multiple call sequences, randomize the timing intervals, and physically move speakers or redirect them periodically. Always check local noise ordinances before deploying outdoor speakers, particularly in residential areas.
Propane-powered gas cannons and pyrotechnic hazing devices (bird bangers, screamers, cracker shells) create loud reports that startle and disperse birds across large open areas. These are used regularly in agriculture and at airports. They are effective at dispersal but produce rapid habituation if fired at predictable intervals or from the same location. Randomizing timing and position is essential. They are generally not practical for residential or dense commercial settings due to noise regulations and neighbor impact. The Bird Hazing Manual (UC ANR extension catalogue, operational guidance on visual/acoustic hazing) notes that propane/gas cannons and pyrotechnics can disperse birds over large open areas but are subject to noise‑nuisance rules, require varied timing to reduce habituation, and often face community and legal constraints for residential settings Bird Hazing Manual (UC ANR extension catalogue — operational guidance on visual/acoustic hazing).
Ultrasonic devices
Ultrasonic devices emit sound above 20 kHz, outside normal human hearing range. Government and university evaluations, including assessments by the USDA and UK agencies, consistently find that ultrasonic devices lack efficacy in field conditions for pigeons, starlings, and gulls. Many bird species do not reliably detect or respond to ultrasound, and any initial effect habituates quickly. They are not recommended as a primary control method. If you see them marketed prominently for outdoor use against common pest species, treat those claims with skepticism.
Wind-powered repellents and windmill deterrents
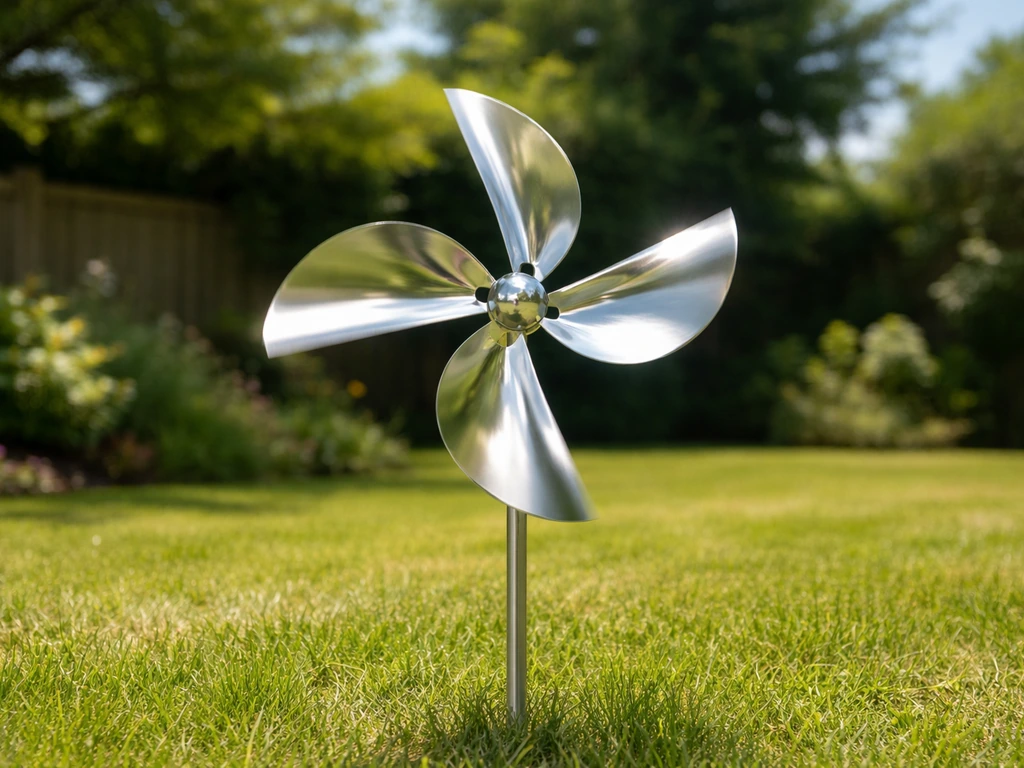
Bird repellent windmills (sometimes called garden spinners or bird-deterrent pinwheels) use wind-driven rotation to combine visual movement with mild acoustic effects (spinning noise, reflective surfaces) to deter birds from gardens, raised beds, and small outdoor areas. They are low-cost, require no power source, and are simple to install. Their limitation is real: they are entirely wind-dependent, ineffective in calm conditions, and birds habituate to them relatively quickly if they remain in a fixed position.
How wind-powered repellents work
The deterrence effect comes from a combination of unpredictable visual motion (which birds initially associate with a potential threat) and any reflective surfaces or noise-making elements the unit includes. Units with metallic or holographic blades add a light-scatter effect. Some designs include elongated streamers or reflective tape arms that swing independently of the main rotor, creating a less predictable visual pattern. They are most useful as part of a multi-method approach in gardens and small yards where large, permanent physical barriers are not practical.
Installation and setup
- Choose placement in the area where birds land or forage most frequently. Open exposure to prevailing wind is essential: windmills in sheltered corners are largely useless.
- For stake-mounted units, push or drive the ground stake at least 8–10 inches into soil for stability. In hard or compacted ground, pre-drill a pilot hole with a garden auger.
- For pot or rail mounting, use the manufacturer's mounting clip or tie-down. Ensure the unit spins freely through 360 degrees without catching on adjacent surfaces.
- Place units 10–15 feet apart if covering a garden bed or larger area. A single windmill covering more than 15 feet of open ground loses deterrent effect at the edges.
- Position the unit so the rotor spins freely. Bent or misaligned blades create friction that stops rotation in low wind. Straighten any bent blades before installation.
- After installation, apply a small amount of silicone-based lubricant to the bearing or pivot point to ensure smooth spinning in light winds.
- Rotate unit positions every 7–10 days. Birds that see a windmill spinning in the same spot for more than a week or two start to ignore it.
- Pair with reflective tape or a predator decoy (also moved regularly) to compound the deterrence effect and slow habituation.
Limitations to know before you buy
- No wind means no motion: on still days the unit provides no deterrence at all.
- Habituation is the primary failure mode. Expect diminishing returns after 2–3 weeks in a fixed position.
- Windmills are not appropriate as the sole deterrent for heavy infestations, roosting birds, or nesting scenarios.
- Lightweight plastic models can fail in high winds or UV degrade within a season. Choose metal-bladed or heavy-duty polycarbonate models for year-round outdoor use.
- They have no meaningful effect on birds that are already nesting nearby — address the nesting site separately.
Installing and configuring sensory deterrents for lasting results
Getting sensory deterrents to work over weeks and months rather than days comes down to placement, variation, and maintenance. Here is how to set up each type to maximize performance and reduce habituation.
Visual deterrents: placement and rotation
- Place decoys at the highest visible point in the area you want to protect, ideally where real raptors would perch (fence posts, roof peaks, elevated poles).
- Move decoys to a new position every 1–3 days without exception. A static decoy stops working faster than almost any other variable.
- Use two or three decoys in rotation across the site so birds do not simply learn that one corner is safe.
- In gardens, pair owl or hawk models with reflective tape on surrounding stakes to create a multi-stimulus zone.
- Inspect decoys monthly: sun-bleached, faded models lose realism and become less effective. Replace or repaint as needed.
Sonic and bio-acoustic devices: programming and timing
- Install speakers at a height that projects sound over the target area without being blocked by walls or dense vegetation. For rooftop applications, mount speakers at roof edge height directed inward over the surface.
- Program multiple call types: species-specific distress calls should be the core, supplemented with predator calls (hawk screech) and alarm calls. Devices with libraries of 20 or more call variants maintain effectiveness longer.
- Set randomized intervals rather than fixed schedules. A call every 10 minutes on the dot habituates birds faster than irregular 5-to-20-minute randomized intervals.
- Vary the volume through the day: louder at dawn when bird activity peaks, quieter midday, louder again in the late afternoon.
- In autumn and winter, bird species and flock compositions change. Update the call library seasonally to target species that are actually present.
- For commercial sites using networked multi-speaker systems, rotate which speakers activate each session so the sound source appears to move.
- Check speaker grilles monthly for spider webs, insect nests, and moisture ingress, which degrade sound quality and frequency response.
Power and weather considerations
Most commercial sonic deterrent units run on AC power, rechargeable battery, or solar panels. Solar-powered units are practical for rooftops and remote garden locations but verify that the solar panel is sized to run the device through several consecutive cloudy days. Inadequate battery backup is the most common failure point for solar-powered deterrents. Battery-powered units need a charge check at least monthly. In northern climates, battery capacity drops in cold weather, so units that work fine in summer may shut down overnight in winter.
Seasonal adjustments
Spring is the most critical period to maintain deterrents. Birds are actively seeking nesting sites, and any gap in coverage during March through May in North America can result in an established nest that is then legally protected under the MBTA if it belongs to a covered species. Increase deterrent intensity and inspection frequency during early spring. In winter, many migratory species are absent, so you can reduce the operational intensity of sonic units, but maintain physical barriers year-round.
Maintenance schedule overview
| Deterrent type | Monthly check | Seasonal check | Annual service |
|---|---|---|---|
| Visual decoys | Relocate; inspect for wear and UV fading | Update species for migrant changes | Replace faded or damaged units |
| Reflective tape | Check for tears and weather dulling | Replace worn sections before nesting season | Full replacement if coverage has degraded |
| Sonic/bio-acoustic units | Test playback; inspect speaker grilles; check battery/solar charge | Update call library; adjust programming for seasonal species | Inspect weatherproofing seals; clean electronics housing |
| Wind-powered repellents | Confirm free spin; relubricate pivot; reposition | Check blade integrity before storm season | Replace worn bearings or degraded blades |
| Bird spikes | Visual scan for debris and nesting attempts | Clear accumulated debris; check adhesive/fasteners | Full perimeter inspection; re-secure any loose sections |
| Bird netting | Look for visible tears or sagging from exterior | Check all perimeter anchor points and clips | Full perimeter walk with close inspection of all edges and joins |
Aviation and industrial contexts: a different scale of problem
For airports and large industrial sites, bird control is a safety management function, not just a maintenance task. The FAA requires airports that have experienced a wildlife strike or that have conditions attracting wildlife to conduct a Wildlife Hazard Assessment and, where significant hazards exist, to implement a FAA-approved Wildlife Hazard Management Plan. See our guide to bird strike prevention methods for specific airport-focused tactics, monitoring protocols, and mitigation case studies. These plans are detailed, site-specific documents covering habitat modification, active harassment protocols, monitoring, record-keeping, and strike reporting to the FAA's National Wildlife Strike Database. ICAO's Airport Service Manual (Part 3: Wildlife Hazard Management) provides the equivalent internationally recognized framework, used by airports worldwide.
The research consistently shows that no single deterrent method is reliably effective at airports over time. Integrated wildlife programs combining habitat management (reducing grass height to limit rodent and insect prey, draining standing water, limiting ground cover attractive to geese), active hazing (pyrotechnics, laser hazing, border collie programs, falconry), physical exclusion where feasible, and continuous monitoring produce the best sustained results. Falconry-based raptor hazing in particular is rated highly effective for sustained dispersal at airports and large open sites because trained raptors actively chase birds and vary their behavior in ways that prevent habituation, but the operational cost and logistics mean it is typically contracted out to specialist firms.
Trapping, chemical repellents, and when to call a professional
Trapping is a legitimate control tool for feral pigeons and European starlings (not MBTA-protected) but requires daily monitoring once traps are set, humane handling, and a clear plan for what happens to captured birds. For any MBTA-covered species, a USFWS Depredation Permit (form 3-200-13) is required before any trapping, relocation, or lethal action. The permit application process involves describing the damage, the species, the location, the methods to be used, and the justification for why non-lethal methods have been inadequate. Permits are reviewed regionally and require reporting. There is more detail on the practical and legal side of trapping in the bird trapping methods guide on this site.
Chemical repellents like methyl anthranilate (a grape-derived compound registered as a bird repellent by the EPA) are applied to grass, turf, or water surfaces to deter foraging geese and gulls. Polybutylene gel repellents create a sticky, uncomfortable surface that discourages perching on ledges and signs. Both have legitimate applications but require label compliance: apply only to labeled surfaces, at labeled rates, and in labeled conditions. Neither is a substitute for exclusion in high-pressure or nesting scenarios.
Call a professional pest control operator or wildlife management company when: the infestation is large-scale or involves a protected species; the installation is on a high-access or complex structure; the bird pressure has persisted despite multiple DIY attempts; or you suspect active nesting by MBTA-covered birds. A qualified professional can conduct a site survey, identify the species accurately, design an integrated control program, handle permit applications where needed, and install commercial-grade exclusion systems with warranties.
Putting it all together: integrated bird control
The consistent finding across government agency reviews, peer-reviewed field studies, and industry practice is that no single method solves a serious bird problem on its own. The practical framework is: start with habitat and food source modification to remove what is attracting birds in the first place, then apply physical exclusion to the specific roosting or nesting sites, and use sensory deterrents as a supplemental layer in open areas or during transitions. Monitor the results at two to four week intervals and adjust. If one deterrent stops working, rotate or replace it before birds fully re-establish.
Species accuracy, site specifics, and legal compliance determine whether your approach succeeds. Take the time to correctly identify the bird, check the MBTA status, measure your site accurately before buying materials, and plan for maintenance from day one. A well-installed spike strip or netting system that gets an annual inspection will last 10 or more years and cost far less over time than repeatedly replacing ineffective sensory devices.
FAQ
What are the main categories of nuisance bird control methods and how do they compare by effectiveness and typical cost?
Main categories: physical exclusion (netting, spikes, electrified tracks), sensory deterrents (visual decoys, reflective tape, lasers, distress-call playback, sonic devices), active harassment (pyrotechnics, propane cannons, falconry, dogs), chemical repellents, and trapping. Comparison summary: - Physical exclusion: highest long-term effectiveness when properly installed and sealed (near-total exclusion for ledges, recesses). Cost: moderate to high (DIY lower for spikes; professional netting higher). Maintenance: low–moderate. - Sensory deterrents: short-term effectiveness; rapid habituation if static. Cost: low–moderate. Maintenance: low, but requires rotation/variation. - Active harassment: effective while in operation (especially falconry/dogs); costly and labor-intensive; regulatory/noise constraints possible. - Chemical repellents: variable species efficacy (taste/visual repellents, sticky gels); often best as a supplement and subject to safety/regulatory limits. - Trapping: species- and jurisdiction-dependent; can require permits (lethal or removal). Use only with legal authorization and humane practices. Sources: FAA, ICAO, USFWS guidance and peer-reviewed evaluations.
How does legal/regulatory compliance affect what control methods I can use?
Regulations matter: in the U.S., the Migratory Bird Treaty Act (MBTA) prohibits taking (killing, capturing, disturbing nests/eggs) most native migratory birds without permits — permits (e.g., USFWS depredation permits) are required for lethal take or nest destruction. Airports follow FAA/ICAO wildlife-hazard frameworks and reporting. Local noise, pesticide, and building codes can restrict pyrotechnics, propane cannons, chemical repellents, and electrified systems. Before lethal control, nest removal, or trapping, check national/regional wildlife agencies and secure permits (USFWS Migratory Bird Permits; FAA/airport regulations for aviation). Links: USFWS permits and FAA wildlife resources.
Which methods are best for homeowners for patios, balconies, windows and solar panels?
Homeowner recommendations by site: - Patios/balconies: spikes or low-profile electrified strips for railing ledges; netting for fully enclosed balconies; frequent cleaning and removal of food sources. - Windows (roosting/collision): apply bird‑safe window treatments (decals, patterned films, external screens) spaced per manufacturer spacing guidelines to prevent collisions. - Pools: cover, netting, or motion-activated sprinklers to discourage waterfowl and corvids; avoid feeding. - Solar panels/rooftops: professional mesh/netting under arrays and perimeter exclusion; electrified track systems for heavy-roosting species. Selection criteria: species present (pigeons vs gulls vs starlings), access for installation, aesthetics, and maintenance ability. DIY feasible for spikes and window films; hire pros for complex netting or solar-array exclusion.
What are best-practice installation steps and maintenance tips for bird spikes and netting?
Spikes: 1) Clean and dry surface; remove old nests/debris. 2) Choose spike height appropriate to species (short spikes for starlings/pigeons; taller for larger gulls). 3) Secure with manufacturer-recommended adhesive and/or screws. 4) Overlap sections and seal gaps at ends/corners. Maintenance: inspect twice yearly for debris accumulation and re-secure loose sections; remove nests built on top. Netting: 1) Map access points and anchor locations; ensure full perimeter seal with no gaps >1–2 cm for small species. 2) Use UV-stable, appropriately gauged mesh. 3) Tension net to avoid sagging and provide escape-free exclusion. 4) Install bird guards around anchors. Maintenance: inspect anchors, repair tears, and clear debris seasonally. For complex or high-access areas, use professional installers.
Are ultrasonic bird repellents effective?
Evidence and agency reviews show ultrasonic devices generally lack reliable field efficacy for pigeons, gulls, and starlings and are not recommended as primary control. Lab/field studies indicate variable detection and rapid habituation; use other methods (exclusion, active hazing) as primary strategies and consider ultrasonic only as a low-cost adjunct with realistic expectations.
How should sensory deterrents (visual, acoustic) be used to reduce habituation and improve results?
Use integrated and variable approaches: - Combine modalities (visual effigies + distress-call playback + intermittent laser/hazing). - Change placement, timing, and pattern routinely (daily/weekly rotation) to avoid predictability. - Use predator models that move or are kite-mounted and pair distress calls with visible predator cues. - Apply sensory tactics as part of a habitat/husbandry program (remove food, water, nesting materials). Expect strong short-term responses; plan for ongoing adjustments and monitoring.