
You can make effective homemade bird scarers using materials you probably already have: old CDs, reflective tape, wind chimes, old hose coiled on a ledge, predator decoys, or simple string lines strung across a problem area. The key is matching the right type of scarer to the right location, then rotating or moving it every few days before birds figure out it's harmless. A single static scarer almost always stops working within a week or two, so how you deploy it matters just as much as how you build it.
How to Make Homemade Bird Scarers That Really Work
Marcus Weatherby
30 May 2026
Choose the right DIY deterrent for the birds and location
Not every homemade scarer works in every situation. Before you start building anything, think about three things: where the birds are congregating, what species you're dealing with, and whether the problem is visual, noise-based, or about landing space. A pigeon roosting on a narrow ledge needs a physical deterrent like a string barrier. Starlings raiding a vegetable garden respond better to reflective flash and sound. Gulls on a flat roof are persistent and usually need a combination approach.
| Problem Area | Most Common Bird Issues | Best DIY Scarer Type |
|---|---|---|
| Garden / yard | Seed-eating birds, crows, starlings | Reflective tape, CDs, sonic deterrents, predator decoys |
| Patio / balcony | Pigeons, sparrows roosting | Physical string lines, reflective streamers, decoys |
| Windows / ledges | Pigeons, starlings perching | Physical barriers, reflective film, string deterrents |
| Roof / gutters | Gulls, pigeons, crows | Predator decoys, physical wire lines, auditory deterrents |
| Pool area | Ducks, herons, geese | Predator decoys (heron or owl), reflective strips, water-activated motion devices |
| Solar panels | Pigeons nesting underneath | Physical barriers (mesh skirting), string deterrents along panel edges |
One important note: if you're near an airport or aviation zone, check local regulations before deploying anything that creates reflective glare or loud unpredictable noise. Most residential DIY scarers won't cause issues, but large-scale deployments in sensitive areas are worth checking with your local authority first.
Quick-start: materials, tools, and safe setup basics
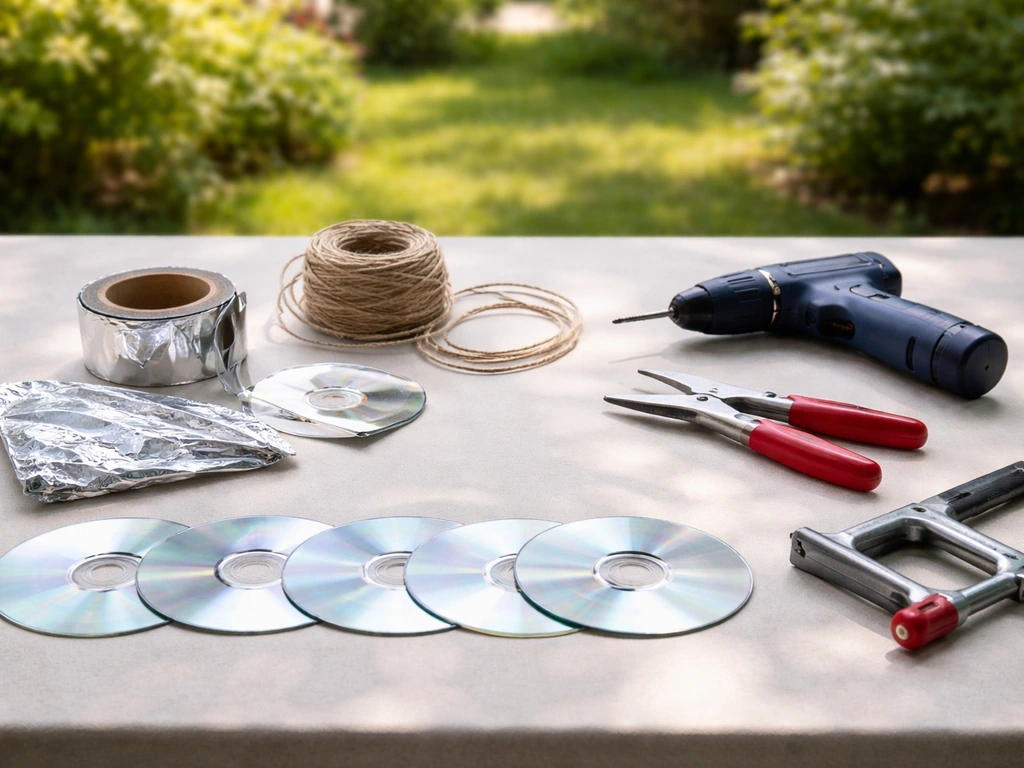
Most homemade bird scarers need only basic household items and a few minutes to assemble. Here's what covers the majority of builds in this guide.
- Old CDs or DVDs (at least 4 to 6 for a good garden spread)
- Reflective Mylar tape or emergency foil blankets (cheap from camping stores)
- Strong garden twine or fishing line (monofilament, 20 lb or heavier)
- Bamboo canes or wooden dowels (for mounting)
- Zip ties and small carabiner clips (for repositioning quickly)
- An old plastic bottle or tin cans (for noise-based builds)
- A realistic owl or hawk decoy (optional but very effective short-term)
- Eye bolts or screw hooks (for anchoring lines to walls or fences)
- Scissors, a hole punch or drill, and UV-resistant cable ties
Safety basics before you start: don't use thin monofilament line at head height near walkways where people could walk into it. Keep any physical lines well above or below eye level, or clearly marked. Avoid sharp edges on homemade can or bottle rattles where children or pets could contact them. If you're fixing anything to a roof or high ledge, use a proper ladder with a helper and don't lean out over edges.
Homemade visual bird scarers
Visual deterrents work by exploiting birds' instinctive responses to flashing light, unexpected movement, or the silhouette of a predator. They're the easiest DIY option and the most common starting point for gardens and patios.
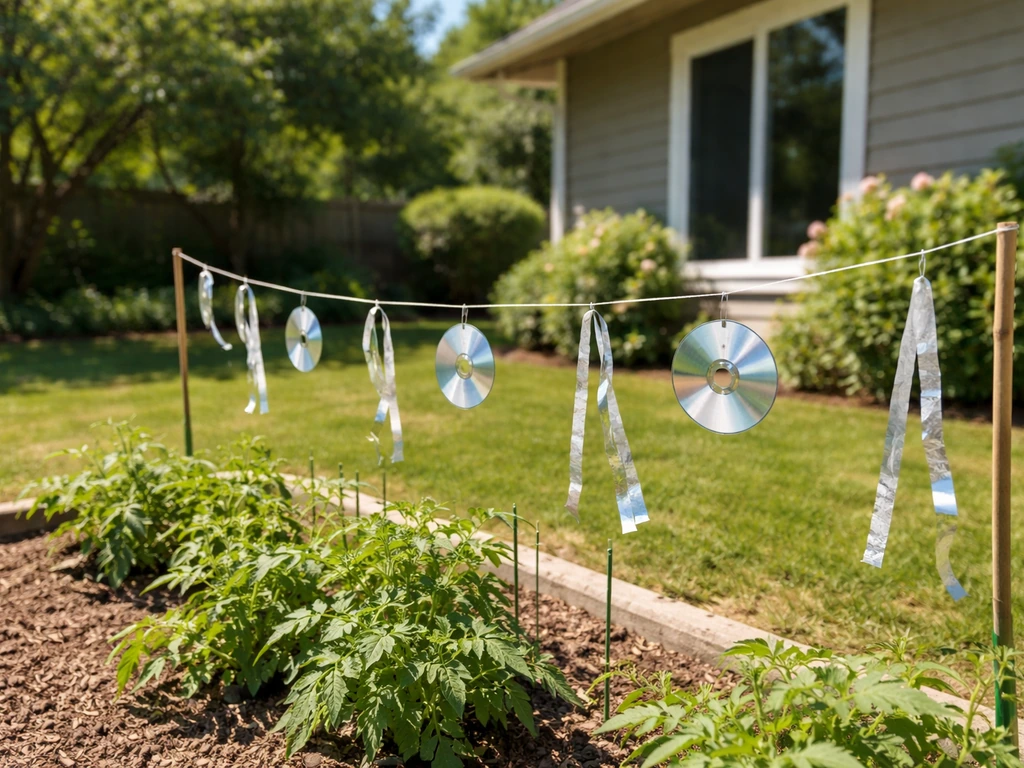
Reflective CD or DVD scarer
- Punch or drill a small hole near the edge of each CD.
- Thread 30 to 50 cm of garden twine through the hole and tie it off so the CD hangs freely.
- Tie the other end to a bamboo cane, washing line, or fence wire at varying heights (roughly 1 to 1.5 m apart).
- Position CDs where they catch direct sunlight and can spin freely in a breeze.
- Reposition every 3 to 5 days so birds don't map their location.
A full guide specifically on CD-based scarers covers this method in more detail, including multi-strand arrangements that work better for larger garden spaces.
Reflective Mylar tape streamers
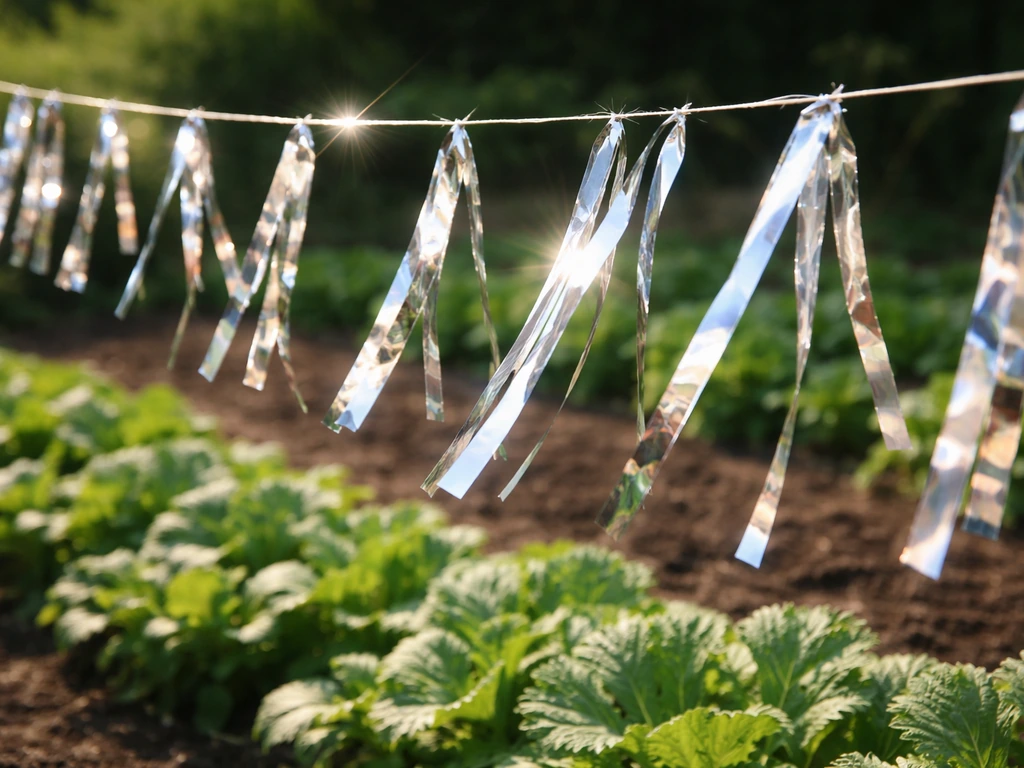
- Cut strips of reflective Mylar tape or foil emergency blanket into lengths of about 60 to 90 cm.
- Attach strips to a horizontal line strung above your vegetable beds, patio furniture, or gutters.
- Space strips roughly 30 cm apart so they flutter independently in light wind.
- Twist each strip once before hanging to maximize flash and movement.
Reflective tape is one of the most cost-effective options for gardens and is far more durable in wet weather than CDs. The main downside is that it can look messy, and birds in low-wind conditions may ignore it if it's not moving.
Predator decoys (owl, hawk, heron)
- Place a realistic owl or hawk decoy on an elevated position, such as a fence post, roof ridge, or stake in the garden.
- For pool areas, a standing heron decoy positioned at the water's edge deters other herons and small wading birds.
- Add a wobble mechanism: mount the decoy on a flexible post or stake rather than a rigid surface so wind causes natural-looking movement.
- Move the decoy to a different location every 2 to 3 days. Birds quickly learn a stationary 'predator' poses no real threat.
Decoys are probably the single most effective short-term visual scarer, but they also habituate faster than almost anything else if left in place. A hawk kite on a long pole (a large kite shaped like a bird of prey, flown 5 to 10 metres above the ground) takes more effort to set up but stays effective longer because it's constantly moving. You can make a basic one from a foam board cutout shaped like a hawk silhouette on a long garden cane, though purpose-built hawk scarers work significantly better for large open areas.
Homemade sonic and auditory bird scarers
Sound-based deterrents can extend your coverage beyond line of sight, which makes them useful for rooftops, larger gardens, or areas where visual devices aren't practical. The challenge is that constant or predictable noise habituates birds quickly, sometimes within 24 to 48 hours.
Wind chime or tin can rattle
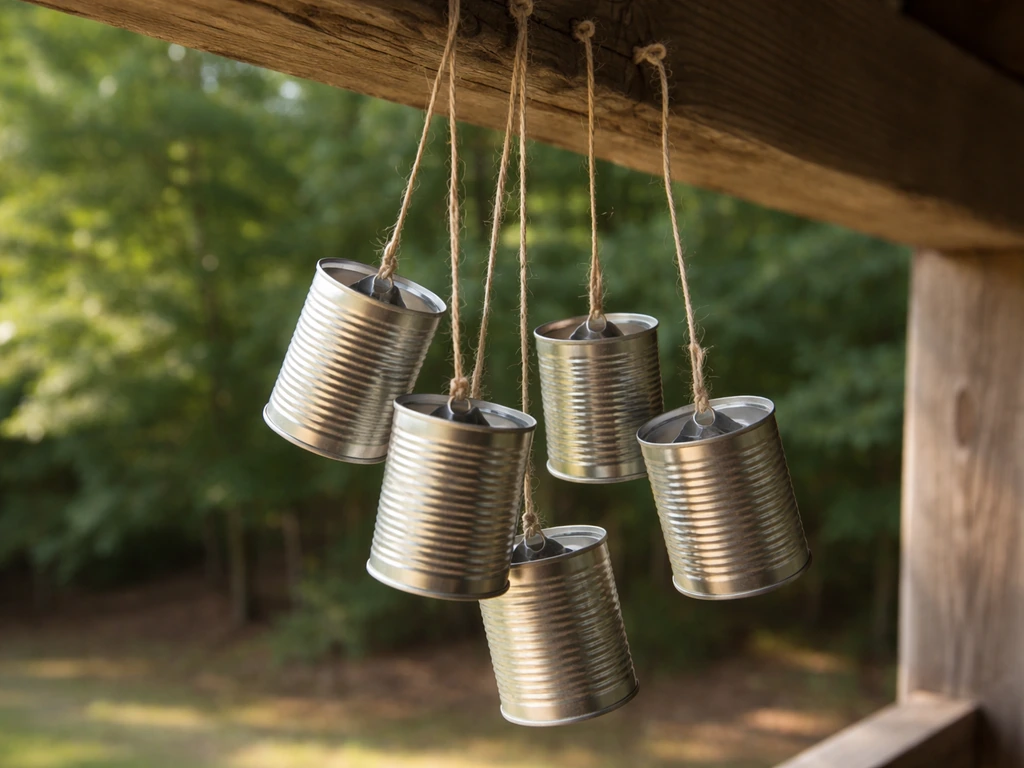
- Take 3 to 5 empty tin cans and remove any sharp edges by bending them inward with pliers.
- Punch a hole in the base of each can and thread them onto a length of strong string.
- Hang the string from a horizontal line or bracket so cans knock together in the breeze.
- Position in an area with reasonable airflow, such as a roof edge, corner post, or tree branch near the problem area.
Wind chimes work on a similar principle: irregular noise created by wind is harder for birds to ignore than a constant tone. Combine them with a visual scarer on the same mounting point for better results, since research from Penn State Extension confirms that pairing visual and sound devices measurably improves deterrence compared to using either alone.
Recorded distress call playback
Playing back species-specific distress calls (alarm calls that birds make when a predator is close) is one of the more effective DIY audio deterrents. You can download free recordings for common pest species like pigeons, starlings, or crows. Use a small weatherproof Bluetooth speaker connected to your phone on a timer, and play calls in irregular bursts rather than on a fixed loop. Irregular, unpredictable playback prevents habituation far better than a constant or regularly timed sequence, which is the same principle behind more sophisticated commercial sonic devices that only activate on detection.
Keep the volume at a level that's effective locally but doesn't create a noise nuisance for neighbours. In residential areas, this typically means using it during daylight hours only and keeping output below 65 dB at the boundary of your property.
What about ultrasonic devices?
You'll find cheap ultrasonic plug-in or solar units sold as bird repellers, but the evidence behind them is weak. blank" rel="noopener noreferrer">USDA APHIS materials note that birds' hearing ranges don't overlap well with the ultrasonic frequencies these devices emit, which is why most wildlife damage management guidance doesn't recommend them as a standalone solution. USDA APHIS materials note that blank" rel="noopener noreferrer">environmental factors can affect sound transmission effectiveness for auditory deterrents. Stick to audible sonic deterrents for better real-world results.
Homemade physical and behavioral scarers
Physical deterrents don't scare birds so much as make it impossible or uncomfortable to land, perch, or roost in the first place. For problem areas like window ledges, roof ridges, fence tops, and the edges of solar panels, physical barriers are often the most reliable long-term DIY solution because birds can't habituate to something that physically blocks them.
String or monofilament line perching barriers
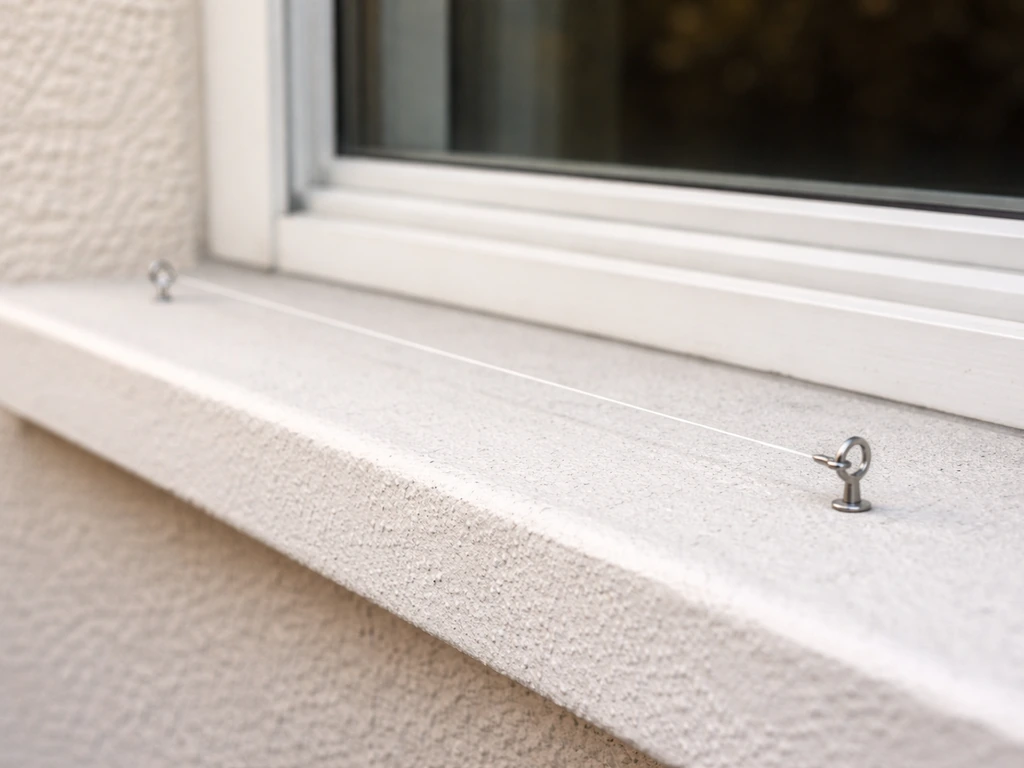
- Fix small eye bolts or screw hooks into the surface at each end of the area you want to protect (fence top, window ledge, roof ridge).
- Run 20 lb monofilament fishing line or garden twine between the hooks at a height of 5 to 8 cm above the surface.
- For wider ledges, run two parallel lines, spaced 5 cm apart, so birds can't easily land between them.
- Check tension regularly: sagging lines lose effectiveness because birds can push them down.
This works because birds prefer stable, flat landing zones. A line that shifts when they try to land feels unstable, and most species will move on quickly. It's particularly effective against pigeons on window ledges, fence tops, and roof ridge tiles.
Garden string grid for vegetable beds
- Push bamboo canes into the soil at roughly 40 to 50 cm intervals around and across the bed.
- Run garden twine between the canes in a criss-cross grid pattern, about 10 to 15 cm above the soil.
- Keep the grid tight enough that birds can't comfortably land between the lines.
This is one of the simplest and most effective DIY options for seed beds and low-growing crops. It doesn't harm birds and requires no maintenance beyond retying after strong wind.
Coiled hose or pipe as a snake decoy
An old garden hose coiled loosely in a garden bed or on a flat surface acts as a snake decoy. Many bird species have strong instinctive avoidance responses to snake-like shapes. Lay the hose in a loose S-shape or coil and move it every couple of days. It sounds too simple, but it's genuinely effective in the short term for ground-feeding birds like blackbirds and pigeons in garden beds.
How to install, position, and rotate scarers to prevent habituation
This is where most DIY bird scarers fail. A static device in the same position every day gives birds exactly the predictable information they need to learn it's safe. The USDA defines habituation as the degradation in a bird's response to repeated stimulation, and it's the number one reason homemade scarers stop working. UC IPM guidelines make the point directly: rotation is necessary to maintain deterrence, and you should switch tactics as soon as birds no longer respond.
- Move visual scarers (CDs, tape, decoys) to a new position every 3 to 5 days at minimum.
- Alternate between scarer types on a rotating schedule: use reflective tape one week, then swap in a decoy, then add a sound element.
- Vary the timing and pattern of any sound-based deterrents rather than running them on a fixed schedule.
- Combine at least two scarer types (for example, reflective tape plus wind chimes) since birds that habituate to one stimulus may still respond to another.
- Remove scarers for a few days occasionally: birds that have stopped responding will often become wary again after a short absence.
- Check that physical barriers like string lines haven't sagged or come loose, as a failed barrier quickly becomes a perch.
Penn State Extension's guidance on fruit crop protection reinforces this: visual scare devices need to be changed regularly to prevent birds from learning they're harmless, and combining visual with sound produces better outcomes. If you're setting up multiple scare stations in a larger garden, stagger the rotation so they're not all changed on the same day.
Troubleshooting, maintenance, and when to call in professional bird control
Why your scarer stopped working
If birds are ignoring a scarer within a week or two, habituation has almost certainly set in. The fix is not to replace it with the same thing in the same spot but to switch to a completely different type and position. If you've been using reflective tape, switch to a decoy or a sound deterrent. If sound isn't working, try adding a physical barrier. Escalating to a combined approach (two or more different deterrent types used together) is the single most reliable upgrade you can make.
Common maintenance issues
- Reflective tape and Mylar degrade in UV sunlight over time: replace after one full season.
- Monofilament lines stretch and sag: re-tension monthly or replace with fresh line seasonally.
- Decoys gather grime and lose their realistic appearance: wipe down regularly and check for fading.
- Tin can rattles can rust and become sharp hazards: inspect monthly and replace when corroded.
- Distress call audio files can develop playback patterns if looped: vary tracks and playback intervals.
When to escalate beyond DIY
DIY scarers are a reasonable starting point for low-to-medium pressure bird problems. But there are situations where they genuinely won't be enough. If you have a large roost of pigeons on a building, a colony of gulls nesting on a flat roof, birds nesting under solar panels, or serious damage to structures or crops, professional-grade solutions are worth considering. These include spiked ledge systems, properly tensioned tensile wire systems, full netting exclusion, or acoustic devices that use detection-triggered activation to prevent habituation, which is a principle commercial units use specifically to stay effective over longer periods.
It's also worth being aware of legal protections. In the UK, most wild birds (including pigeons and gulls) are protected under the Wildlife and Countryside Act, and active nest interference is an offence. In the US, many species fall under the Migratory Bird Treaty Act. DIY deterrents that prevent birds from landing or roosting in the first place are generally fine, but physically interfering with active nests is not. When in doubt, contact a licensed pest control or bird management professional before taking further action.
If you want to expand beyond basic scarers, it's worth looking into gas gun deterrents for larger open areas, hawk kite systems for persistent aerial coverage, or understanding what makes more complex commercial systems effective so you can decide whether a professional installation is worth the cost for your situation. A gas gun is often paired with rotation and other deterrents so birds do not habituate quickly gas gun deterrents.
FAQ
How often should I move or change homemade bird scarers so they keep working?
For most DIY options, plan on checking them daily at first, then changing placement every 2 to 5 days. If you see birds returning calmly, not just landing and looking around, switch tactics immediately instead of continuing rotation with the same visual or sound pattern.
What’s the best way to place scarers so they deter landing, not just scare birds in the air?
Set up coverage so the birds cannot approach and land comfortably. That usually means addressing the “landing path” (approach view) with visuals higher up, and the “landing zone” with string lines or other barriers where they actually touch down, like a ledge, roof edge, or panel frame.
How do I avoid creating a noise nuisance while using sound-based homemade deterrents?
Use the lowest noise level that still changes bird behavior, typically daylight hours in residential areas. If neighbors complain or you live near shared walls, rely more on visual devices plus physical barriers, since constant audio increases both habituation and the chance of noise issues.
What should I do if the birds might be nesting on or near my property?
It depends on the species and the risk level. If birds are actively nesting, avoid anything that could interfere with nests or force relocation. In that case, focus on exclusion methods that prevent further access without contacting nests, and consider calling a licensed bird management professional.
What do I do if my homemade bird scarer stops working after a few days?
If birds ignore your device within a week or two, assume habituation. The fix is not “more of the same” but a complete switch in type (for example, reflective tape to a decoy, or audio to a physical barrier) and a position change.
Are string or line barriers safe to use, and how should I position them to reduce risk?
Avoid thin monofilament near walkways, especially at head height, because it can be hard to see and can cause collisions. If you use string lines, keep them clearly above or below typical head and eye levels, tension them safely, and remove them when people need to access the area.
Does combining visual and sound deterrents actually help, and how do I combine them without making the setup predictable?
Yes, but do not overdo it in a way that becomes predictable. When you combine deterrents, stagger changes so both devices are not updated at the same time every day, and ensure the visual and sound are aimed at the same problem zone, not competing directions.
Should I buy ultrasonic bird repellers, or are homemade audible solutions better?
Ultrasonic plug-in or solar units are often ineffective because the emitted frequencies do not match what birds respond to reliably. If you try sonic methods, use audible playback or irregular, wind-driven noise instead of relying on ultrasonic hardware alone.
Which homemade scarers work best for ground-feeding areas versus ledges and rooftops?
For seed beds and low crops, the easiest win is a simple shifting string barrier or a loose hose snake shape with rotation. For ledges, roof edges, and window areas, physical barriers usually outperform visual-only scarers because they remove the usable landing surface.
How can I tell whether birds are starting to learn that my scarers are harmless?
Yes. Even if it’s working, keep an eye out for birds learning your pattern, especially with decoys and chimes. If you notice fewer “check then leave” reactions and more confident landings, switch the deterrent type and change the setup height or angle.
How many scarers do I need if birds are hitting multiple spots across my yard?
If birds are persistent across a large area, one small device in one spot is usually not enough. Set up multiple stations with staggered rotation, so there is no single predictable “safe zone,” and widen coverage to match the birds’ likely approach routes.
When is it better to switch from homemade scarers to professional exclusion solutions?
If the problem is structural damage or birds are roosting in large numbers, DIY rotation may not keep pace. Consider professional-grade exclusion like properly tensioned tensile wire systems or netting, especially for roof and solar-panel situations where birds can keep finding new landing points.