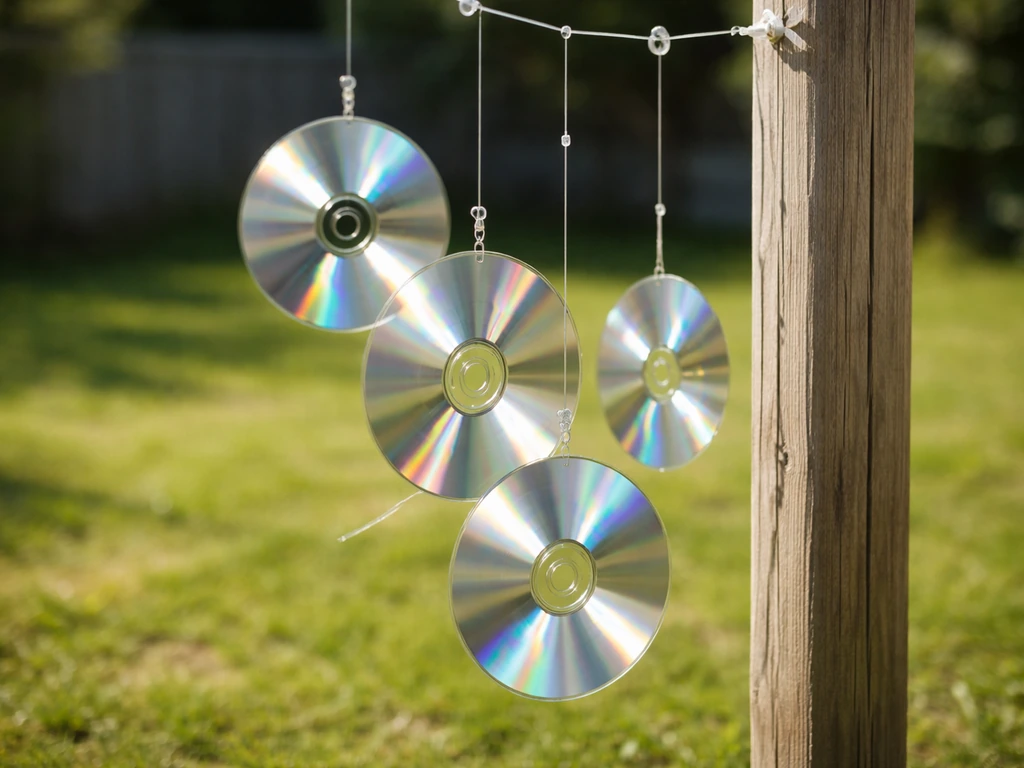
Hang old CDs on a length of string or fishing line in an exposed spot, spaced about 30 cm apart, where the wind will spin them and sunlight can hit the reflective surface. That flashing, moving light is enough to spook birds away from gardens, patios, and vegetable beds, at least for a while. The build takes about 20 minutes, costs nothing if you have old discs lying around, and actually works well as a short-term deterrent when it's set up correctly. If you still want birds to stay away longer, the same setup principles apply, and you can combine it with other deterrents how to make gas gun bird scarer.
How to Make a Bird Scarer with Old CDs Step by Step

Marcus Weatherby
25 Jun 2026
Why old CDs can deter birds (and where it works best)

The deterrent effect comes almost entirely from light, not sound. When sunlight hits a spinning or swaying CD, it throws unpredictable flashes of reflected light across the area. Birds interpret rapid, erratic light movement as a potential threat and instinctively avoid it, at least until they learn it isn't one.
This is the same principle behind commercial reflective Mylar tape and mirror-based scare devices. The Bird Hazing Manual notes that reflective Mylar tape can deter birds because it flashes in sunlight and moves in the wind, creating a startle or avoidance response This is the same principle behind commercial reflective Mylar tape and mirror-based scare devices.. The key ingredients are movement and sunlight. A static CD hanging in a shaded corner does almost nothing. A CD spinning freely in a sunny, breezy spot is genuinely disorienting for birds approaching a garden bed, a fruit tree, a patio table, or a pool.
CD bird scarers work best in open, sunny locations with some regular wind. Good applications include:
- Vegetable gardens and allotments, especially around seedlings and ripening fruit
- Fruit trees and berry bushes
- Patios and outdoor dining areas where pigeons or sparrows congregate
- Garden ponds and small pools where herons or diving birds are a problem
- Greenhouse entrances and cold frame areas
- Balconies and flat roof terraces
They are less effective under dense tree canopy, in consistently shaded areas, or in still, windless conditions. For rooftop installations or areas near solar panels, the setup still works but you need secure anchoring to prevent loose discs from becoming a hazard.
Materials and tools list for a CD bird scarer
You don't need to buy much. Most of this is already at home or available cheaply from any hardware store.
- Old CDs or DVDs (the more scratched and reflective the better; avoid opaque printed discs with minimal shiny surface)
- Strong nylon fishing line or thin garden twine (fishing line is better, it's nearly invisible and very durable outdoors)
- A hand drill with a small bit (2–3 mm) for adding extra holes if needed, or a sharp skewer/nail for plastic
- Scissors
- A long bamboo cane, wooden dowel, or taut washing line to suspend the string from
- Outdoor cable ties or small S-hooks if you're attaching to fence posts, trellises, or wire
- Optional: small swivel clips (the kind used in fishing) attached between the line and each CD to allow free spinning
- Optional: brightly coloured ribbon or strips of Mylar tape to add alongside the CDs for extra movement
Swivel clips are worth the small extra cost. Without them, the CD can only twist and untwist along the line, which limits movement. A swivel lets the disc spin freely in any breeze, dramatically increasing the flash effect.
Step-by-step: preparing and mounting the CDs safely

CDs have a pre-existing central hole that you can use directly for threading. For most setups, that hole is all you need. Here's the full process:
- Check each CD for sharp edges, especially around the central hole and any cracks. Run your finger along the edge. If a disc is cracked or has a jagged rim, discard it, a cracked disc can break apart in wind and create sharp plastic fragments.
- Thread a length of fishing line (around 40–50 cm per disc) through the centre hole. Tie a secure knot below the hole so the disc cannot slip off. A simple double overhand knot works well here.
- If you're using swivel clips, tie the fishing line to the clip first, then attach the clip to a longer main line. This keeps the discs evenly spaced and spinning independently.
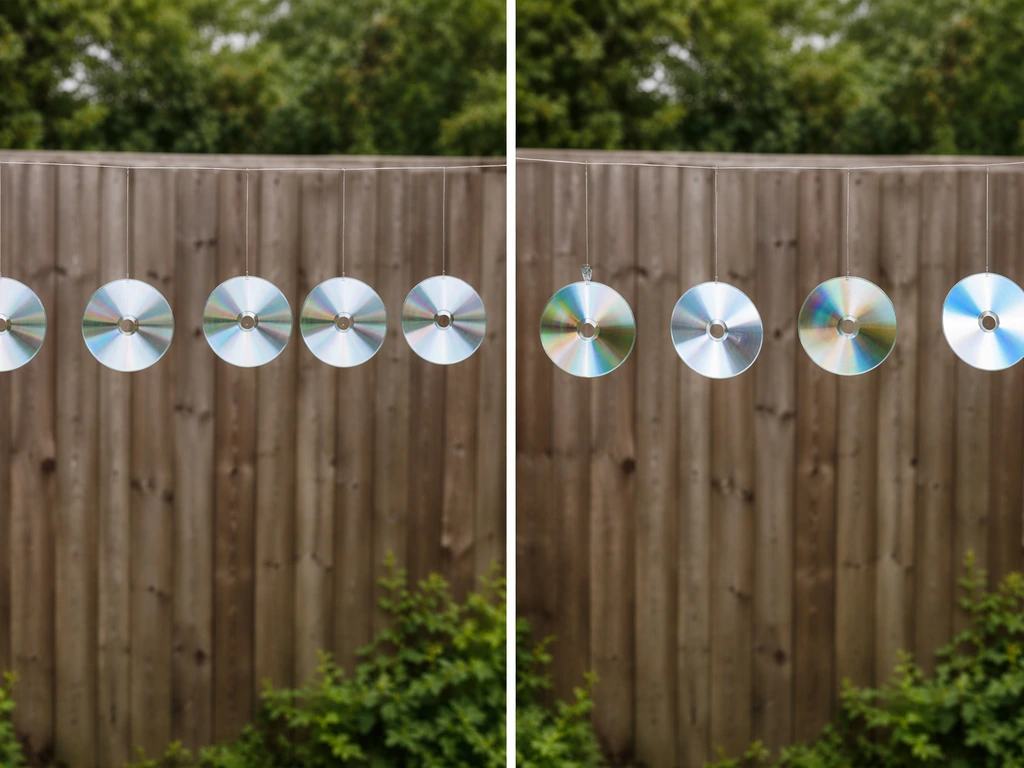
- Space each CD roughly 25–35 cm apart along the main line. Closer than 25 cm and the discs can tangle; further than 35 cm and you lose coverage.
- Leave at least 10 cm of free line below each CD so it can swing as well as spin. The combination of spin and swing is more effective than spin alone.
- Tie the completed string to your cane, post, or line using a secure knot or cable tie. Make sure the attachment point is firm enough to handle wind load without loosening.
- If mounting on a bamboo cane pushed into soil, push it at least 30 cm deep and firm the soil around the base. A loose cane will fall over in wind, and a length of line with multiple hard plastic discs swinging around is a trip hazard.
A quick safety note: if you're setting this up in an area used by children or pets, run the main line at a height they can't easily reach, at least 1.5 m off the ground. Keep the string taut enough that it won't sag down to face height.
Placement and setup: where to hang or stake for maximum flash and movement
Placement is where most DIY CD deterrents go wrong. People hang them in a sheltered corner where there's no wind and the sun barely reaches, then wonder why birds ignore them. Follow these guidelines and you'll get a much better result.
Height matters. Hang the string so the CDs sit at roughly the same height as the birds' normal approach path. For a ground-feeding problem (pigeons on a patio, sparrows in a seed bed), position the discs about 60–90 cm above the ground. For fruit trees or berry bushes, aim for the height of the fruit, typically 1–2 m. For balcony or rooftop use, hang the line at parapet height where birds tend to land.
Position the line so it runs across the main approach direction. If birds are flying in from the south, run the string east-to-west so they're flying toward the reflective surface rather than parallel to it.
Here are the key placement rules in one place:
- Choose the sunniest part of the area, facing the direction birds approach from
- Ensure the line is exposed to prevailing wind, not sheltered by fences, walls, or dense planting
- For a garden bed, run 2–3 parallel lines across the bed spaced about 1 m apart, not just one line along the edge
- For a patio or outdoor eating area, hang a line overhead from wall to wall, centred above the space
- For a pond or pool, suspend the line lengthways across the water, about 50–80 cm above the surface
- Avoid placing CDs directly against a wall or fence where they can't swing freely
If you have multiple problem areas, it's more effective to put 4–5 CDs in each critical spot than to spread 15 CDs thinly across a large area. Concentrate the flashing where birds are actually landing or feeding.
How to keep it effective over time (movement, rotation, replacement)
This is the part most guides don't emphasise enough: birds habituate to static or predictable visual deterrents very quickly. Research shows habituation can happen blank" rel="noopener noreferrer">in as little as one to two days when a device stays in the same position and poses no real threat. The CDs are not actually dangerous, and birds eventually figure that out.
To slow down habituation, you need to change things regularly. The goal is unpredictability.
- Move the string to a different position in the same area every 3–5 days. Even shifting it 1–2 metres resets the effect for most birds.
- Rotate the CDs themselves: replace a few shiny ones with metallic-painted ones, or add strips of reflective tape between them to change the flash pattern.
- Remove the deterrent for 2–3 days occasionally, then put it back. The temporary absence followed by reappearance can renew the startle response.
- Add a physical element like a plastic bag or streamer on the same line so the visual pattern keeps changing in wind.
- Check the CDs every couple of weeks. Discs that have become dull, coated in dust or grime, or that have lost their reflective backing should be replaced with fresher ones.
- In winter or during low-sun months, the deterrent becomes less effective simply because there's less light to reflect. Supplement with other methods during these periods.
Think of CD bird scarers as a tool that needs refreshing, not a one-time fix. With regular repositioning, they can stay useful for weeks at a time. Without it, you might get two or three good days before the birds start ignoring them completely.
When to combine with other bird control methods and safety considerations
CD scarers work well as part of a broader approach but they're rarely enough on their own for persistent bird problems. If you still need birds to back off after trying a CD setup, you can combine it with other scare tactics to make the area feel far less safe make a hawk bird scarer. If you're dealing with determined pigeons, starlings, or crows, or if the birds have been using the area for a long time, you'll almost certainly need to layer in other methods.
Good combinations that work alongside CD scarers:
- Reflective Mylar tape or flash tape run between the same stakes adds continuous movement and a different type of reflection, reinforcing the deterrent effect
- Physical barriers like netting over fruit bushes or raised beds close off the area entirely, rather than just discouraging birds from approaching
- Bird spikes on fence tops, pergola beams, or ledges prevent landing in the spots birds target most
- Sonic or ultrasonic deterrents add an auditory element that CDs alone can't provide, which helps when birds become visually habituated
- Predator decoys (hawk kites or owl figures) used in rotation near the CD lines tap into a different fear response, though these also require regular repositioning to stay effective
If you want to escalate beyond DIY visual deterrents, exploring homemade bird scarers that combine multiple sensory approaches is a natural next step. For very persistent problems, particularly on commercial properties or around solar installations, professional-grade physical exclusion is usually more reliable than any visual deterrent.
On safety: a few practical things to keep in mind. Always sand or file any cracked edges on discs before use. Secure all lines firmly so nothing works loose in strong wind and becomes airborne debris. If you're near a public path or shared outdoor space, make sure hanging lines are visible and at a safe height. In aviation-adjacent locations, reflective surfaces can potentially attract attention from above, so check any local guidance if you're in a flight path area. And finally, none of these methods harm birds physically, which is exactly what you want. The goal is discouragement, not injury.
Start with the basic setup described here, move it every few days, and assess after two weeks. If you are also trying to temporarily stop these deterrents, you can disable a bird scarer by removing it from the area or turning off any reflective or moving components how to disable a bird scarer. If birds are still regularly landing, that's the signal to add a second layer of deterrence rather than just adding more CDs to the same line.
FAQ
Why do my CD bird scarers seem to do nothing in the first day?
Use bright sun plus wind, not shade. If your spot is mostly shaded, switch the line to a sunnier exposure or use an alternate approach (for example, combining reflective CDs with another deterrent) because flashes in low light rarely spook birds.
How often should I move the CDs to prevent birds from getting used to them?
Replace or refresh the setup. As birds habituate to a fixed pattern, moving the line and changing spacing or height every few days helps keep the flashes unpredictable, especially after the initial 1 to 2 day period when birds start to test it.
Can I use knots or tape instead of swivels, and will it still work?
Yes, but only if the discs still move. If you twist CDs too tightly or tie them in a way that prevents free spinning, you lose the erratic flash pattern. Use the existing center hole and ensure the line allows rotation.
Where exactly should I hang the string if birds approach from different directions?
Avoid it. CDs can create confusing reflections that some birds quickly learn to ignore if placed where they do not lie across the birds’ approach path. Position the line so birds fly toward the reflective area rather than alongside it.
What height works best for pigeons versus sparrows versus birds in fruit trees?
Hang it where birds normally feed or land, at roughly their approach height. For ground feeders, try 60 to 90 cm above ground, for fruiting areas aim around 1 to 2 m, and for balcony or rooftop use place it near typical landing height rather than at ceiling level.
Is it better to use more CDs spread out, or concentrate them in one spot?
Run multiple shorter lines rather than one long line across a wide area, because density matters. Using about 4 to 5 CDs per critical spot gives more concentrated flashing near the landing and feeding zone.
If birds return, should I just add more old CDs to the same line?
Not usually. If you use the same reflective area and the CDs move only slightly, birds may habituate quickly. Improve movement first (freer spinning, correct wind exposure, not tight ties) before adding extra discs.
What should I inspect if the deterrent stops working after a few days?
Check movement and sharpness of reflections. Cracked, dull, or cloudy discs reduce flash quality, and sagging strings reduce spinning. Sand any cracked edges, then re-tighten the line so CDs swing or spin freely.
How do I make the setup safer around children, pets, or walkways?
Use secure anchoring and visibility. If the discs are near a public path or shared outdoor space, keep the hanging line at a safe height and ensure the line cannot slip, sag, or become a snag hazard.
Can CDs become a hazard in bad weather, and how do I prevent it?
In strong wind, loose hardware can become debris. Secure both ends, keep the string taut enough that it stays off face height, and ensure swivel and connection points are tight so discs do not detach.
Will a CD bird scarer cause issues near solar panels or on rooftops?
If the area is near solar panels, a rooftop, or any elevated space, test and adjust. Reflective surfaces might draw attention from above, so make sure local guidance is followed and anchoring is extra secure to prevent the line from shifting.
What’s the best next step if I’ve refreshed the CDs but birds still land regularly?
Yes, by changing what the birds see and how often it changes. Consider mixing in another non-harmful layer that adds a different signal (visual plus movement or other deterrence) when you still see regular landings after refreshes.
How can I temporarily stop a CD bird scarer when I still need to use the space?
Yes, but only as a temporary control. Remove the CDs from the area or stop the reflective or moving component so the birds no longer get the deterrent flash, then reassess after a short period.