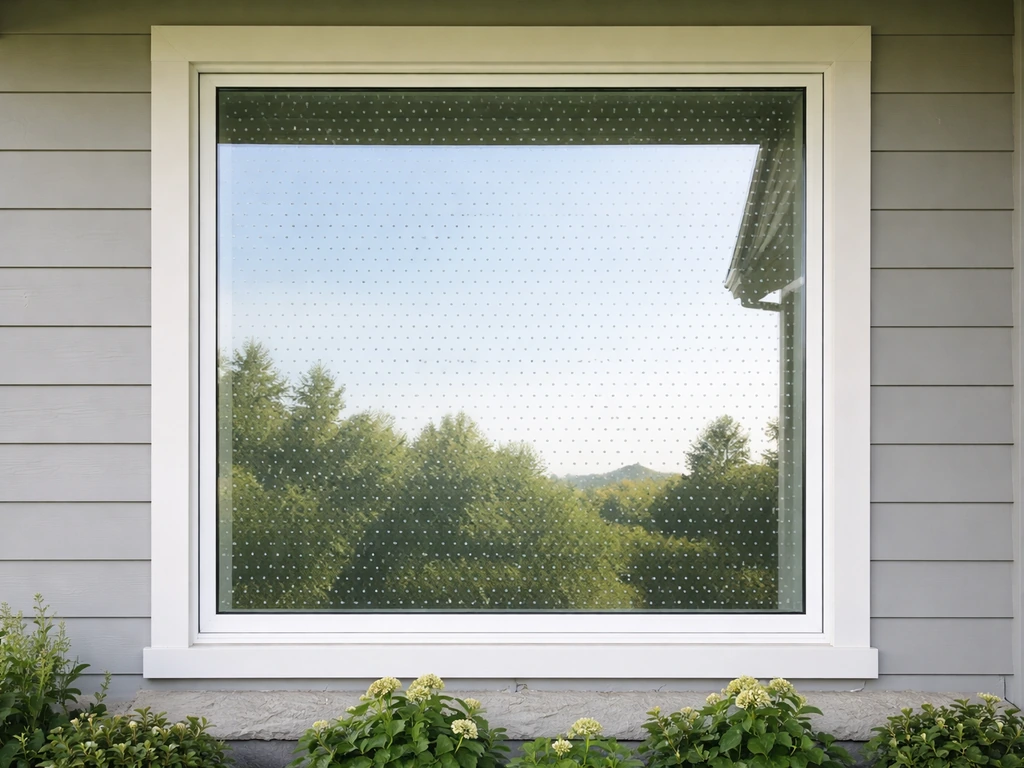
Window decals can prevent bird strikes, but only when they're blank" rel="noopener noreferrer">placed on the outside of the glass and spaced closely enough that birds can't fly between them. If you are wondering whether do bird window stickers work, the key is using the right spacing and placing the decals on the exterior so birds can’t use the reflection as a clear flight path. Most people apply a hawk silhouette or two and call it done. That doesn't work. What works is treating your window like a grid and covering it with markings no more than 2 inches apart horizontally and 4 inches apart vertically, ideally on the exterior surface. Do that consistently, and you'll see a real drop in collisions. If you want the best bird-window strike prevention, prioritize exterior placement and coverage density over decorative “hawk” decals. If you want the best bird-window strike prevention for your setup, review how to prevent bird strikes on windows alongside decal spacing and placement. If you want the best bird-window strike prevention for your setup, review how to prevent bird strikes on windows alongside window clings for bird safety.
Best Window Decals to Prevent Bird Strikes: How to Pick and Install

How window decals actually help (and where they fall short)
Birds collide with windows because glass reflects sky, trees, and open space. To a bird flying at speed, your window looks like a safe flight path. Decals interrupt that illusion by breaking up the reflection into a visual pattern that the bird's brain registers as an obstacle rather than open air.
The key word is 'break up.' A single hawk decal or a pair of sunflower clings doesn't break up anything. The bird just flies around them. Coverage density is what matters. The 2-inch horizontal by 4-inch vertical spacing rule comes from research into how birds judge gaps. If any gap in your pattern is larger than about 2 inches wide or 4 inches tall, birds treat it as a passage they can squeeze through.
Where decals fall short: they don't help much on heavily tinted or frosted glass because the reflection is already reduced. They also won't address bird behavior driven by something inside the window (a houseplant or a feeder directly behind the glass), and they won't work at all if they're placed on the interior surface instead of the exterior. Interior placement is one of the most common mistakes people make, and it essentially renders the decals useless because the reflection the bird is responding to is on the outside of the glass.
What to look for when buying bird-strike decals
Not all decals are built the same. Here's what separates products that actually perform from ones that just look good in a product photo.
Visibility at bird flight distance
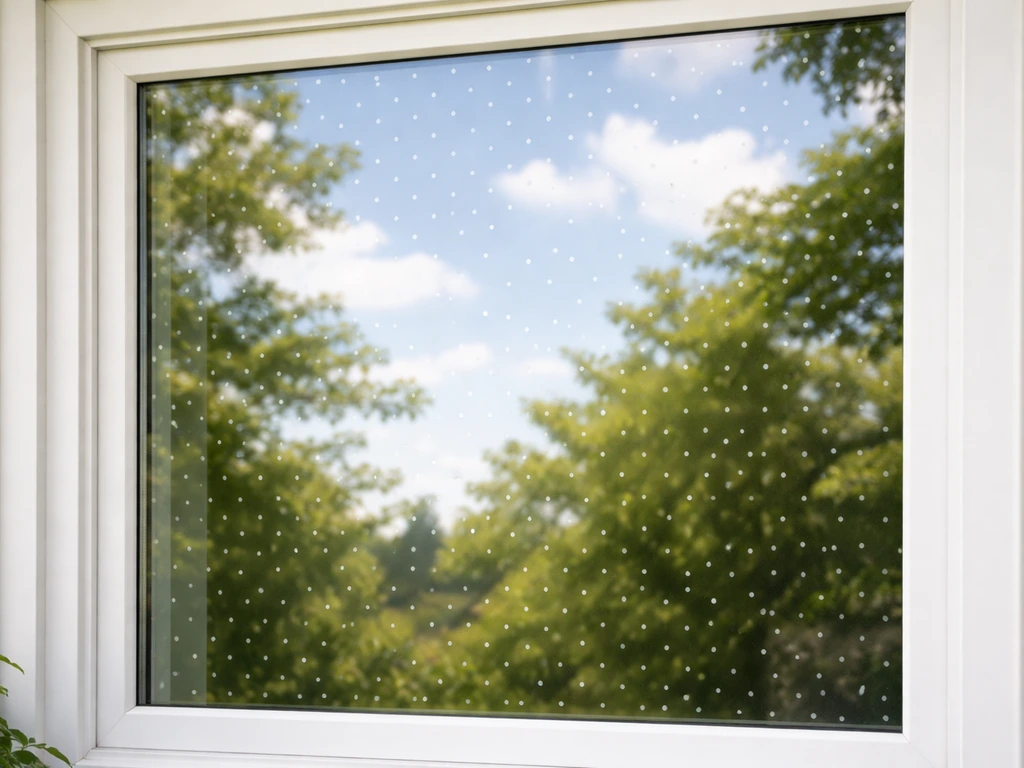
Birds need to detect the pattern before they're too close to change course. Look for decals with high contrast, either white or UV-reflective patterns against a clear background. Many quality products use UV-reflective ink that's nearly invisible to humans but highly visible to birds, whose vision extends into the ultraviolet spectrum. This is genuinely useful if you want something discreet. Just confirm the product explicitly states UV-reflective ink, not just 'bird-friendly' as a vague marketing claim.
Pattern type and spacing
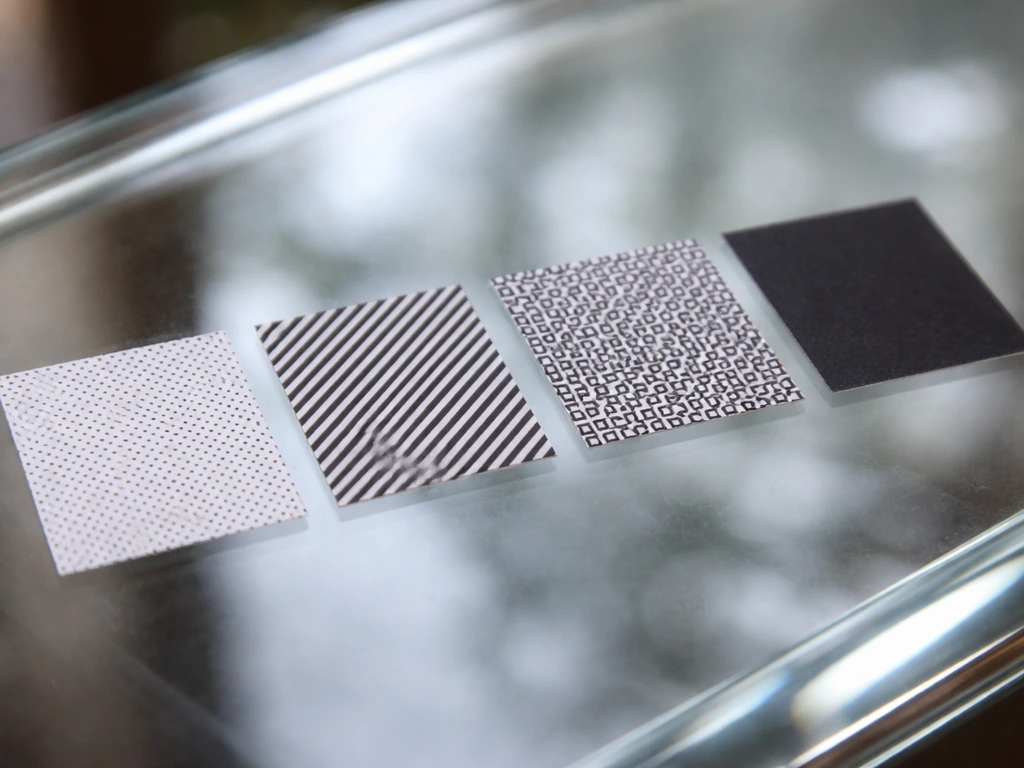
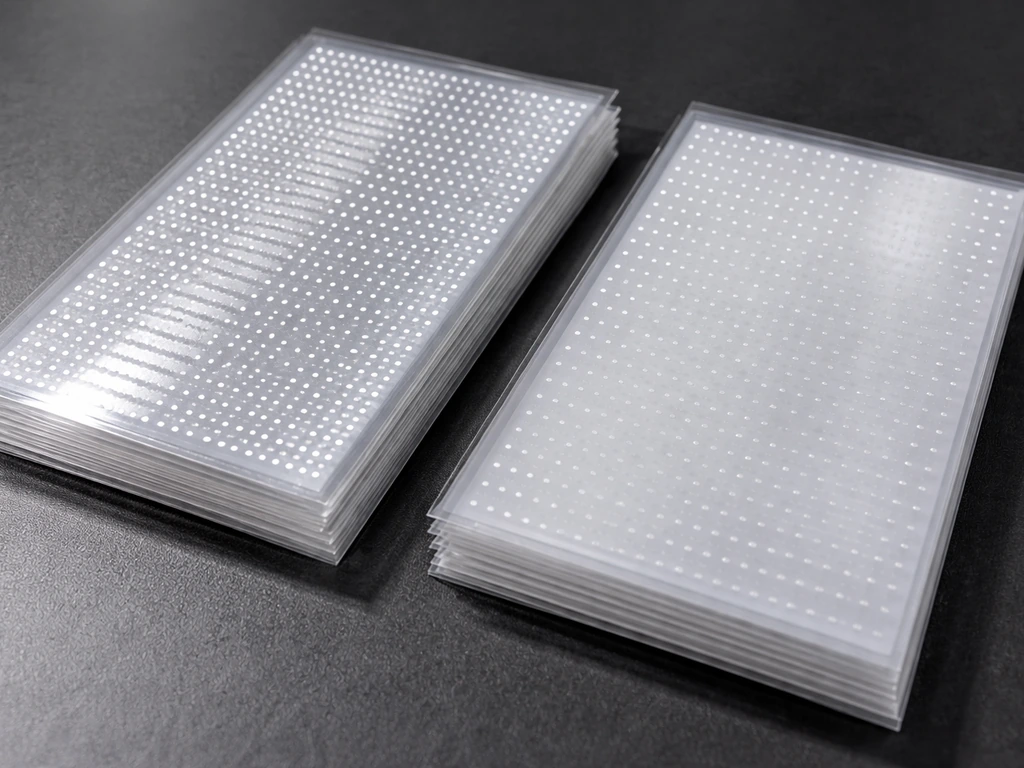
Dots, stripes, and repeating geometric patterns all work well. Solid shapes like silhouettes only work if they're part of a dense repeating grid, not a single decorative element. Products designed specifically for bird safety usually come in strips or sheets that make it easier to achieve consistent 2x2 or 2x4 inch spacing across a large pane.
UV stability and weather resistance
Exterior decals face sun, rain, temperature swings, and cleaning. Cheap vinyl clings will yellow, peel, or lose adhesion within a season. Look for products rated for exterior use with UV-stable inks. Good ones last 3 to 5 years. If a product doesn't specify exterior durability, assume it's interior-only and skip it for this application.
Adhesive quality

Static-cling decals are repositionable and leave no residue, which makes them appealing for renters or anyone who wants flexibility. The tradeoff is that they can slip or fall off over time, especially in humid conditions or on non-standard glass. Pressure-sensitive adhesive decals bond more firmly, but test one in an inconspicuous spot first if you have special coatings on your glass.
How to install window decals correctly
The installation process isn't complicated, but there are a few steps where people commonly go wrong and end up with decals that fail early or don't provide coverage.
Step-by-step for standard residential windows
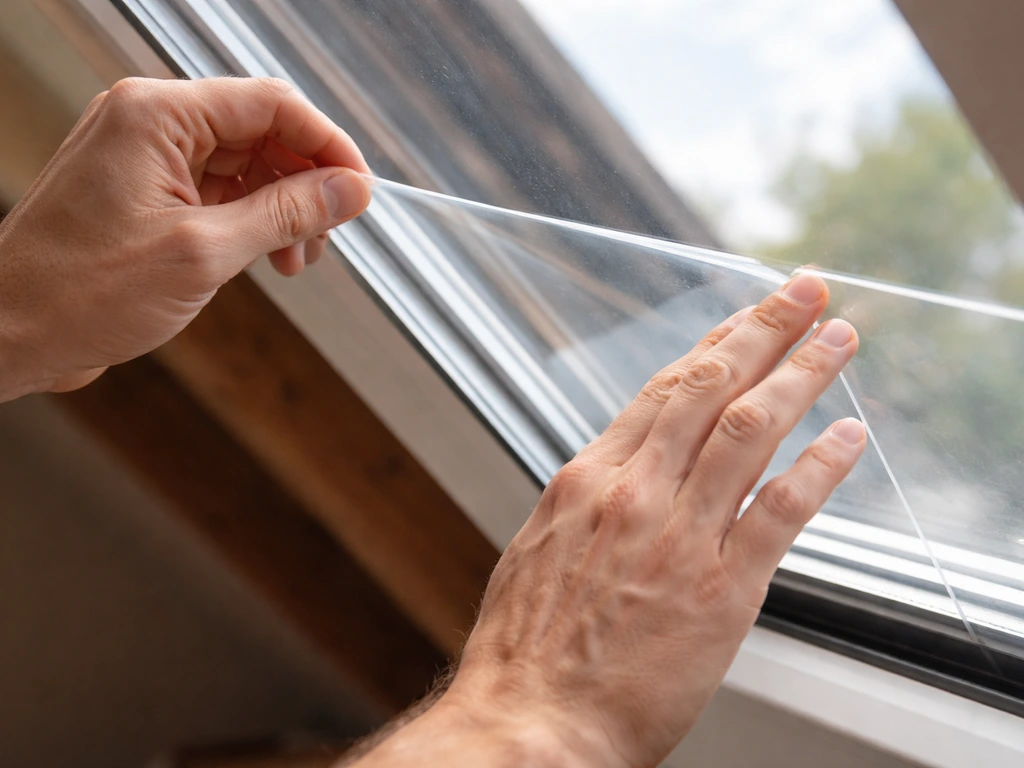
- Clean the exterior glass surface thoroughly with a streak-free glass cleaner and a lint-free cloth. Dust, oils, and residue all weaken adhesion and create bubbles under static clings.
- Let the glass dry completely. Don't apply decals to wet or damp glass.
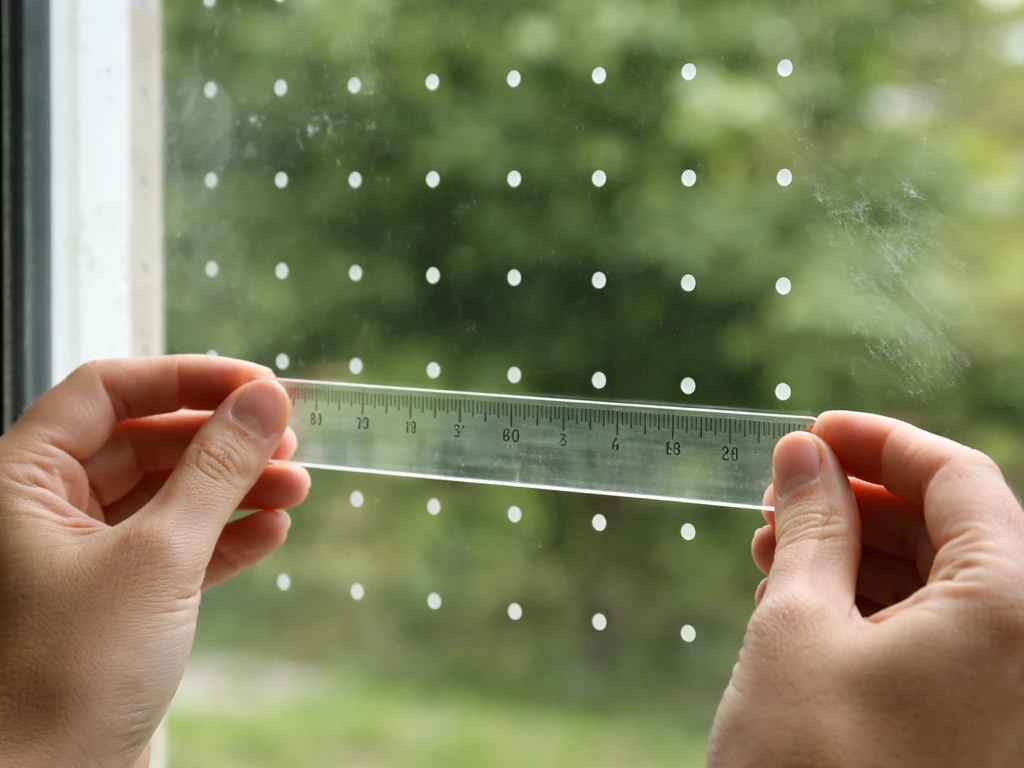
- Map out your grid before peeling anything. For a standard double-hung window (roughly 28 x 54 inches), you'll need many more decals than you think. At 2-inch horizontal spacing, a single row spans about 14 markers. Plan coverage across the full pane, not just the center or corners.
- Start from the top corner and work across in rows. Use a ruler or tape measure for the first row to set your spacing, then use the previous row as a visual reference.
- Press each decal firmly and smooth out air bubbles as you go using a credit card or squeegee.
- Step back and check from a bird's-eye perspective: are there any gaps larger than 4 inches vertically or 2 inches horizontally? Fill them in.
Skylights and angled glass
Skylights are actually a higher-risk surface because birds see them as open sky from above. Apply the same 2x4 inch grid spacing, but use pressure-sensitive adhesive decals rather than static clings since gravity works against you on horizontal and angled surfaces. For large skylights, tape decal strips lengthwise rather than placing individual dots, which reduces installation time significantly.
Large commercial or multi-pane glass
For floor-to-ceiling panes or large commercial windows, decal strips and pre-spaced pattern sheets are far more practical than individual dots. Some manufacturers sell full-window perforated film specifically for this scale. You apply it like window film rather than individual decals. Coverage is faster and the spacing is built into the product.
Interior vs. exterior mounting: what you need to know
Always mount on the exterior if possible. Interior-mounted decals sit behind the reflective surface, so the bird never sees them. The only exception is if the window is non-reflective from the outside (like a matte-finish specialty glass). For rental properties where you can't modify the exterior, interior mounting combined with anti-reflective window film on the outside is a workable compromise, but plain interior decals alone won't reliably prevent strikes.
Testing effectiveness and troubleshooting
Give your installation two to four weeks and watch for signs of impact: feathers on the glass, dead or stunned birds on the ground nearby, or smudge marks where a bird's beak or feathers hit the pane. If you're still seeing strikes after a month, work through this checklist before replacing products.
- Check spacing again with a ruler. It's easy to eyeball 2 inches and end up with 4-inch gaps on a large pane.
- Confirm all decals are on the exterior surface. If you installed them inside, move them outside.
- Look for decals that have lifted at the edges or slipped. Reapply or replace them.
- Check whether the strikes are concentrated in one area of the window. That usually means a specific gap in your pattern, not a total product failure.
- Observe what time of day strikes happen. Early morning and late afternoon strikes often correlate with specific sun angles that change how reflective the glass is. You may need to add coverage in the zones where direct sunlight hits.
- Replace UV-reactive decals after 3 to 5 years even if they still look fine. UV ink degrades before visible discoloration appears.
If you've covered the full pane at correct spacing on the exterior surface and strikes are still happening, the window itself may need a different solution. Very large, highly reflective panes sometimes need window film treatment rather than individual decals. For people who need a similar effect over a large pane, choosing the best window film to prevent bird strikes can be the next step beyond decals. That's a topic worth exploring separately if decals aren't getting the job done.
Going beyond decals: pairing them with other bird control methods
Decals address the visual problem, but they work better as part of a layered approach, especially if you have multiple problem windows or persistent bird activity in the area.
Physical barriers
For windows close to feeders, dense vegetation, or migratory corridors, adding a physical barrier outside the glass is more reliable than any marking solution. Netting installed 2 to 3 inches in front of the glass surface creates a soft barrier that stops birds before impact. This is particularly useful for skylights or large glass walls where complete decal coverage is impractical. Window screens work the same way if they extend across the full pane.
Sensory deterrents
Visual deterrents like holographic tape or predator decoys hung near problem windows can reduce approach frequency. They work by discouraging birds from flying through the area near the glass in the first place. Sonic deterrents are less effective at the window level specifically, but they can reduce bird density in a yard overall, which reduces the total number of strike opportunities.
Feeder and plant placement
If you have a bird feeder, move it either within 3 feet of the window or more than 30 feet away. Feeders at mid-distance (roughly 5 to 20 feet) give birds enough flight distance to build dangerous speed before impact. Close placement means any collision happens at low velocity and causes little harm.
Safety, legality, and compatibility considerations
Adhesives and glass coatings
Most standard decals are safe for untreated glass. If your windows have low-E coatings, tinted film, or specialty treatments, check the decal manufacturer's guidance before applying. Pressure-sensitive adhesives can sometimes damage or cloud aftermarket window film if they're left on for extended periods. When in doubt, test a small corner first and wait a week before covering the whole pane.
Residential use
For homeowners, there are no legal restrictions on applying bird-safety decals to your own windows. HOA rules occasionally restrict visible window modifications, so it's worth checking if you're in a managed community. UV-reflective decals that are essentially invisible to humans are a practical workaround if aesthetics are a concern.
Commercial buildings
Some jurisdictions, including several major US cities, have adopted bird-safe building guidelines or requirements for new commercial construction. These typically specify minimum pattern densities for glass treatments. If you're retrofitting a commercial building, check local bird-safe building ordinances. Perforated window film or fritted glass treatments are often the preferred commercial solution because they provide consistent coverage at scale without the labor of individual decal placement.
Aviation-adjacent and high-risk environments
Standard window decals are a residential and light-commercial solution. For facilities near airfields or in contexts where large-scale bird strike prevention is required for safety compliance, decals alone don't meet the threshold. Those situations typically call for integrated wildlife management programs that combine physical deterrents, habitat modification, and active monitoring, which goes well beyond what any decal product can offer.
A simple buy, install, and test plan you can start today
If you want to act today, here's the straightforward path. The best bird-window strike prevention combines the right decal pattern with correct placement and density. Buy a product specifically designed for exterior bird-strike prevention, ideally one with UV-reflective dots or strips that come pre-spaced for a 2x2 or 2x4 inch grid. Clean the outside of your problem windows, let them dry, and apply the decals across the full pane with blank" rel="noopener noreferrer">no gaps larger than 2 inches wide or 4 inches tall. Check back after 2 to 4 weeks and look for signs of continued impact. If strikes persist, audit your spacing and surface placement before assuming the product has failed. Pair the decals with feeder relocation and, if you have large panes, consider netting as a backup. That combination handles the vast majority of residential bird-strike problems without major cost or effort.
| Decal Type | Best For | Durability | Visibility to Humans | Exterior Safe |
|---|---|---|---|---|
| UV-reflective dot sheets | All residential windows, skylights | 3-5 years | Nearly invisible | Yes |
| Static cling patterns | Renters, temporary use | 1 season | Visible | Limited (may slip) |
| Pressure-sensitive adhesive strips | Large panes, skylights, permanent install | 3-5 years | Varies by product | Yes |
| Perforated window film | Large commercial glass, floor-to-ceiling panes | 5+ years | Low from inside | Yes |
| Single hawk/predator silhouette | Not recommended alone | Varies | Visible | N/A |
FAQ
Can I place decals only in the middle of the window to save time?
You should plan for a full coverage pattern across the entire field of reflection, not just the center or a few “hot spots.” Birds approach based on what looks like open air, so leaving unmarked strips, especially along edges or near nearby vegetation, can create a new gap that still looks passable.
How do I check if my decal spacing is actually tight enough after installation?
Test with a simple “gap audit.” After you place decals, step back and look for any visible passage wider than about 2 inches horizontally or about 4 inches vertically in the repeating grid. If your pattern has uneven clusters, tighten the spacing where the gaps are largest rather than only where it feels convenient.
What if I want to use decorative bird decals, can they work if I space them closely?
Yes, but only if it still results in consistent dense coverage. Large, decorative single silhouettes usually fail because they do not create a repeating obstacle pattern. If you combine designs, make sure the final layout still follows the 2-inch by 4-inch gap rule everywhere on the pane, including around the perimeter.
Do bird decals work on tinted or frosted windows?
If the reflection is already reduced by the glass (tint, frosting, or strong glare-control coatings), decals may show less benefit because birds have fewer “clear flight paths” to exploit. That doesn’t mean you should give up, but it does mean you should confirm exterior placement and then focus on coverage density, and consider layered measures like feeder relocation or netting if strikes continue.
How can I tell if UV-reflective decals are actually UV reflective, not just marketed as such?
Don’t assume a label is enough, confirm what “UV reflective” means for the pattern. Look for explicit statements about UV-reflective ink or UV-reflective pattern materials. “Bird-friendly” without that detail often indicates ordinary visible-contrast art, which may look good but does not reliably interrupt bird perception.
Are decals safe to use on windows with low-E coatings or aftermarket film?
If you recently installed anti-reflective window film or have specialty coatings, pressure-sensitive decals can sometimes cause residue or clouding when removed or left too long. Do a corner test first, wait a full week, then reassess adhesion and visibility before applying across the whole pane.
Will static-cling decals stay put and still prevent strikes reliably?
Static-cling decals can work temporarily, but they are more prone to drifting as humidity changes or as the glass surface expands and contracts. If you choose static cling, monitor regularly, especially after rain or temperature swings, and replace quickly if you see any slipping that creates larger-than-allowed gaps.
What’s different about installing bird decals on skylights?
For skylights and angled glass, gravity and viewing angle make it easier for decals to sag and form gaps. Use exterior-rated pressure-sensitive adhesive products, and prioritize pre-spaced strips or tape decal strips placed lengthwise to keep the grid consistent over the full surface.
What’s the best approach for floor-to-ceiling windows or very large glass panels?
For very large panes, individual dots can be impractical and easy to mis-space. Pre-spaced pattern sheets or full-window perforated film treatments are more consistent because the spacing is built in, reducing human error across tall or wide surfaces.
If I covered the entire window correctly and strikes continue after a month, what should I do next?
A practical “strike persistence” decision point is after about a month of correct, exterior full-pane coverage. If you still see impacts, re-check the grid for uneven gaps, confirm the decals are on the exterior side, then consider upgrading to window film for high-reflectivity situations or adding a physical barrier if the strikes cluster near a feeder or dense vegetation.
How should I adjust bird feeders if I’m also using decals?
Yes, but treat them as supporting actions, not replacements. Move feeders to within 3 feet of the glass or more than 30 feet away, and avoid mid-distance (roughly 5 to 20 feet), which gives birds enough room to build speed. If feeder relocation alone helps but does not fully solve the issue, keep decals as the visual layer.
What if I live in a rental and can only apply decals on the interior?
If you cannot access the exterior, interior decals can still help in some rare cases when the outside view is non-reflective or matte, but you should not rely on interior placement as your only measure for typical reflective glass. The most dependable compromise is pairing interior decals with anti-reflective window film on the outside to reduce the reflection birds use.
Are there any rules or appearance considerations I should plan for before applying decals?
Yes. If you are in an HOA or managed property, visible window modifications can be restricted, even when they are bird-safety related. If appearance is a concern, choose UV-reflective patterns that are designed to be nearly invisible to humans while still noticeable to birds.
Best Window Film to Prevent Bird Strikes: How to Choose
Learn how bird-safe window film deters strikes and choose the right pattern density, placement, and specs for your windo