The best bird-window strike prevention strategy is applying a dense external visual marker pattern to your glass, spaced no more than 2 inches apart in every direction. That single rule covers the majority of situations, whether you have a patio slider, a bay window, or a commercial glass facade. Everything else in this guide is about diagnosing exactly where and why birds are hitting your specific glass, and then choosing the right product to meet that 2-inch spacing standard on the outside surface.
Best Bird-Window Strike Prevention: Do This Today Guide

Marcus Weatherby
3 Apr 2026
Why birds hit windows (and how to spot the cause at your glass)
Birds don't recognize glass as a solid barrier. Their brains evolved to process open sky, vegetation, and habitat, and glass either mirrors those things perfectly or lets them see right through to a plant or courtyard on the other side. In both cases, the bird sees an open flyway and commits to the path. There's no hesitation, no last-second recognition, and no safe swerve. The result is a collision that can stun or kill even a healthy bird in peak condition.
The two main failure modes are reflection and transparency. A reflective window acts like a mirror, bouncing back sky, trees, or neighboring vegetation so convincingly that the bird treats it as real habitat. A transparent window (think a glass corner, a patio door with a garden visible behind it, or a window with houseplants on the sill) lets the bird see through to what looks like a passable gap. Both conditions are dangerous, and a single window can cycle between them depending on the sun angle and time of day. That's why treatments need to work on the exterior surface during daylight hours, not just from inside. American Bird Conservancy advises applying window treatments on the outside surface to reduce problems caused by reflections treatments need to work on the exterior surface during daylight hours.
Seasonal timing matters too. Spring and fall migration send enormous numbers of birds through unfamiliar routes at night and at dawn. Residential areas that feel quiet in winter can become collision hotspots in April and September. If your strikes seem to cluster in those windows, migration pressure is likely compounding whatever reflective or transparency problem your glass already has.
Quick diagnosis: map the strike pattern and identify the worst windows

Walk the outside of your building in the morning and mid-afternoon and look for smudge prints, feather dust outlines, or debris on the glass. These impact marks tell you the exact pane, the height zone, and often the approach angle. Mark each one with a piece of painter's tape before you clean them off, so you end up with a strike map rather than a vague sense that 'that corner window is bad.'
Once you have your map, run the reflection test: stand at the approach angle a bird would use (often from a nearby tree or feeder) and look at the glass from outside. If you see sky, trees, or your own garden reflected back, that pane is operating as a mirror and needs exterior treatment. If you can see through to interior plants, a lit room, or a window on the far side of the building, the window is acting as a transparent tunnel and still needs exterior markers, but you should also close interior blinds or move plants away from the sill.
Feeder and birdbath placement is both a clue and a lever. If strikes cluster around feeder-active periods, the birds are approaching from a fixed direction and hitting the glass on their way in or out. Moving feeders to within about 3 feet of the glass changes the flight geometry so birds can't build up enough speed to be seriously injured. That's a valid short-term fix, but it doesn't replace external markers on the glass itself.
One thing to check when reviewing your map: are there any untreated sections of glass between existing stickers or decals? Even a small gap can be enough. Birds are extremely good at finding and threading through narrow openings, so any section of glass without coverage at the right density is still a live hazard. Your diagnostic goal is a fully covered exterior surface with no gap exceeding 2 inches in any direction.
Top prevention methods (visual treatments, films, decals, screens)
All effective window strike prevention works by making the glass visually obvious to a bird approaching from outside. The method you choose determines how it looks, how long it lasts, and how much effort it takes to install. Here's how the main options stack up.
| Method | Applied Where | Spacing Requirement | Visibility Impact | Lifespan | Best For |
|---|---|---|---|---|---|
| Bird tape (e.g., ABC BirdTape) | Exterior surface | ≤2" x 2" grid | Low to moderate | 1-3 seasons | DIY, rentals, quick fixes |
| Patterned window film | Exterior surface | ≤2" x 2" or 2" x 4" depending on design | Low (frosted/patterned options available) | 5-10+ years | Permanent installs, large panes |
| Window decals | Exterior surface | ≤2" x 2" grid (multiple decals) | Minimal if dots/small patterns | 1-3 years | Light retrofit, small windows |
| Window clings | Exterior surface | Must achieve 2" x 2" coverage | Minimal | 1-2 years | Renters, seasonal use |
| Hanging cord systems (Zen Curtains/Acopian BirdSavers) | Exterior, in front of glass | Cords ≤4" apart | None (hang in front) | 5+ years | Large windows, architectural installs |
| Exterior insect screens | Exterior, over glass | Mesh covers full pane | Slight reduction in clarity | 5-10 years | Windows already needing screens |
If you want a deeper look at how films compare to other products, the best window films for bird strike prevention covers the leading options in detail. The short version: films that meet the 2x2-inch marker standard and are applied to the exterior surface perform significantly better than interior-only films that don't interrupt exterior reflections.
Decals are popular but often misapplied. blank" rel="noopener noreferrer">A single hawk silhouette does nothing. What matters is density, not shape. If you want to use decals effectively, you need enough of them placed close enough together to eliminate fly-through gaps. On r/Ornithology, commenters emphasize that if decal spacing is more than about 2 inches apart, birds may still try to fly through gaps, so a tight 2x2-inch grid concept and full coverage are important blank" rel="noopener noreferrer">Decals placed close enough together to eliminate fly-through gaps. The best window decals for bird strike prevention breaks down which products actually meet the spacing standard and how many you'll need per square foot of glass.
Window clings are a good option for renters or anyone who needs a removable solution. They work on the same principle as decals, so you still need full coverage at the right density. Window clings for bird safety explains which cling products are genuinely bird-safe and how to apply them correctly without leaving gaps.
Physical solutions that work best near windows (rated barriers and coverings)
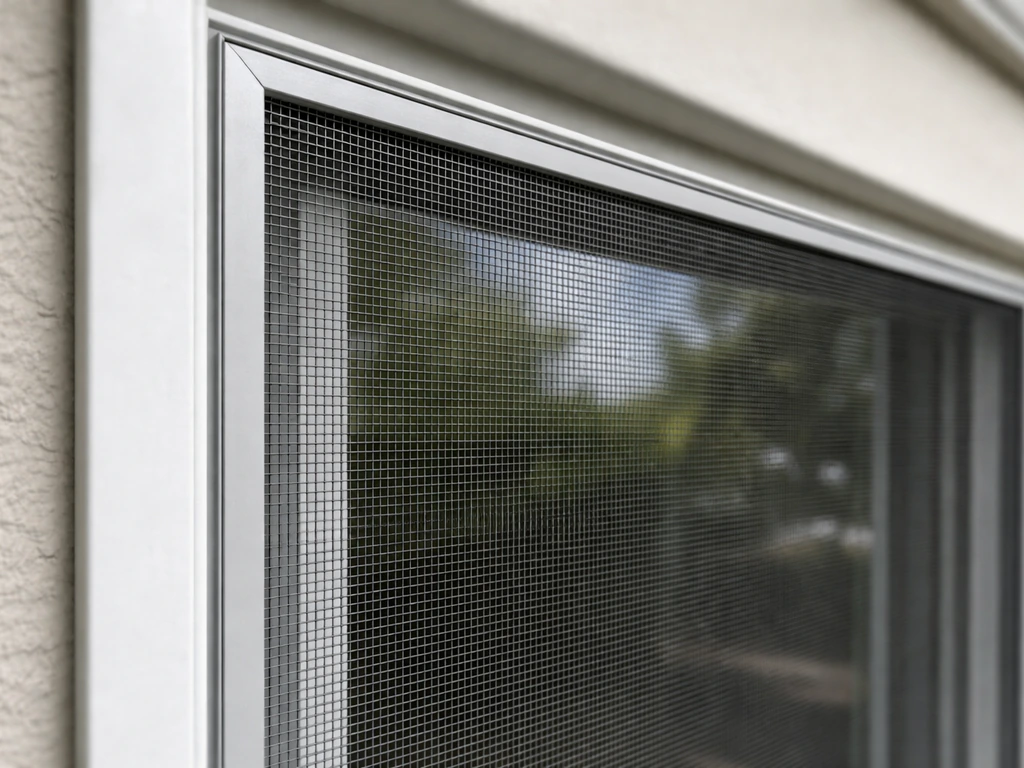
Exterior insect screens are one of the most underrated solutions. If your windows already have tracks for seasonal screens, installing tight-mesh exterior screens over hazard panes reduces reflections, breaks up the visual signal, and cushions any impacts that do occur. The key is that the screen needs to sit close to the glass but with enough gap (at least a few inches) to absorb impact energy. A screen pressed flush against the glass doesn't offer much protection.
Hanging cord systems like Acopian BirdSavers and Zen Curtains are external frames fitted with paracord or thin rope hanging vertically in front of the glass, spaced about 4 inches apart. They're highly effective, essentially invisible from inside the house, and last for years. They work best on large picture windows or glass walls where applying tape or film to every square foot would be costly. Installation requires a frame or hardware mount above the window, but it's a straightforward DIY project for most windows.
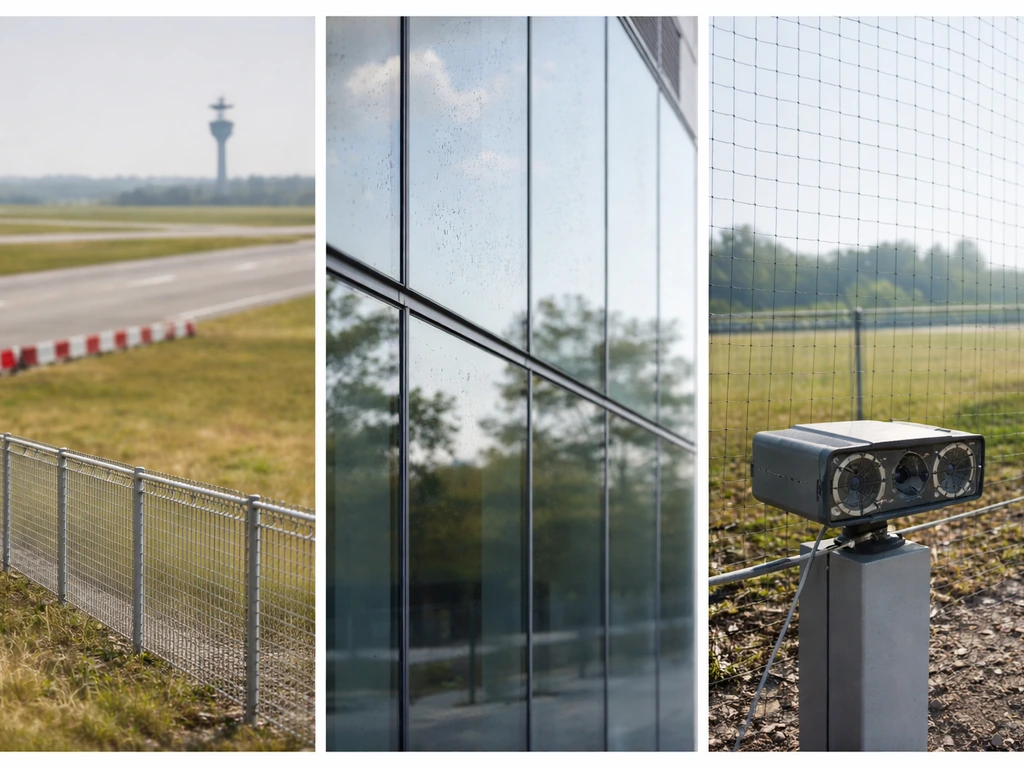
Bird netting can be used in front of large glass sections (curtain walls, atriums, glass building corners) as a buffer zone rather than a perch deterrent. Stretched in front of the glass with enough standoff distance, it absorbs impact before birds reach the hard surface. This is more of a commercial or institutional solution, but it's worth knowing about for large patio glass walls or conservatories where other methods would be impractical.
A quick note on spikes: they're not appropriate for windows and shouldn't be applied to glass surfaces. Spikes are a perch deterrent for ledges and flat surfaces, not a collision prevention tool. Applying them to or near windows doesn't address the reflection or transparency problem and can create a hazard for birds that approach fast. Stick to methods designed specifically for glass.
Deterrents to use carefully (sonic/ultrasonic/behavioral options, what works and what doesn't)
Sonic and ultrasonic deterrents are frequently marketed as window strike solutions, and this is where you need to be skeptical. Birds collide with windows because they can't see the glass, not because they're ignoring an auditory warning. No sound device changes the optical properties of your glass. Ultrasonic units in particular have no demonstrated effectiveness for bird-window collisions, since bird hearing doesn't reliably operate in the ultrasonic range the way some manufacturers imply.
Predator calls and distress sounds can temporarily shift bird activity away from a zone, but the effect is short-lived. Birds habituate to repeated sounds within days to weeks, especially in areas with consistent food sources or nesting sites nearby. These tools might reduce traffic near a window briefly, but they're not a substitute for treating the glass itself.
Reflective tape and spinning pinwheels are behavioral deterrents that can help at low-traffic windows when combined with glass treatment, but they shouldn't be your primary strategy. Wind-dependent, they stop working on calm days, and birds eventually stop responding to stationary or slow-moving reflectors. If you use them, treat them as a supplement to exterior visual markers, not a replacement.
One behavioral change that genuinely works is repositioning feeders. If birds are approaching a window repeatedly from a feeder positioned 10 to 20 feet away, moving the feeder to within 3 feet of the glass reduces impact force because birds can't accelerate over that short a distance. It's not glamorous, but it's free and takes five minutes.
Step-by-step DIY setup for the best option for common window types
Standard double-hung or casement window
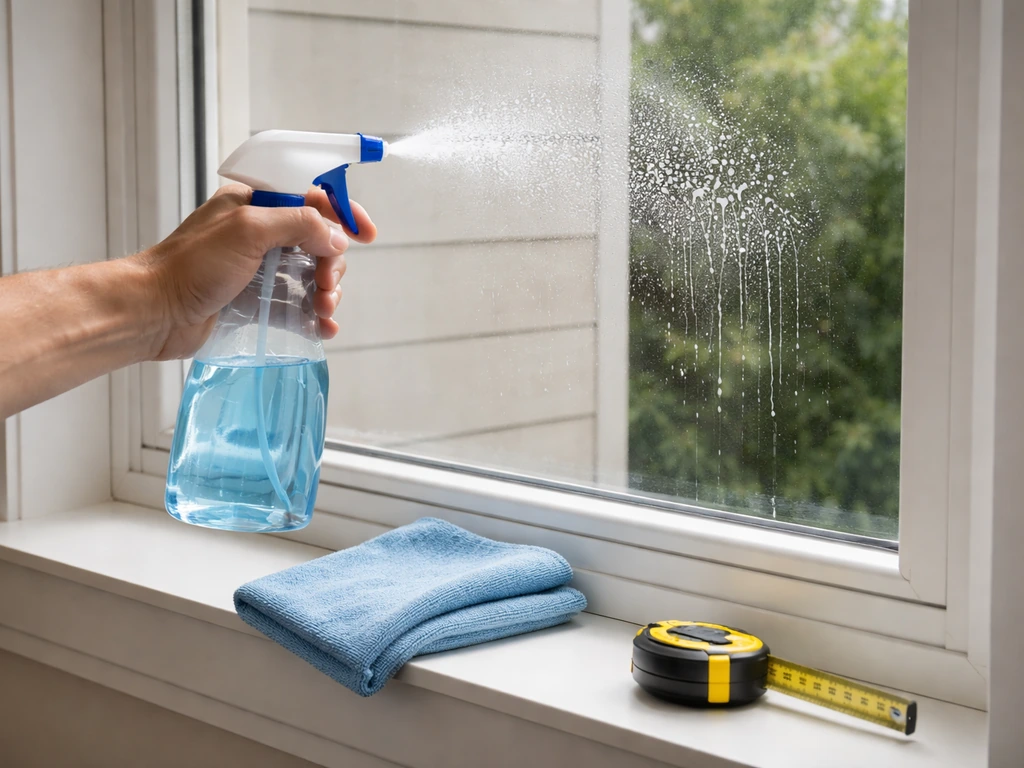
- Clean the exterior surface thoroughly with glass cleaner and let it dry completely. Adhesive products won't bond to dusty or wet glass.
- Measure the full glass area, not just the visible frame opening. You need to treat the entire reflective surface.
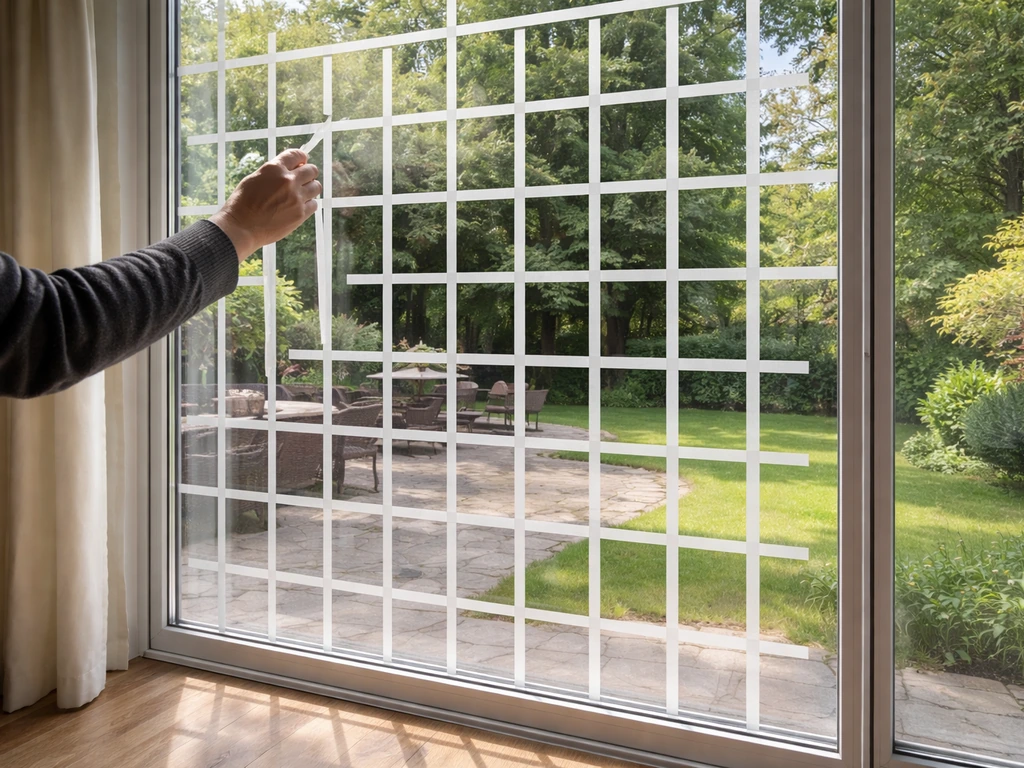
- Cut your bird tape or apply your decals/clings starting from the top left corner, working in horizontal rows spaced no more than 2 inches apart. Each strip or marker should also be no more than 2 inches from the next one horizontally.
- Step back and check coverage from outside at the approach angle birds would use. There should be no gap larger than 2 inches in either direction.
- Press all edges and seams firmly to prevent wind lifting or water intrusion under the tape.
- Check again after the first rain or wind event and re-adhere any lifted sections.
Patio sliding door or large glass wall
- For doors you open regularly, patterned bird film applied to the exterior is the most durable option. Choose a product rated for outdoor exposure with UV-resistant adhesive.
- Clean and dry the full glass panel. For a 6-foot slider, you're working with roughly 40 to 48 square feet, so plan for multiple film sections.
- Apply film from the top down using a squeegee to eliminate bubbles. Overlap seams slightly and trim with a straight edge.
- For a no-adhesive alternative, install a hanging cord system above the door frame. Mount the rod or bracket so cords hang 4 inches apart across the full width of the glass.
- Close interior blinds or curtains during peak strike hours (early morning and late afternoon) as a supplemental measure.
Skylight
- Access the skylight from the roof and clean the exterior glass surface.
- Apply bird tape in a grid pattern meeting the 2-inch spacing rule, or use a patterned bird-safe film cut to fit the skylight dimensions.
- If roof access is difficult or unsafe, stretched bird netting installed a few inches above the skylight glass is a practical alternative that also catches debris.
- Inspect every spring and fall since skylights accumulate UV damage and debris faster than vertical glass.
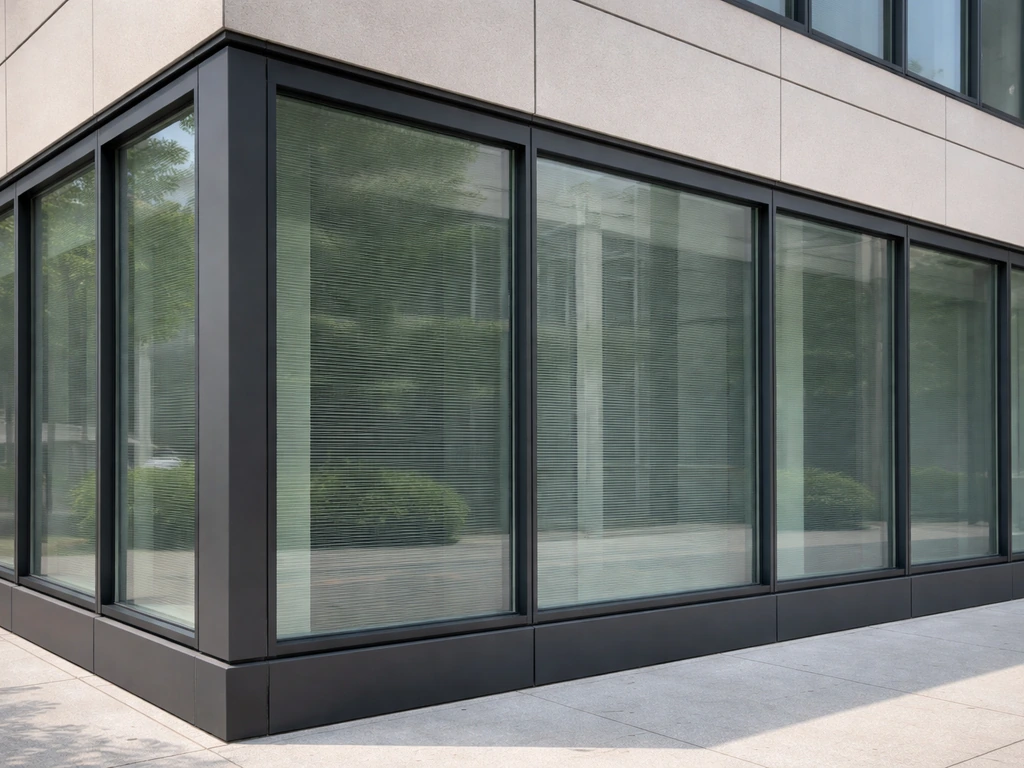
Bay window or glass corner
Glass corners are particularly hazardous because birds approaching from one angle can see through to what appears to be open space on the far side. Treat every pane independently and make sure the corner sash itself (if glazed) is also covered. The bird doesn't know there are two panes meeting at an angle; it sees one continuous flyway.
Effectiveness, maintenance, and when to call in a pro
A properly installed exterior marker system meeting the 2-inch spacing rule can reduce bird-window collisions by 70 to 90 percent at treated panes, based on documented results from bird-friendly building programs. Don't expect zero strikes overnight, especially during peak migration, but you should see a clear reduction within the first week of treatment if your coverage is complete and correctly spaced.
Maintenance is straightforward. Inspect exterior tape and decals every three to four months for lifting, fading, or cracking, especially at corners and edges. UV exposure degrades most adhesive products over one to three outdoor seasons, so budget for periodic reapplication. Film products rated for exterior use typically last five to ten years with normal weather exposure. Cord systems need an annual check for UV degradation and replacement of any broken cords.
If you've treated your glass correctly and strikes are still happening, check whether any neighboring panes or glass structures are funneling birds toward your windows. Large buildings, glass fences, and greenhouse panels can create secondary reflection hazards that redirect flight paths. You may need to treat a broader area than just the window where impacts occur.
For a broader overview of the full toolkit available, how to prevent bird strikes on windows covers the complete prevention landscape including both DIY and professionally installed options. And if you're still unsure whether your current stickers or small-format decals are doing anything meaningful, this breakdown of whether bird window stickers actually work gives you a straight answer based on the available evidence.
Call in a professional bird-control contractor when you're dealing with a large commercial glass facade, a curtain-wall building, a high-strike-rate aviation-adjacent structure, or any situation where working at height creates a safety risk. Professionals can also source architectural-grade bird-friendly glass retrofits (ceramic frit, acid-etched, or UV-patterned glass) that go beyond what DIY products can achieve and are worth the investment for permanent installations. For residential situations, though, most homeowners can solve 90 percent of their strike problem with a roll of bird tape, a squeegee, and an hour on a weekend morning.
FAQ
Do I have to place bird markers on every pane, or is one “bad window” enough?
Treat every glass pane that birds can see through or reflect, including corner sashes and adjacent sidelights. If a single pane between treated sections is left uncovered, birds can still thread a fly-through gap and keep colliding in that hotspot.
What counts as a “gap” if my stickers are close together but not perfectly aligned?
Spacing matters, but coverage does too. If you can look at the glass from outside and spot any untreated stripe wider than about 2 inches in any direction (including along mullions or frame edges), assume it can act as a passable corridor and rework coverage.
Should I apply window markers to the inside surface if I can’t reach the outside?
Inside-only products can work less reliably because they often fail to interrupt exterior reflections and visible sky. If you cannot reach the exterior, prioritize a removable exterior solution (cord system, cling applied on the exterior if feasible, or exterior screen) rather than relying on interior-only coverage.
How long after installing should I expect to see improvement?
You should see a clear reduction within about a week if coverage is complete and correctly spaced, but do not expect zero strikes during migration spikes. If collisions continue at the same pane after 10 to 14 days, recheck spacing gaps and whether another nearby glass surface is funneling birds toward it.
Will moving the feeder within 3 feet of the glass stop collisions completely?
It reduces impact force and can help short term, but it does not replace exterior visual markers. Use feeder repositioning as an added lever while you complete the 2-inch exterior coverage on the actual hazard panes.
Can I use a smaller number of decals if I pick the right bird shape?
No, shape is not the limiting factor. Density and the elimination of fly-through gaps are what matters. For decals, follow the coverage density to meet the 2-inch spacing standard, not the size or silhouette of the design.
What’s the fastest way to find the exact height zone birds are hitting?
Make a strike map by marking fresh impact smudges, feather-dust outlines, or debris with painter’s tape before cleaning. Those impact marks typically reveal the height band and sometimes the approach angle, which helps you prioritize coverage rather than guessing.
Do sun angle and time of day change whether a window is reflective or transparent?
Yes. Many windows shift between mirroring and see-through behavior depending on daylight and the bird’s viewing angle, especially near dawn or late afternoon. That’s why exterior application during daylight is important, and why you should confirm with the reflection test from the approach side.
Are hanging cord systems actually safe for birds and reliable over time?
They are designed as collision-visibility barriers, typically staying effectively aligned for years, but you should still inspect annually for UV degradation and any broken cords. They work best on large picture windows where full tape or film installation would be too time-consuming.
Why do sonic or ultrasonic devices rarely solve window strikes?
Because the problem is visual. Sound does not change the optical behavior of the glass, so birds still cannot see the barrier clearly. Also, ultrasonic performance is not dependable for birds and is not a substitute for meeting the exterior marker spacing requirement.
Is it ever okay to use bird spikes on or near windows?
No. Spikes are perch deterrents for ledges, not collision prevention for glass, and they do not address the reflection or transparency problem. They can also create an unsafe approach scenario for fast-moving birds, so use glass-specific methods instead.
How should I clean and maintain exterior markers so they keep working?
Inspect every three to four months, and check especially at corners and edges where lifting starts. Expect adhesive products to lose effectiveness over one to three outdoor seasons due to UV, while exterior-rated film products generally last longer (often several years), depending on exposure.
If I treated the window but strikes moved to a nearby section, what should I check?
Look for untreated neighboring panes and also for secondary reflection hazards like glass fences, greenhouse panels, or adjacent structures that redirect flight paths. Birds may stop hitting one pane and then collide with the next glass surface that still behaves like a flyway.
When should I hire a professional for bird-window strike prevention?
Hire help for curtain walls, large commercial facades, aviation-adjacent sites, or any situation where working at height is required. Professionals can also propose permanent architectural retrofits (for example ceramic frit or UV-patterned glass) when DIY solutions would be too temporary or impractical.
Next Article
What Is Already Being Done to Prevent Bird Collisions
Learn what’s already used to prevent bird collisions, from airport safeguards to building glass and humane deterrents, p