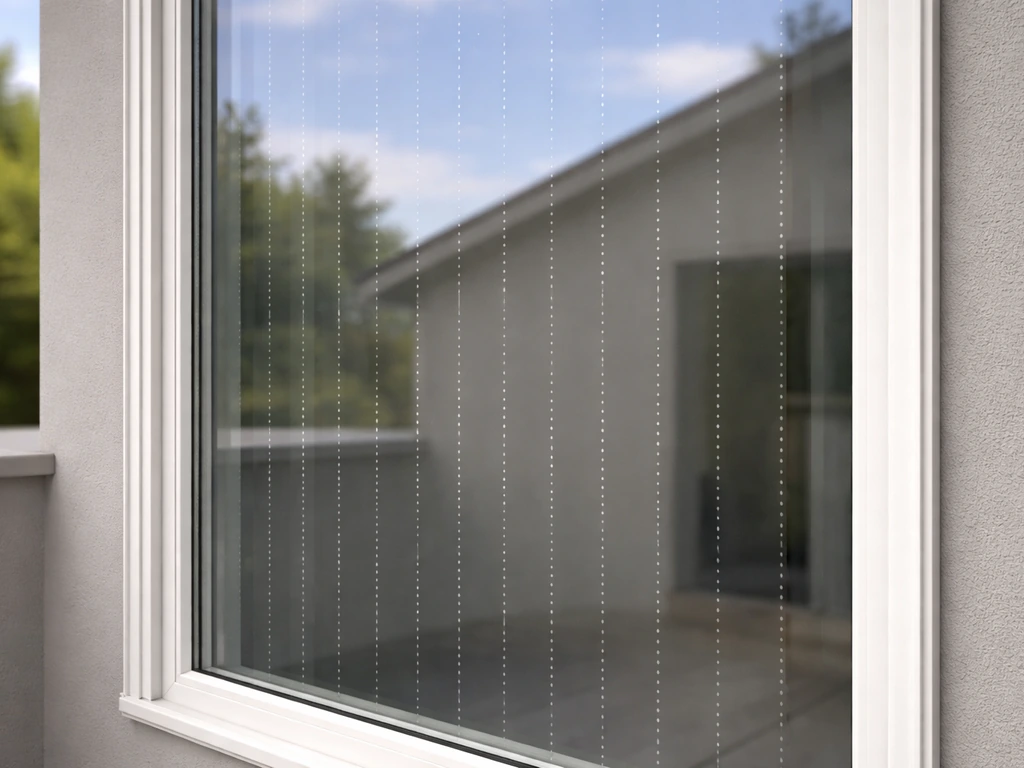
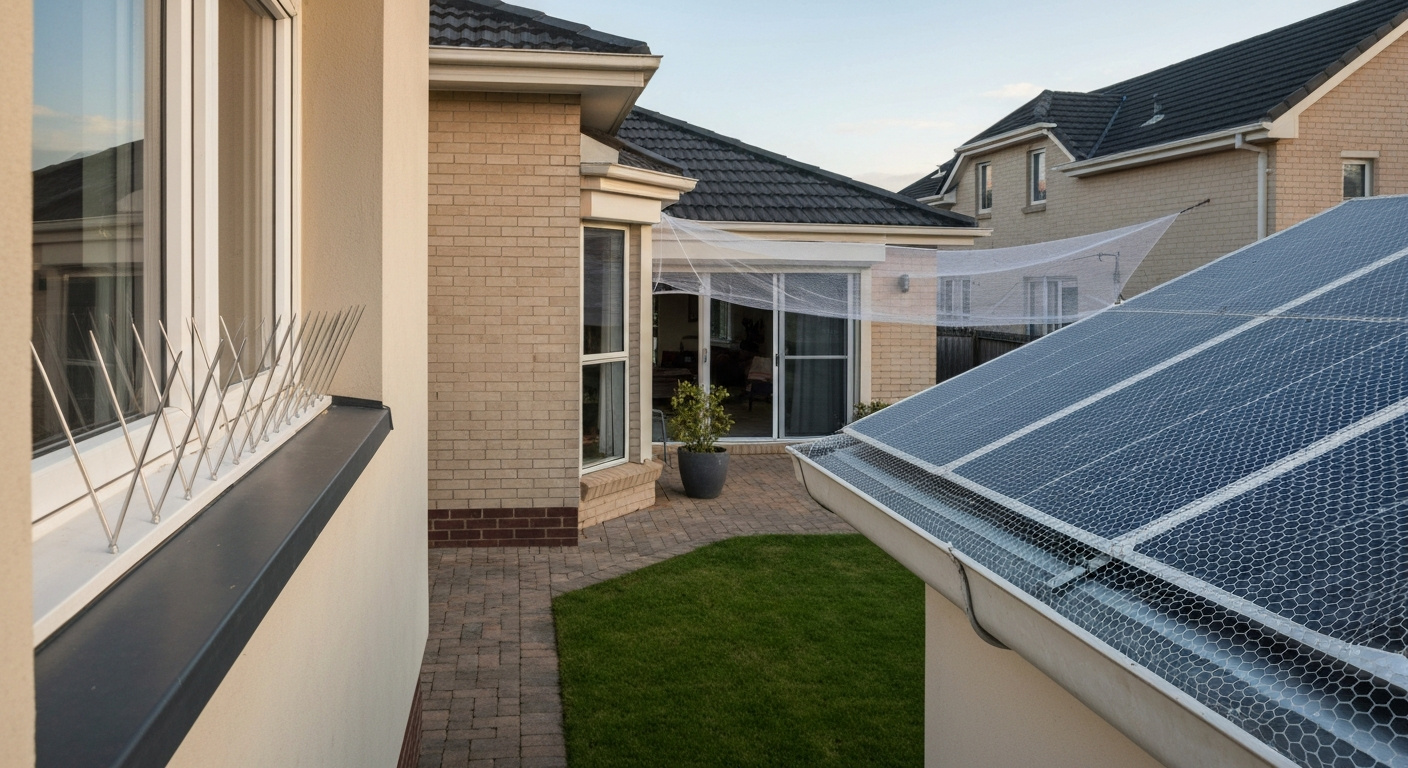
For most houses, physical exclusion, which means properly installed netting, spikes, or wire systems, is the most effective and durable bird deterrent you can use. Sensory options like reflective tape or predator decoys can help in low-pressure situations, but birds habituate to them quickly. Chemical repellents have limited residual life. The best approach almost always starts with blocking access rather than trying to scare birds away, and the right product depends heavily on which birds you have, where they are roosting, and how much surface area you need to cover.
Best Bird Deterrent for House: Top Humane Solutions with Installation Guide

Marcus Weatherby
21 Jul 2026
Who this guide is for and how to use it
This guide is written for homeowners, renters, property managers, and DIYers dealing with nuisance birds around a residential property. Whether you have pigeons camping on your roof ridge, sparrows nesting under solar panels, or starlings dive-bombing your patio, the goal here is to help you choose the right deterrent, install it correctly, and keep it working. I've organized the guide so you can jump straight to your scenario, or read through the full taxonomy if you want to understand how different product types compare before spending money.
One thing to understand before you start: in the United States, most native birds are protected under the Migratory Bird Treaty Act (16 U.S.C. §§ 703-712). You cannot legally remove or destroy active nests, eggs, or nestlings without a federal permit. See Bird nests | U.S. Fish & Wildlife Service for federal guidance on protections, exceptions, and permitting. The focus here is on deterrence and exclusion, not removal, and everything covered in this guide is designed to work within those legal boundaries. If you already have an active nest in a problem location, the right move is to wait until it is vacated, then immediately install deterrents so the spot does not get reused.
Quick top picks by scenario
If you just need a fast recommendation before diving into the details, here is what I'd suggest for the most common residential situations. These are starting points, not one-size-fits-all solutions. Scroll to the relevant scenario section later in the article for full installation and maintenance guidance.
| Scenario | Best Primary Deterrent | Backup / Supplement |
|---|---|---|
| Patios and balconies | Tensioned bird netting across the opening | Reflective tape or predator decoys for light pressure |
| Windows and sills | Stainless steel anti-perch spikes on sill ledge | Window films or reflective strips for strike prevention |
| Roofs and ridge lines | Stainless steel spikes or parallel wire system | Slope/ledge inserts for enclosed gutters |
| Gutters | Gutter guards with fine mesh plus eave spikes | Foam gutter fill for enclosed sections |
| Solar panels | Purpose-built solar panel mesh kit (clip-on) | Perimeter spikes on panel frame edges |
| Gardens | Row cover netting or poly netting over beds | Visual reflectors as a short-term supplement |
| Trees (fruit-bearing) | Drape netting over canopy at fruiting time | Audible deterrents moved regularly to slow habituation |
| Fruit / blueberries | Fine mesh netting (19 mm or smaller) over rows | Methyl anthranilate spray (check label for crop compatibility) |
| Parked cars | Car cover or carport netting | Reflective tape or predator decoys under nearby roosting areas |
Types of bird deterrents explained
Understanding what each category actually does, and where it falls short, saves you money and frustration. Here is how the main types break down.
Physical barriers: netting, spikes, and wire
Physical exclusion is consistently rated by university extension programs and pest management professionals as the most effective and longest-lasting humane method. The principle is simple: if birds cannot physically land or access a space, they move on. There is no habituation because there is nothing to habituate to.
Bird netting works by fully enclosing or covering a target area. Mesh size matters: use 19 mm (3/4 inch) mesh for general bird exclusion, larger mesh for pigeons and gulls, and smaller mesh for sparrows and starlings. The netting must be installed taut and without gaps, because loose or sagging netting can trap birds, which creates both a welfare problem and a maintenance headache. For high-value crops like blueberries, properly tensioned netting provides near-complete exclusion and is strongly preferred over chemical options. See our guide on the best bird deterrent for blueberries for crop-specific recommendations on mesh types, tensioning, and timing.
Anti-perch spikes prevent birds from landing on narrow ledges, gutters, sills, and roof ridges. Stainless steel spikes significantly outlast plastic versions in outdoor UV and weather exposure. Plastic spike strips can become brittle and collapse within two to three years; stainless steel systems can last a decade or more with minimal maintenance. Spikes need to cover the full width of a ledge with no gaps, because birds will simply use the uncovered section.
Parallel tensioned wire and pin-and-wire systems (also called bird wire) are a lower-profile alternative to spikes. A series of stainless steel wires mounted on spring-loaded pins creates an unstable landing surface. These work well on wider ledges where spikes would look too aggressive and are commonly used on heritage buildings and residential fascias.
Slope and ledge products, including plastic angled inserts that attach to horizontal ledges, remove the flat landing area entirely. These are simpler than spikes for some gutter applications and work well on enclosed roof voids.
Sensory deterrents: visual and acoustic
Sensory deterrents work by startling or threatening birds through sight or sound. They are generally cheaper and easier to install than physical barriers, but they come with a significant limitation: habituation. Birds, especially intelligent species like crows and pigeons, learn quickly that a flapping owl or spinning reflector poses no real threat and stop responding to it, sometimes within days.
Visual deterrents include reflective tape, mirror-finish spinning rods, predator eye balloons, and moving predator decoys. Field studies show these produce measurable short-term reductions in bird activity, particularly for foraging birds in open areas. Effectiveness is extended by rotating the location and type of deterrent regularly, combining multiple visual elements, and pairing them with physical exclusion. On their own, static decoys are among the least reliable long-term solutions.
Audible acoustic systems, including propane exploders, broadcast alarm calls, and recorded predator sounds, can disperse flocks in the short term. However, systematic reviews and airport bird control evaluations confirm that birds habituate rapidly, especially when the sounds are predictable and unvaried. For residential use, the bigger problem is usually neighbor relations and local noise ordinances. Acoustic deterrents are more practical in rural or low-density settings and are most effective when the sound pattern is varied and combined with other methods.
Ultrasonic devices deserve special mention because they are widely marketed but poorly supported by evidence. Multiple independent reviews, including research from the University of Nebraska-Lincoln, conclude that high-frequency ultrasonic devices generally lack repeatable, long-term efficacy for outdoor bird control. Many birds simply do not perceive ultrasonic frequencies at the levels these consumer devices produce, and those that do habituate quickly. I would not recommend spending money on ultrasonic-only solutions for residential use.
Chemical repellents
The most widely used chemical bird repellent for residential and agricultural use is methyl anthranilate (MA), a grape-scented compound derived from a food-flavoring source. It is EPA-registered as an avian repellent and works primarily by irritating birds' trigeminal nerve systems when they ingest or inhale it. Field trials show measurable reductions in bird foraging damage in open agricultural settings, particularly for species like starlings and blackbirds, but effectiveness is inconsistent and residual life is short. You typically need to reapply frequently, especially after rain, and you need to start before birds establish a feeding pattern at the site.
An important caution if you are considering MA for fruit crops: extension and crop production guides warn that some MA formulations can cause foliar burn on certain plants, notably blueberries. Always check the product label for crop compatibility and state-specific restrictions before applying.
Polybutene sticky gels are sometimes applied to ledges as a tactile deterrent. University of Basel research on feral pigeons found gels produce some short-term deterrence but do not provide complete or reliable long-term control. They can also trap non-target small birds, which raises animal welfare concerns, and they collect dirt, feathers, and debris quickly, requiring regular reapplication. Gels are generally a supplementary tool, not a primary solution.
Exclusion and habitat modification
Beyond physical products, changing the environment itself can reduce bird pressure significantly. Removing food sources (open compost, bird feeders in problem zones, spilled seed) eliminates the reason birds visit in the first place. Blocking access to nesting voids under eaves, in roof gaps, and around solar panel gaps denies shelter. Trimming overhanging branches that give birds a roosting platform near your roof reduces the number of birds that end up on the structure. These habitat changes are often free or very low cost and amplify the effectiveness of any product-based deterrent you add.
Which deterrents work on which birds
Not all birds respond equally to the same deterrent. Matching your approach to the species causing the problem saves time and money. Here is a practical breakdown of the most common residential nuisance species.
| Species | Main Problem | Most Effective Deterrent | Notes |
|---|---|---|---|
| Pigeons (Rock dove) | Roosting, nesting on ledges, roofs, gutters | Spikes, bird wire, netting | Highly susceptible to physical exclusion; will persist until every landing point is blocked |
| Starlings | Nesting in voids, fouling, crop damage | Void netting, taste repellents (MA) | MA shows some variable effectiveness; nesting voids must be physically sealed |
| House sparrows | Nesting under eaves, solar panels | Fine mesh netting, eave blocking | Very small body; use 19 mm or smaller mesh; persistent nesters |
| Crows and ravens | Scavenging, noise, crop raiding | Habitat modification, varied acoustic methods | Highly intelligent; habituate rapidly to visual/acoustic deterrents; multi-modal tactics required |
| Gulls | Roof nesting, fouling, aggression during nesting | Full roof netting, parallel wire systems | Aggressive at nest; exclusion before nesting season is critical; check local protected species status |
| Woodpeckers | Drumming on siding, excavating nest holes | Hardware cloth over affected siding, foam sealants for holes | Visual deterrents can help short-term near drumming sites; physical cover is most reliable |
| Blackbirds and grackles | Crop and garden damage, large roosting flocks | Netting over crops, varied acoustic methods, MA spray | MA shows some effectiveness for these species; flocks are large so multi-method approach needed |
For corvids (crows, ravens, and jays) in particular, any single deterrent will have a limited lifespan. These birds investigate, learn, and test new objects quickly. Research and practical reviews recommend site-specific trials and multi-modal approaches: combine a visual element with a physical modification and regular changes to the visual stimulus to maintain effect longer.
Windows and sills
Best deterrents for windows
Window sills create a narrow, slightly recessed ledge that pigeons and starlings find very attractive for perching. Anti-perch spikes are the primary fix for the sill itself. For the window surface, the problem is usually bird strikes (birds flying into glass) rather than perching, and the best solution there is breaking up the reflection with window films, decals, or closely spaced reflective strips on the outside of the glass. There is more detail on bird window strikes in the companion guide focused on windows specifically. For product recommendations and installation tips, see our guide to the best bird deterrent for windows.
Installing spikes on a window sill: step by step
- Clean the sill surface thoroughly with a wire brush and remove any old droppings, moss, or debris. This step is critical because adhesive mounts will not bond to a dirty or crumbling surface.
- Let the surface dry completely. On painted timber or masonry, give it at least 24 hours after cleaning.
- Measure the full sill width including any returns or recesses at the sides. Birds will use any uncovered section, so plan to cover 100% of the landing surface.
- Apply a bead of exterior-grade silicone adhesive or use the manufacturer's adhesive pads along the base of the spike strip. For high-wind or high-bird-pressure situations, use screws or masonry anchors as well as adhesive.
- Press spike strips firmly into place, butting them end to end without gaps. Trim the last strip to length with wire cutters or a hacksaw.
- For stainless steel strips, bend the strip slightly to match any curved or angled profile on the sill before installation.
- Leave adhesive to cure for 24-48 hours before the area is disturbed.
Maintenance and troubleshooting for sill spikes
Inspect spike strips twice a year. Look for strips that have lifted at one end (usually caused by thermal expansion or poor initial adhesion), gaps that have opened between strip sections, or debris accumulation between the spines that might create a flat landing area again. Plastic spikes should be replaced as soon as they show UV brittleness, typically within two to three years in most climates. Stainless steel strips rarely need replacement but may need re-adhesion at the base. If birds are still landing despite full spike coverage, check whether they have shifted to the window frame surround or lintel above, which will need its own strip.
Roofs, gutters, and eaves
Best deterrents for roofs and gutters
Roofs have multiple bird-attractive zones: the ridge line (for perching), gutters (for nesting material and fouling), flat roof sections or parapet ledges (for roosting), and open eave soffits (for nesting access). Each zone benefits from a slightly different product.
- Ridge lines: stainless steel spikes or parallel wire/pin systems. Wire systems are lower profile and often preferred on visible roof ridges.
- Gutters: gutter guards with fine mesh screen prevent nesting debris accumulation; add spikes along the gutter edge for perching prevention.
- Eave soffits and fascia gaps: block with heavy-gauge hardware cloth (galvanized or stainless steel) cut to fit and screwed into place. Do not use foam alone as birds can peck through it.
- Parapet and flat roof ledges: spikes along the full ledge width or slope inserts. For large flat roof areas with flock roosting, professional full-roof netting may be the only complete solution.
Installing a roof ridge wire system: step by step
- From the safety of a properly set-up ladder or scaffold, inspect the full ridge length and identify all perching zones. Note any ridge tile mortar gaps that also need sealing.
- Clean the ridge tiles and remove all fouling before installation. Dried bird droppings are a health hazard; wear an FFP3 dust mask and disposable gloves.
- Mark post positions at the intervals specified by your wire system kit, typically every 1.0-1.5 meters (3-5 feet).
- Fix posts using appropriate anchors for your roof material (adhesive pads for concrete or clay tiles, mechanical fixings for ridge boards on timber-framed roofs). On older mortar ridges, use a two-part exterior epoxy adhesive.
- Thread the stainless steel wire through or clip it onto each post following the kit instructions. The wire should be tensioned so it moves and bounces when a bird attempts to land, creating an unstable surface.
- Seal any exposed mortar gaps in ridge tiles with exterior flexible mortar or sealant to remove nesting access alongside the wire installation.
- Inspect from ground level after installation to confirm coverage is complete along the full ridge.
Maintenance and troubleshooting for roofs and gutters
Inspect roof deterrents after major storms, as wind can lift adhesive-mounted posts or shift wire tension. Gutters should be cleared of debris each spring and autumn regardless of deterrents, since leaves and seeds can accumulate even through mesh guards and provide nesting material. If pigeons are still roosting despite ridge spikes, check parapet walls, chimney pots, and aerial or satellite dish mountings, which are all secondary perch points that attract birds once the ridge is blocked. Each new perch point needs its own treatment.
Solar panels
Why solar panels attract birds and what works
The gap between a solar panel and the roof surface is an ideal nesting cavity for sparrows and starlings: protected from rain, elevated, and warm from panel heat. A colony nesting under panels can cause wiring damage, clog ventilation, and void manufacturer warranties if nesting material reaches inverters or junction boxes. The only reliable solution is sealing the perimeter completely.
Purpose-built solar panel bird mesh kits are the standard fix. These consist of a UV-stabilized PVC-coated wire mesh that clips or fastens around the perimeter of the panel array, sitting between the panel edge and the roof surface and blocking the gap entirely. Unlike screwing into panels or frames directly, these clip-on systems avoid penetrating the panel frame or mounting hardware, which is important for preserving roof and panel warranties. Some premium kits include a powder-coated aluminium trim for a cleaner finish.
Installing solar panel mesh: step by step
- Before starting, check with your solar panel installer or manufacturer about any warranty conditions related to roof access or modifications. Most clip-on mesh systems are warranty-safe, but confirm this before purchase.
- Inspect under the panels first (from the roof edge or with a camera on an extendable pole) to confirm no active nesting is present. If birds are actively nesting, wait until the nest is vacated before installing.
- Measure the full perimeter of the panel array, accounting for each panel edge that borders a gap to the roof surface.
- Cut the mesh to length with wire cutters. Most kits include coiled mesh rolls and fixing clips. Avoid cutting cables or power connectors under the panels.
- Clip the mesh to the panel frame at regular intervals, typically every 200-300 mm (8-12 inches), starting at one corner and working around the perimeter.
- Ensure the bottom edge of the mesh sits flat against or slightly into the roof surface so there is no gap a sparrow could squeeze through. Sparrows can enter gaps as small as 25 mm (1 inch).
- For corners and around mounting brackets, use additional clips or pre-formed corner pieces if supplied with the kit.
Maintenance and troubleshooting for solar panel mesh
Check the mesh once a year, ideally in late winter before the spring nesting season. Look for clips that have worked loose (common after thermal expansion cycles), sections where the mesh has lifted away from the roof surface, and any evidence of mesh that has been pushed aside or chewed (rare, but woodpeckers and squirrels can disturb it). If sparrows are still getting in, probe the perimeter with a gloved hand to find the gap. Even one 30 mm breach in an otherwise complete installation is enough for a determined sparrow. Replace any corroded or broken clips immediately.
Patios, balconies, and outdoor living areas
Best deterrents for outdoor living spaces
Patios and balconies present a different challenge from roofs and sills. The goal is usually keeping the entire overhead or perimeter zone clear without turning your outdoor space into a fortress. For enclosed or semi-enclosed balconies, tensioned netting across the open face is the most complete solution. For open patios, the options depend on how much bird pressure you are dealing with.
- Light pressure (occasional visiting birds): rotating visual deterrents like reflective spiral rods or iridescent tape strips moved to a new position every few days can reduce activity at low cost.
- Moderate pressure (regular perching on railings or overhead beams): spikes on railings and beams, combined with hanging reflective deterrents.
- Heavy pressure (large flocks, regular fouling of furniture and flooring): overhead tensioned netting is the only reliable solution. For a covered pergola or patio, netting can be suspended from the existing structure at relatively low cost.
Setting up patio netting: practical steps
- Measure the full opening to be covered, including any height variation in the surrounding structure.
- Choose a UV-stabilized polyethylene or polypropylene netting with a mesh size appropriate for your target species. A 50 mm (2-inch) mesh works well for pigeons and gulls; use 19 mm or finer for starlings and sparrows.
- Install attachment points (screw eyes or staples into timber, masonry anchors for walls) around the full perimeter of the area to be covered.
- Run a perimeter wire or rope through the attachment points to create a tensioned frame. This keeps the netting taut and prevents sagging under its own weight or debris accumulation.
- Attach the netting to the perimeter frame, tensioning as you go. The netting should be firm with no loose sections that could trap a bird.
- If the netting needs to be accessed (for example, over a BBQ area), install it with laced or clipped edges on one section so it can be folded back when needed.
- For balconies in apartment buildings, check your lease or building management policy before installing any permanent fixings to the structure.
Keeping your outdoor space comfortable and bird-safe
Netting is only bird-safe when it is properly tensioned. Loose netting is a bird entanglement risk, so inspect it monthly and re-tension any sagging sections immediately. Clear fallen leaves and debris from the netting surface before it becomes heavy enough to pull the system out of tension. For visual deterrents, the key maintenance rule is rotation: move the position and type of deterrent every week or two to prevent habituation. If you have a bird feeder on the patio, consider whether it is drawing more birds than you want. Relocating or removing feeders from problem zones often reduces overall bird pressure more than any deterrent product.
Cost and durability at a glance
| Deterrent Type | Typical DIY Cost | Expected Lifespan | Maintenance Level |
|---|---|---|---|
| Stainless steel spikes (per linear meter) | $8-$20 | 10+ years | Low (annual inspection) |
| Plastic spikes (per linear meter) | $3-$8 | 2-4 years | Medium (replace when brittle) |
| Bird wire/pin system (per linear meter) | $15-$35 | 10+ years | Low (re-tension after storms) |
| Polyethylene netting (per sq meter) | $2-$6 | 5-10 years (UV-stabilized) | Medium (clear debris, re-tension) |
| Solar panel mesh kit (full array) | $150-$400 | 7-10 years | Low (annual clip inspection) |
| Reflective tape / visual deterrents | $5-$20 | 1-2 seasons | High (rotation required) |
| Methyl anthranilate spray | $20-$60 per season | Days to weeks per application | High (frequent reapplication) |
| Sticky gel (per tube) | $10-$25 | 3-6 months | High (reapply, remove debris) |
Legal considerations and protected species
It bears repeating: under the Migratory Bird Treaty Act, you cannot legally disturb, move, or destroy an active nest containing eggs or chicks without a federal permit. This applies to almost all native North American birds. The USFWS Migratory Bird Permitting Handbook (updated January 2025) outlines the permit types available and when nest removal may be authorized, but obtaining authorization takes time and is not guaranteed for common nuisance species. The practical solution is to install deterrents in the off-season, before birds arrive to nest, rather than after. If you find an active nest in a problem location, consult the handbook and your regional USFWS office before taking any action.
Laser hazing, sometimes marketed for residential use, carries additional legal and safety considerations. Research on high-power laser exposure in birds raises concerns about avian visual impacts, and human eye-safety regulations require professional protocols for any high-power laser use. A study titled 'Effects of a high‑power laser eye exposure on avian foraging behaviour: implications for the safety of laser bird deterrents (PubMed)' reports laser hazing can disperse some species at night but highlights avian visual impacts and human eye‑safety risks, advising high‑power lasers be used only under professional protocols. Residential laser deterrent devices sold at consumer power levels are unlikely to cause these issues, but always check the product's safety classification and follow all label and safety instructions.
DIY vs calling a professional
Most of the deterrents covered in this guide are genuinely DIY-friendly. Spike strips, gutter guards, solar panel mesh kits, and basic netting installs are achievable for any competent DIYer with the right materials and a safe way to access the roof or elevated areas. Where professional installation is worth considering:
- Large roof areas requiring full coverage netting, where scaffold access and precision tensioning are needed
- Multi-storey buildings where working at height creates serious safety risks
- Commercial or rental properties where documentation of a compliant, professionally installed system may be required by an insurer or local authority
- Active gull or pigeon colonies at scale, where a survey and integrated pest management plan will be more cost-effective than repeated DIY attempts
- Any situation involving an active nest where a USFWS permit may be required
A professional bird control installer will typically survey the property, identify all entry and perching points, and propose a multi-element solution. This can cost significantly more upfront but often resolves the problem more completely than repeated partial DIY installs. If you have tried two or more DIY approaches without lasting results, a professional assessment is usually the more economical next step.
Seasonal prevention calendar
Timing matters as much as product choice. Installing deterrents after birds have already established a nesting site is harder and less effective than acting preventively. Here is a simple seasonal approach for most of the continental United States.
| Season | Key Action |
|---|---|
| Late winter (January-February) | Inspect all deterrents, replace worn or damaged sections, re-tension loose netting and wire systems before the spring nesting season |
| Early spring (March-April) | Install any new deterrents or close newly identified gaps before migratory birds return and before resident species (sparrows, pigeons) start nest-building |
| Late spring / summer (May-August) | Monitor for any breaches or new perching activity; do not disturb active nests; note problem areas for post-season action |
| Autumn (September-November) | Clear gutter guards and netting of leaf debris; inspect solar panel mesh clips after thermal cycling; treat any new perching areas before winter roosting begins |
| Winter (December-February) | Assess overall effectiveness of the season; plan upgrades or extensions to deterrent coverage for the following spring |
A note on gardens, trees, fruit, and cars
This guide focuses on the house structure and immediate outdoor living areas. If your bird problem is primarily in your garden beds, fruit trees, or blueberry rows, the deterrent principles are the same but the installation specifics differ, particularly around crop-compatible netting and chemical repellent use. For targeted advice on protecting trees specifically, see our guide on the best bird deterrent for trees. Similarly, if birds are fouling parked cars, the root problem is usually a roosting spot directly above the parking area, and the fix is deterring birds from that roosting point rather than protecting the car itself, though a car cover is a fast interim solution. These topics each have their own detailed coverage elsewhere on this site. For product-specific recommendations and quick installation tips, see our guide on the best bird deterrent for cars. For garden-specific recommendations, see our guide on the best bird deterrent for garden for crop-compatible netting and fruit-tree solutions.
FAQ
What are the top bird deterrents for different residential scenarios (patios, windows, roofs, gutters, solar panels, gardens, trees, fruit, parked cars)?
Top, scenario-specific recommendations: - Patios & balconies: bird netting or removable screening; anti‑perch spikes on narrow rails; tensioned wire (sparrow/finch areas). - Windows & sills: transparent suction‑cup netting or acrylic bird‑glass film to prevent collisions; anti‑perch spikes on exterior sills. - Roofs, eaves & gutters: stainless‑steel anti‑perch spikes or angled strips on ledges; gutter guards and bird‑proof mesh around downspouts; access exclusion with custom cut netting for soffits/attics. - Solar panels: panel-to-panel wire systems or stainless‑steel perimeter mesh to block under‑panel roosting; raised-edge flashing or professional under‑panel skirts. - Gardens & fruit (berries, small trees): bird netting with species‑appropriate mesh and full enclosure; temporary frame hoops with netting for backyard patches. - Trees & large shrubs: visual deterrents (rotating reflectors) combined with nearby netted fruit; pruning to reduce low roosting branches. - Parked cars: reflective tape, car covers, or temporary overhead netting/cover; avoid leaving food/seed sources nearby. Prioritize physical exclusion (netting, spikes, screening) as the most durable and humane first choice.
What is the taxonomy of bird deterrent types and when is each best used?
Major types and best uses: - Physical barriers: spikes, netting, guards, mesh, wires. Best for long‑term exclusion of perching/roosting birds and protecting high‑value items (gutters, ledges, solar panels, fruit). - Sensory visual: reflective tape, pinwheels, predator decoys, eye balloons, lasers. Best for short‑term reduction and as part of multi‑modal programs; rotate/animate to reduce habituation. - Acoustic/sonic: propane exploders, distress/prop predator calls, ultrasonic devices. Audible acoustic tools can disperse flocks short‑term but often cause rapid habituation and neighborhood noise issues; ultrasonic devices generally lack reliable outdoor efficacy. - Chemical/taste repellents: methyl anthranilate sprays, sticky gels. Useful as short‑term, targeted measures (field crops, limited outdoor areas) and often as an adjunct to exclusion; note crop plant compatibility and weather/UV breakdown. Use integrated approaches—combine exclusion with sensory and timely repellents for best results.
How effective are these deterrents for different species (pigeons, starlings, sparrows, gulls, crows, geese)?
Species response summary: - Pigeons & large perching birds: highly susceptible to physical exclusion (spikes, netting, wires). Sticky gels may help short‑term but often insufficient alone. - Starlings & blackbirds: variable response to chemical repellents (anthranilates) and visual devices; netting/exclusion recommended for crops/fruit. - Sparrows/finches: small mesh netting or screening required; spikes alone may be less effective where small birds squeeze through. - Gulls & waterfowl (including some geese): exclusion of feeding areas and habitat modification (remove food, cover trash) effective; lasers (night hazing) and trained dogs used in larger sites; legal and safety constraints apply. - Corvids (crows, ravens): highly adaptable and quick to habituate to visual/acoustic stimuli; exclusion and removal of attractants (food/waste) are often most effective. Tailor solution to species size, behavior and legal protections; when in doubt, observe local species before selecting tactics.
What are the safety, legal and humane considerations I must follow before removing nests or excluding birds?
Key points: - In the U.S., most native migratory birds, their eggs and active nests are protected under the Migratory Bird Treaty Act (MBTA); removal or destruction of active nests is unlawful without a permit. - Consult federal/local wildlife agencies or permitting guidance before disturbing active nests; some exceptions and permits exist for urgent safety or professional removal. - Use humane, non‑lethal methods (exclusion, habitat modification) as first choice. - Avoid repellents or tactics that can injure birds (high‑power lasers without training, improperly installed netting that can trap birds). - Comply with local ordinances (noise, lasers, fireworks) and homeowner association rules. When handling nests or trapped birds, contact licensed wildlife rehabilitators or professionals.
What are step‑by‑step installation basics for common deterrents (netting, spikes, wires, repellent sprays)?
Basic installation steps: - Netting (gardens, patios, fruit): measure area; choose appropriate mesh size; build or buy a frame/support (hoops or poles); drape netting tautly with no gaps; anchor edges to ground or structure; check for and quickly free any trapped wildlife. - Anti‑perch spikes (ledges, gutters): choose stainless‑steel spikes for durability; clean surface; use adhesive or screws as manufacturer directs; space and overlap sections so no gaps remain. - Tensioned wire/flight diverters (rails, sills): mount anchors at fixed spacing; thread thin stainless‑steel wire or monofilament under tension ~2–3 cm above the surface to prevent perching. - Chemical repellents (methyl anthranilate sprays): follow label instructions; perform spot tests on plants for foliar sensitivity; reapply per label frequency and after rain; avoid use on plants noted as sensitive. For all installs: follow product instructions, wear PPE as required, maintain access for maintenance, and ensure installations do not create hazards for people or non‑target wildlife.
How do I choose mesh size and materials for bird netting?
Guidelines: - Match mesh to target species: small passerines (sparrows, finches) require finer mesh (~12–19 mm or smaller); pigeons and larger birds can be excluded with larger mesh (≥19–50 mm). - Use UV‑stabilized, knotted or knotless polyethylene or polypropylene for durability; premium products offer UV resistance and rot resistance. - Make netting taut and support it with frames or lines to avoid sagging (sagging traps birds). - Use heavy‑duty attachment points and secure edges to prevent birds squeezing in. If protecting fruit, ensure netting is easy to remove for harvest and inspect regularly for tears.
Next Article
Best Bird Deterrent for Windows: What to Buy and How
Choose and install the best bird deterrent for windows with physical, visual, sonic, and chemical options plus fixes.