| Porch situation | Best first pick | Backup/combine with |
|---|
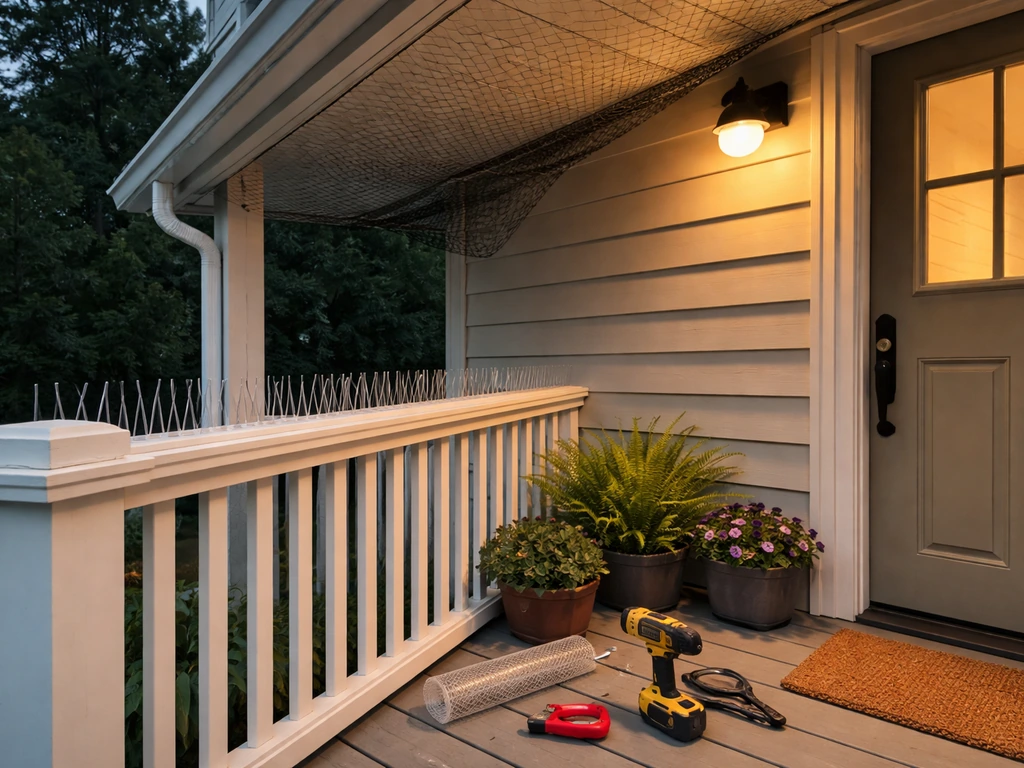
| Birds roosting on rails or ledges | Stainless steel spikes (full coverage, no gaps) | Reflective tape or spinning decoy nearby |
| Birds nesting under eaves or ceiling | Bird netting stretched over the opening | Seal gaps and block entry points permanently |
| Birds landing on steps or flat surfaces | Gel repellent or track-style spikes | Remove food/water sources first |
| Birds near door overhangs | Physical barrier (netting or wire) | Ultrasonic unit mounted at entry |
| Birds attracted to plants or feeders | Remove/relocate the attractant | Visual deterrent on the porch perimeter |
If you only do one thing today, start by removing whatever is drawing the birds in. After that, physical barriers like spikes or netting almost always outperform sensory options over the long term, especially for persistent roosting or nesting problems. For the best results on a roof or eaves, focus on excluding birds with spikes or properly tensioned netting rather than relying on deterrents that birds can ignore physical barriers like spikes or netting.
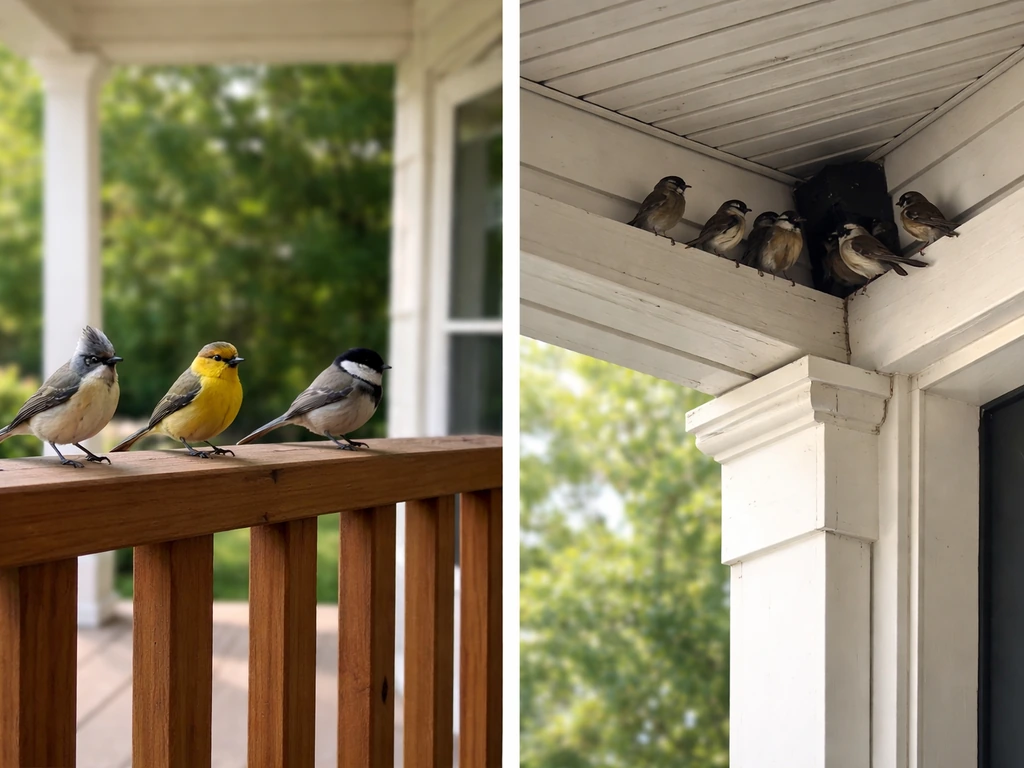
Birds don't show up on your porch randomly. They're there because something is rewarding them: food, water, shelter from wind or predators, or a flat warm surface to roost on. The Houston Humane Society puts it plainly: the first step with birds on a porch is moving or removing potential food sources. That means pet food left outside, birdseed that falls under feeders, water dishes, and even dense potted plants that offer cover.
Spend five minutes walking around your porch and asking: what is the bird actually getting here? If it's food, the deterrent comes second. If it's a sheltered ledge or beam with nothing edible around, you're dealing with a roosting problem and physical exclusion is going to do the most work.
Also note which surfaces they're using. Rails and handrails are common roost spots. Ceiling beams or overhangs attract birds looking to nest. Steps and flat decking are usually landing points near a food source. Each surface calls for a slightly different fix, which is why a single product rarely solves every porch bird problem on its own.
Physical deterrents: the most reliable long-term fix
Spikes for rails, ledges, and beams
Bird spikes are the go-to for any flat surface where birds roost or loaf. They work by making landing uncomfortable, not by harming the bird. The most important installation rule: cover the entire run with no gaps. Bird Barrier's Dura-Spike documentation is specific about this: uneven spacing or leaving gaps at the ends of a section gives birds exactly the landing spot they need. Follow the manufacturer's spacing diagram, butt sections end to end, and don't skip the corners or the last few inches of a rail.
For porch rails, measure the full length and order accordingly. Polycarbonate base strips work on painted wood and metal without looking industrial. Stainless steel spike strips are more durable and better for exposed outdoor conditions. Use the adhesive or screws specified by the manufacturer; adhesive alone tends to fail on painted or rough wood surfaces over time.
Netting for eaves, overhangs, and open ceilings
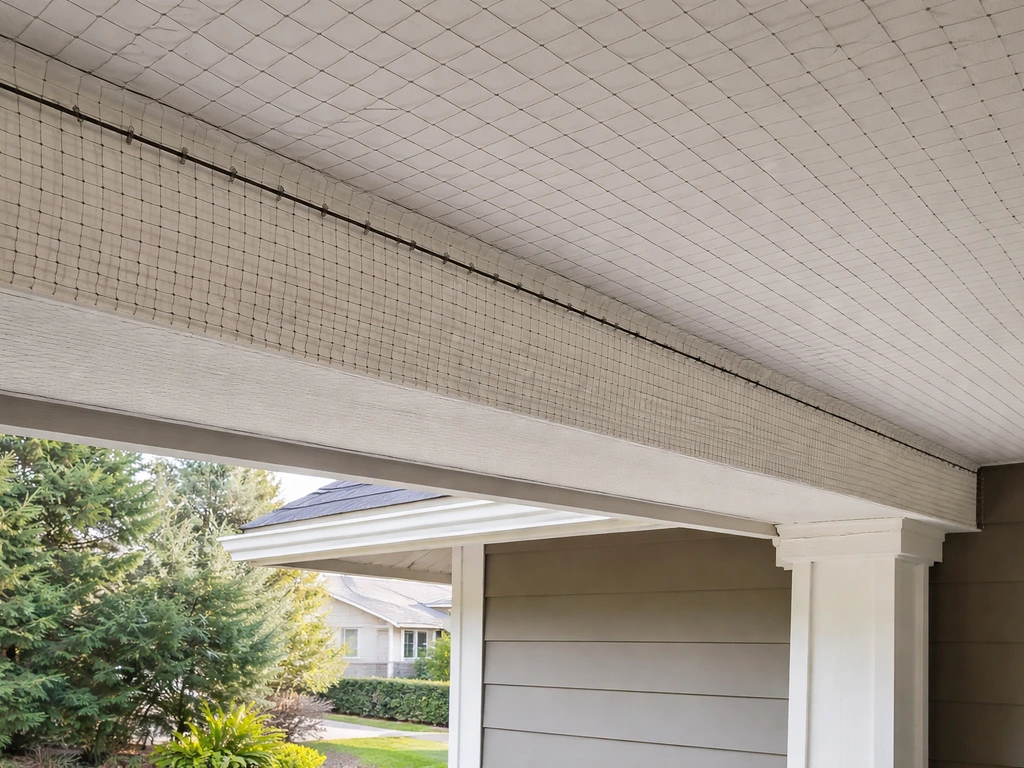
If birds are getting into the space under your eaves, behind ceiling beams, or tucking into a covered porch ceiling, netting is the right tool. It physically blocks access to the space rather than just making surfaces uncomfortable. Bird netting is rated by mesh size: 3/4 inch mesh stops most small songbirds and starlings, 1-1/8 inch works for pigeons and larger birds.
The key to netting working is tension. Bird Barrier's StealthNet installation instructions are clear: if cable tension is too loose, a gap forms between the net and the attachment point, and birds get through. Use turnbuckles to tighten the perimeter cable until no gap larger than the mesh size remains. For a porch ceiling, anchor the net to the fascia board and the wall, and check tension after the first rain since hardware can shift.
One real-world caution worth noting: netting installed loosely or over an uneven surface can become a roosting platform itself. The Minnesota DNR also notes that when exclusion netting is installed over rooftops, gulls have sometimes nested on top of the netting, meaning netting can be ineffective if birds can use the net as a surface blank" rel="noopener noreferrer">exclusion netting can be ineffective if birds can use the net as a surface. The blank" rel="noopener noreferrer">Minnesota DNR documented this with gulls nesting on top of improperly hung netting over rooftops. On a porch, the fix is simple: keep the net tight and flush to the surface, with no sag where a bird could settle. For a roof top bird deterrent, the key is the same: keep barriers tight, flush, and covering every possible landing spot.
Wire systems and track systems
For open railings or architectural ledges where spikes would look out of place, a tension wire or track system (like Bird Barrier's Daddi Long Legs-style wire or post-and-wire setups) creates an unstable landing zone without the visual bulk of spikes. These work best on wide flat ledges. They're less practical for rounded rails and require more precise installation to stay effective.
Sealing entry points and gaps
If birds are actually getting inside a covered porch, soffit area, or behind siding near the porch, sealing gaps is non-negotiable. Use hardware cloth (1/4 inch or 1/2 inch galvanized mesh) to close off openings, not foam or caulk alone. Foam degrades and birds can peck through it. Once you've confirmed no birds or nests are inside (check thoroughly before sealing), close the gap permanently.
Sensory deterrents: useful support, not a standalone fix
Visual deterrents
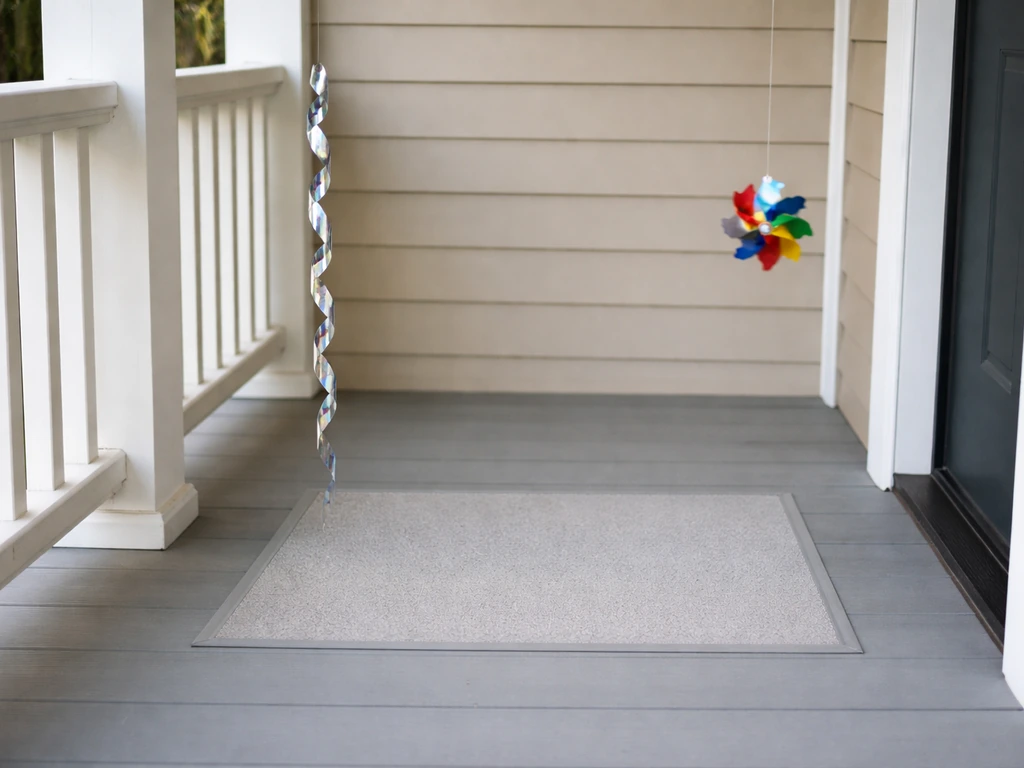
Reflective tape, spinning pinwheels, holographic scare tape, and predator decoys (owls, hawks) all work on the same principle: they make the area look or feel threatening to a bird. The honest assessment is that they work well as a short-term disruptor and as a complement to physical barriers, but birds habituate to static visual deterrents within days to weeks. A fake owl bolted in one spot will stop working faster than one that gets moved every few days.
The most consistently effective visual options on a porch are things that move unpredictably: reflective spiral rods that spin and flash in the wind, or motion-activated devices. Hang reflective tape in strips at the porch ceiling or overhang edge where it will catch wind. Combine it with a physical barrier on the primary roost surface and you get much better results than either alone.
Sound and ultrasonic devices
Ultrasonic devices emit high-frequency sound that birds (and supposedly not humans) find irritating. The evidence for ultrasonic bird deterrents is mixed at best. Most ornithologists and wildlife managers consider them unreliable for persistent bird problems, and the USDA APHIS Wildlife Services states directly that no single technique deters birds in every situation. That said, an ultrasonic unit mounted near a door overhang or a covered porch ceiling can add another layer of disruption, especially in the early days when birds are still evaluating the area.
Sonic devices that broadcast actual predator calls or distress calls are generally more effective than pure ultrasonic units. The limitation on a residential porch is noise: these devices bother neighbors and pets too. Use them sparingly, on a timer, and only in situations where the bird pressure genuinely justifies it. For most porch scenarios, visual deterrents plus physical barriers get you further with less hassle.
Chemical repellents: where they fit and how to use them safely
Bird repellent gels and sprays (the most common active ingredient is methyl anthranilate, derived from grape extract, or polybutylene gel) work by making surfaces tacky and unpleasant to land on, or by producing a chemical irritant that birds find aversive. They're a practical option for flat surfaces like steps, window ledges, or wide sills where spike strips aren't aesthetic or practical.
The limitations are real. Gel repellents degrade in UV light and need reapplication every 3 to 6 months depending on exposure. In dusty or dirty environments they collect debris and lose effectiveness faster. Methyl anthranilate sprays are safe around people and pets when applied as directed, but they're better suited to confined spaces (like a covered porch ceiling) than open areas where wind disperses them quickly.
Application tips: clean the surface thoroughly before applying any gel or repellent. Residue, dirt, or moisture reduces adhesion. Apply in a bead pattern roughly 1 inch wide, not a solid coat. For a porch rail or step edge, a single bead along the landing surface is enough. Keep gel products away from areas where pets could lick the surface. Most EPA-registered bird repellent gels are non-toxic, but it's worth checking the label for any plant-proximity warnings if you have potted plants on the porch.
Repellents work best as a bridge: use them while you're setting up a more permanent physical deterrent, or in spots where spikes or netting genuinely can't go. Don't rely on them as your primary long-term solution for a serious roosting problem.
Implementation plan: how to set this up and know it's working
Step-by-step setup
- Remove attractants first. Take in pet food, move or cover water sources, relocate bird feeders at least 30 feet from the porch, and trim any dense plantings birds are using for cover near the entrance.
- Identify the primary landing and roosting surfaces. Walk the porch and note every horizontal surface birds use: rails, ledge caps, beams, overhang edges, and ceiling junctions.
- Install physical barriers on those surfaces. Spikes on rails and ledges, netting over open ceiling/eave areas, gel repellent on steps or wide flat edges where spikes aren't practical. Cover the full run, no gaps.
- Add a visual deterrent layer. Hang 2 to 3 strips of reflective tape from the ceiling edge or overhang so they move in wind. Place a spinning pinwheel or predator decoy nearby, and commit to moving the decoy every 3 to 5 days.
- If door overhangs are a problem, mount an ultrasonic unit or motion-activated sprinkler pointed at the landing zone and set it on a timer to run during peak bird activity (typically early morning).
- Seal any gaps around the porch soffit, ceiling junction, or siding where birds could enter or nest.
Timing and what to expect
Physical barriers work from day one: birds land, find the surface unusable, and move on. Visual and sensory deterrents typically show results in 2 to 7 days for birds that aren't heavily habituated to the area. Birds that have nested or roosted on your porch for a full season may take longer to give up, and you'll need the physical barriers to hold firm even after the bird pressure appears to drop.
Plan to check the installation after the first week. Look for new droppings outside the protected zone (which tells you where birds have shifted), any gaps that have opened in netting or spike strips, and whether gel repellent has been disturbed or collected debris. Reapply or adjust accordingly.
How to verify it's working
- No fresh droppings on treated surfaces after 7 to 10 days
- No feathers, nesting material, or food debris accumulating in the treated zone
- Birds visibly landing and immediately leaving rather than settling
- No new nest-building activity under eaves or in ceiling corners
If you're still seeing activity after two weeks with physical barriers in place, the most likely cause is a gap in coverage. Go back and look at the ends of spike strips, the perimeter of any netting, and any surface you skipped. Birds are persistent and will find the one open spot.
When to call a professional
Most porch bird problems are solvable with the steps above. Consider calling a wildlife control professional if: you're dealing with a protected species (certain swallows, for example, are federally protected while nesting), the problem involves actual entry into the structure, or the bird pressure is severe enough that DIY barriers aren't holding. Porches share some challenges with decks, balconies, and patios, and the same escalation logic applies: start with removal and physical barriers, then layer in sensory deterrents, and bring in a pro only when the situation is beyond a straightforward exclusion job. Because balconies share the same bird landing and roosting behaviors as patios, the best bird deterrent approach is the same: remove attractants first, then install physical barriers for reliable long-term results. If you are dealing with the birds around a patio too, the best bird deterrent approach is the same: remove attractants first, then use physical barriers for reliable long-term results patios. For the overall best deterrent on a pool, start by removing anything that attracts birds and then use physical barriers designed to block landing and nesting best bird deterrent for pool.