The best bird deterrent for a roof is almost always a physical exclusion method: spikes along ledges and ridgelines for perching birds, or netting over larger open areas where birds are roosting or nesting. Everything else, including visual decoys, ultrasonic devices, and chemical repellents, works best as a supporting layer or a short-term fix while you set up something more permanent. That said, the right choice depends on which birds you have, what they are doing up there, and what your roof actually looks like. This guide will walk you through all of that.
Best Bird Deterrent for Roof: Choose the Right Fix Now

Marcus Weatherby
12 Apr 2026
Diagnose the bird problem on your roof first
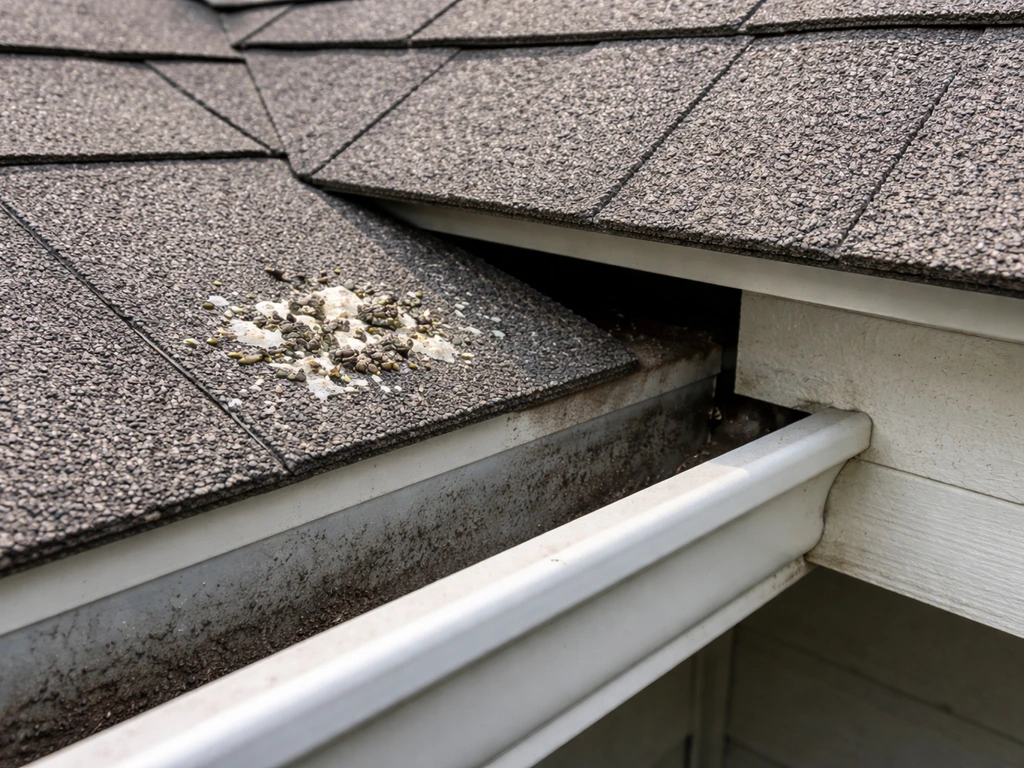
Before you buy anything, spend ten minutes figuring out what is actually happening. Look for droppings concentrated in one spot (that is almost always a roosting or perching location), scratch marks or feathers near soffits and vents, and any nesting material like straw, grass, or small twigs piling up in gutters or behind fascia boards. Where the debris collects tells you where the birds are getting comfortable.
The most common roof troublemakers are pigeons, European starlings, house sparrows, house finches, and barn swallows. Pigeons love flat ledges, parapets, and gutters, and they can nest year-round, so there is no real off-season with them. Starlings and sparrows squeeze through attic vents, soffit gaps, and damaged siding. Swallows build mud nests under eaves and overhangs. Each of these birds calls for a slightly different approach, so identifying which one you are dealing with saves you from wasting money on the wrong product.
Once you know what you are dealing with, ask three questions: Are they perching and leaving, roosting overnight, or actively nesting? Where exactly are they landing and entering? And have you already tried anything that failed? The answers shape your whole deterrent strategy.
Immediate fix vs long-term prevention: know what you are buying
Some deterrents give you fast results but fade within days or weeks. Others take more effort to install but last for years. Understanding this tradeoff upfront stops you from spending money twice.
| Deterrent Type | Speed of Effect | Longevity | Best For |
|---|---|---|---|
| Bird spikes (stainless steel) | Immediate | 20+ years | Pigeons/starlings on ledges, ridgelines, gutters |
| Bird netting | Immediate once installed | 10–15 years | Large open areas, roof valleys, solar panels |
| Hardware cloth / mesh screening | Immediate once installed | 10+ years | Vents, soffits, small gaps |
| Visual deterrents (reflective tape, decoys) | Fast (days) | Weeks to months before habituation | Low-pressure bird activity, short-term use |
| Ultrasonic / sonic devices | Fast initially | Days to weeks before habituation | Supplementary only, not standalone |
| Chemical repellents (methyl anthranilate) | Fast | Up to 7 days, washed off by rain | Open surfaces, temporary gap-filler between installs |
If you want a deterrent that keeps working without constant maintenance, physical exclusion is where your money belongs. If you need to buy yourself a few weeks while you plan a bigger install, a visual or chemical option can bridge the gap.
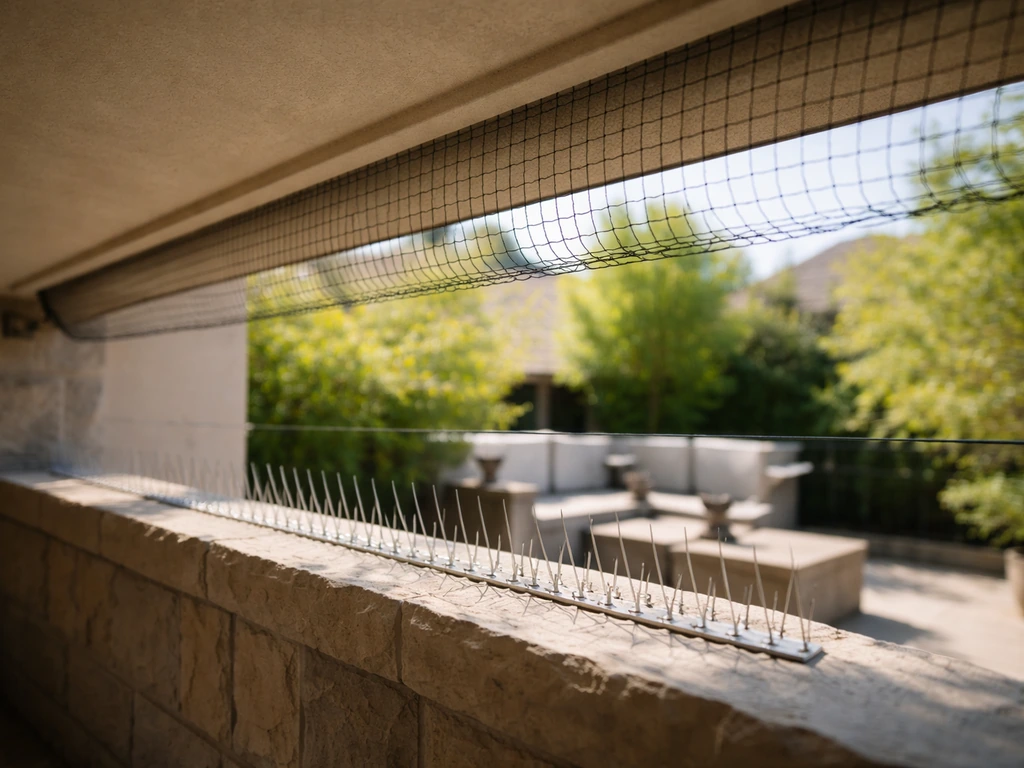
Physical exclusion: the most reliable category
Bird spikes
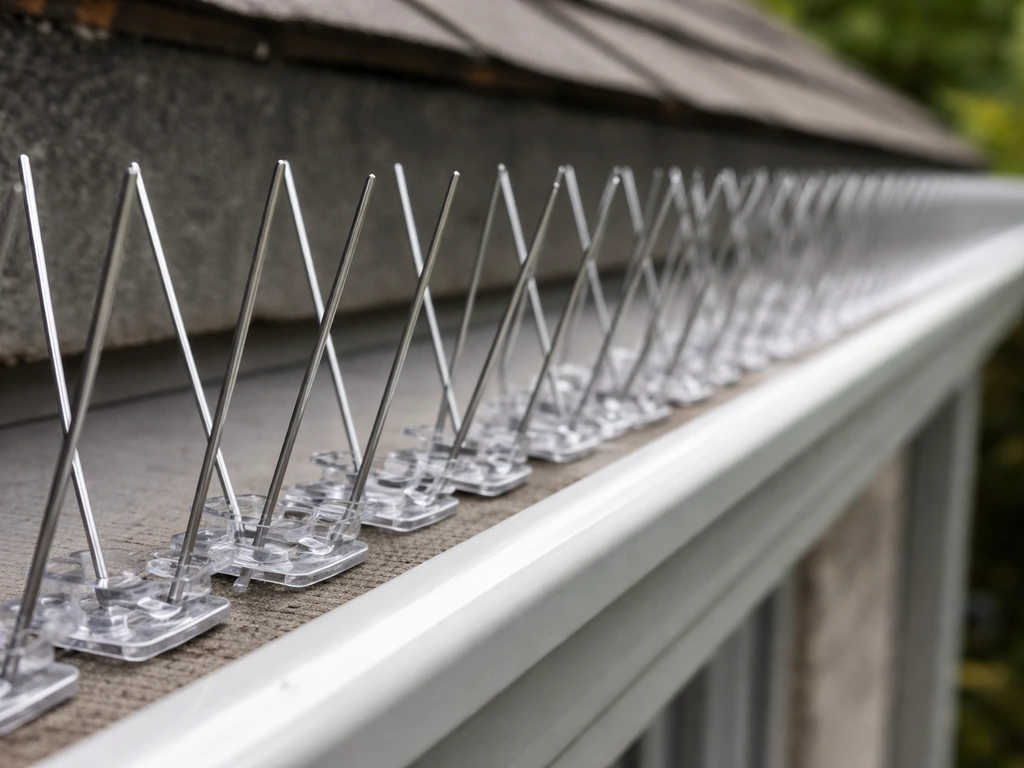
Spikes are the most practical starting point for most homeowners dealing with pigeons or starlings on rooflines, ledges, parapets, and gutters. They work by making it physically impossible for a bird to land flat on a surface, not by hurting the bird. Stainless steel spikes installed correctly can last over 20 years. Plastic versions cost less upfront but degrade in UV exposure and typically need replacing in 3 to 5 years.
A typical spike strip is about 5 inches wide with individual spikes rising roughly 4.5 inches above the base. You attach them to rooflines with adhesive, screws, or straps depending on the surface material. Bird-X’s SPIKES stainless steel spike installation instructions specify affixing the spike system using SPIKES Special Adhesive, along with temperature guidance and correct installation and maintenance for best results attach them to rooflines with adhesive, screws, or straps. The key is coverage: gaps between strips, missed corners, and skipped ledges are exactly where birds will congregate next. Cover every flat or slightly angled surface where you have seen activity, including the full length of gutters and any horizontal beam along the roofline.
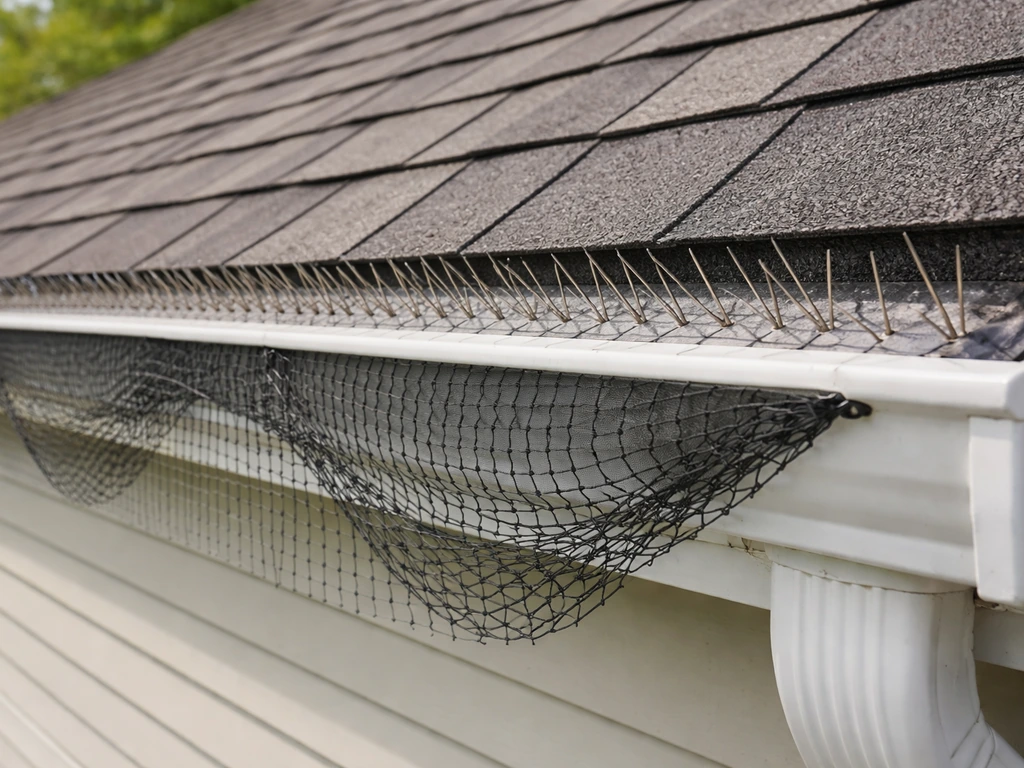
Bird netting
For larger open areas, a pitched roof section that birds are landing across, or spaces under solar panels, netting is the right call. The mesh size matters enormously. Use 3/4-inch mesh for sparrows and swallows, 1-1/8-inch for starlings and blackbirds, 2-inch for pigeons, and 4-inch for gulls or crows. Using mesh that is too large for the target bird defeats the whole purpose.
Properly installed netting lasts 10 to 15 years. It needs to be tensioned correctly and anchored at all edges so birds cannot push underneath or find gaps at the perimeter. This is one area where poor DIY installation is genuinely common, and a partially installed net can actually trap birds underneath, which creates a much worse problem.
Hardware cloth and vent screening
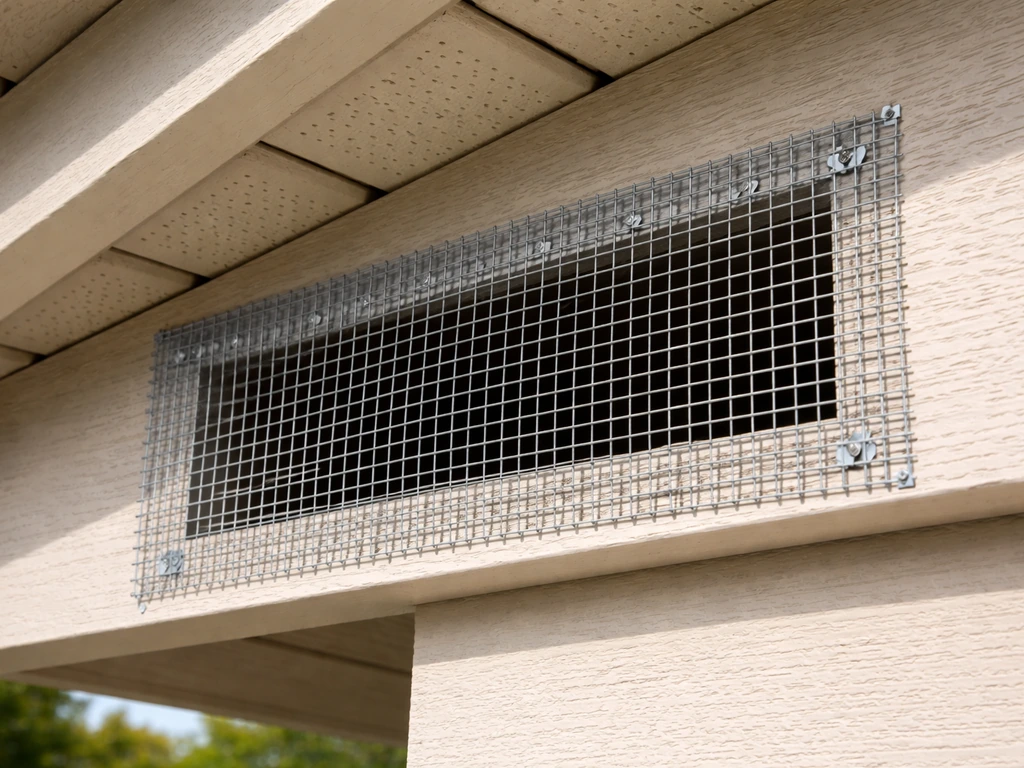
If starlings or sparrows are getting into your attic through vents, soffits, or gaps along the roofline, you need to seal those entry points. Hardware cloth is the go-to material, but mesh size matters here too. Around 1x1 inch works for blocking larger birds; smaller birds need tighter mesh. Be careful: mesh smaller than 1/2 x 1/2 inch can significantly reduce airflow, which matters for vented soffits and roof assemblies. Balance exclusion with the ventilation your roof system needs, or you will create moisture problems.
Sealing gaps properly
Walk the roofline and inspect every junction: where soffits meet fascia boards, where vents are installed, where siding meets the roof edge. Any gap wider than about half an inch is a potential entry point for smaller birds. Use foam backer rod and caulk for small gaps, and hardware cloth secured with staples or screws for anything larger. Do this before nesting season starts and always after confirming no birds or active nests are already inside.
Sensory and visual deterrents: what actually works and what does not
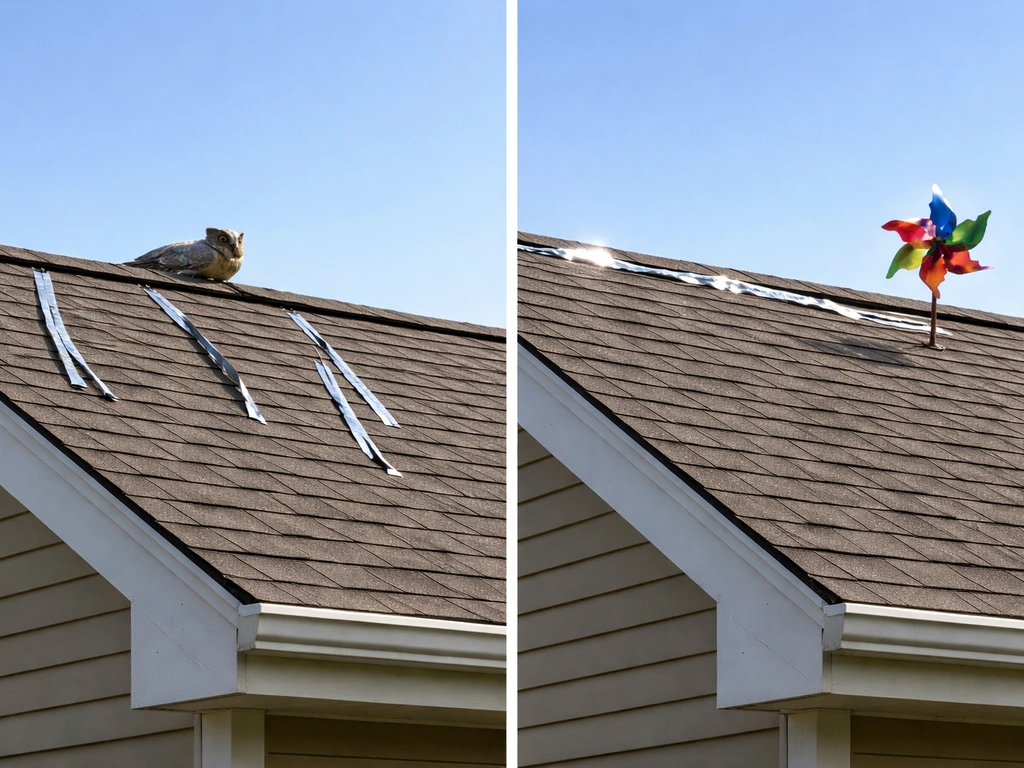
Visual deterrents like reflective tape, predator decoys (owl or hawk shapes), and spinning pinwheels can produce fast results for low-pressure bird activity. The catch is habituation: most birds figure out that a plastic owl does not move within a few days. After that, they ignore it completely. If you use visual deterrents, move them every two to three days and combine them with something that actually blocks access.
Reflective tape or holographic ribbon strung along ridgelines and eaves is one of the better visual options because the movement is less predictable than a static decoy. It is cheap, easy to install, and works well enough as a short-term measure or in combination with spikes or netting.
Ultrasonic devices are widely marketed but the evidence for their effectiveness outdoors is genuinely weak. Birds become accustomed to repeating patterns very quickly, sometimes within a few days. Audible sonic deterrents (distress calls, predator calls) have more research behind them but are temporary fixes, and they can be a nuisance to neighbors. Neither type should be your primary strategy for a roof problem. Think of them as short-term support while you get physical exclusion in place.
Placement matters for anything sensory or visual. Put reflective tape where it catches direct sunlight and wind. Place sonic units where sound can disperse across the area birds are using, not blocked by the structure itself. Rotate patterns and positions regularly to slow down habituation.
Chemical repellents: useful in specific situations
The most common active ingredient in bird repellent liquids is methyl anthranilate (MA), a grape-derived compound that irritates birds' trigeminal systems, basically their sense of taste and smell. Products like Bird Stop use this approach and can discourage birds from landing or roosting on treated surfaces. It is non-toxic and registered as a bird repellent in the US.
The practical limitation is residual time. Rain washes MA off quickly, and reapplication is typically needed within about 7 days under normal weather conditions. On a roof, that means you are reapplying constantly, which gets expensive and time-consuming fast. Chemical repellents make the most sense as a bridge strategy: apply them while you are waiting for spike or netting installation, or on surfaces that are genuinely difficult to fit with hardware.
Gel-based repellents (sticky, tacky formulas) are also available but can trap small birds or cover them in residue, which raises humane concerns. They also collect dust and debris and lose effectiveness quickly in outdoor conditions. Avoid these on roofs.
How to install bird spikes and netting yourself
Installing spikes step by step
- Inspect and clean the surface. Remove all droppings, feathers, and nesting material. Spikes will not adhere properly to dirty or damp surfaces, and birds are more likely to return to areas that still smell like them.
- Measure the ledge or roofline section you are covering and calculate how many strips you need. There should be no gaps between strips; butt them together end-to-end.
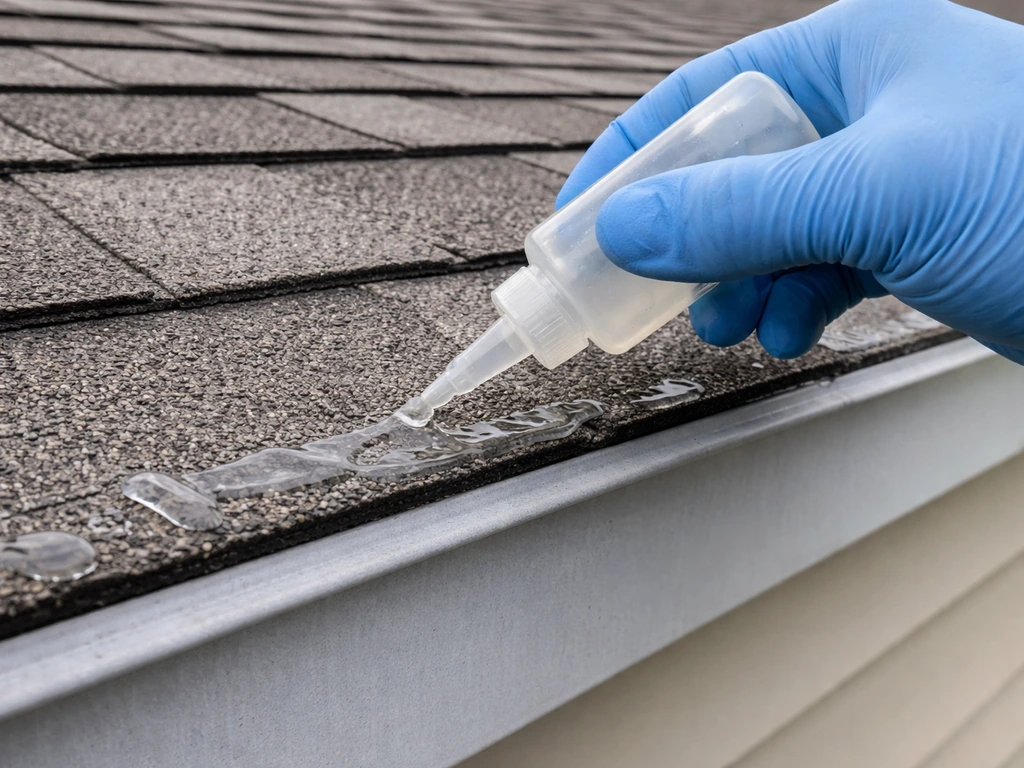
- Choose your attachment method. Adhesive (UV-resistant construction adhesive) works on most flat surfaces. Screws or ties work better on gutters and metal edges. Follow temperature and moisture guidelines on the adhesive: most need dry conditions above 40°F to cure properly.
- Apply adhesive to the base of each spike strip and press firmly into place. For screw-mounting, pre-drill if needed and use rust-resistant fasteners.
- Cover all horizontal surfaces where you have seen activity, including the full run of gutters, ridge caps, ledges, and any protruding beams. Do not skip corners or short sections.
- Check back after 48 hours to confirm adhesion and look for any gaps you missed.
Common installation mistakes to avoid
- Leaving gaps between strips, even small ones, birds will find them immediately
- Installing on wet or dusty surfaces where adhesive will not bond correctly
- Covering only the most obvious perching spots and missing secondary ledges or gutters
- Using spikes that are too narrow for the ledge width, allowing birds to land behind or beside them
- Skipping the cleaning step, old droppings act as a scent marker that draws birds back
Installing netting
Netting installation on a roof is more involved than spikes. You need anchor points around the perimeter of the area you are covering, which means screwing in eye bolts or mounting clips at regular intervals (typically every 12 to 18 inches), running a perimeter cable or rope through them, and then attaching the net to that frame. The net must be pulled taut with no sagging sections, because loose netting can entangle birds. All edges need to be secured fully, with no gaps at corners or low points where a bird could squeeze under.
Safety, legality, and humane considerations
Working on a roof carries real fall risk. Use a sturdy ladder rated for your weight plus tools, set it on stable ground at the correct angle, and never lean to the side or overreach. If the pitch is steep or the work area is near the roof edge, use a safety harness anchored to a ridge strap. On a wet or frost-covered roof, do not go up at all. A lot of deterrent failures come from people rushing an installation under unsafe conditions and missing areas as a result.
On the legal side, most common nuisance birds in the US, including pigeons, house sparrows, and European starlings, are not protected under the Migratory Bird Treaty Act (MBTA), which gives you more flexibility. However, swallows, most native songbirds, and many other species are federally protected. The MBTA prohibits interfering with active nests, eggs, or the birds themselves at any time. Removing or destroying an active nest of a protected species, even on your own roof, can result in federal penalties.
In Canada, the rules are stricter in some cases. Under the Migratory Birds Regulations 2022, certain species' nests cannot be disturbed or removed at any time of year, even when empty. If you are not sure what species you are dealing with, identify the bird before you do anything to an existing nest. When in doubt, consult a local wildlife authority or wait until the nesting cycle is clearly finished.
The practical takeaway: inspect for active nests before any exclusion work, time your sealing and installation for late fall or early spring when nesting activity is lowest, and never block an entry point that birds are currently using to access a live nest inside. You could trap adults or starve nestlings, which is both inhumane and potentially illegal even for unprotected species depending on your jurisdiction.
Troubleshooting: when birds keep coming back
If birds return after you have installed deterrents, work through this checklist before concluding the product does not work. The most common explanation is incomplete coverage: you blocked the obvious spots but left secondary ledges, a short gutter section, or a vent uncovered. Birds almost always shift to the next available surface rather than leaving the area entirely.
The second most common failure is the wrong product for the bird. Spikes designed for pigeons have wider spacing than those designed for sparrows. If small birds are still landing between your spikes, you need a tighter-spaced product or netting instead. Similarly, if ultrasonic or visual deterrents have been in place for more than two weeks without regular repositioning, assume the birds have habituated and switch strategies.
For nesting species that keep returning to the same eave or soffit spot, note that some birds have strong site fidelity and will attempt to rebuild in the same location year after year. In these cases, physical blocking of the entry or surface is essential. Visual deterrents alone will not override nesting instinct.
If you have tried spikes, netting, and sealing and birds are still getting in or roosting somewhere you cannot easily reach, it is time to call a professional bird control company. They have access to commercial-grade systems, proper safety equipment for steep or high roofs, and the ability to do a full perimeter inspection that is hard to replicate from a ladder. They can also confirm species identification, which matters for legal compliance.
It is also worth thinking about adjacent areas. A bird problem on a roof often connects to pressure from other parts of the property. If pigeons are roosting on your roof, chances are they are also using your porch or covered entryway as a staging area. Solving one without addressing the other just relocates the problem. Similarly, if your property has a pool area that birds are frequenting, treating the whole yard as a system rather than isolated spots gives you better long-term results.
Picking the right deterrent for your specific situation
Here is a direct decision path based on the most common roof scenarios.
| Scenario | Primary Recommendation | Supporting Option |
|---|---|---|
| Pigeons perching on ledges, ridgeline, or gutters | Stainless steel bird spikes (full coverage, no gaps) | Reflective tape on ridgeline while spikes cure |
| Starlings or sparrows entering through vents or soffits | Hardware cloth screening over all entry points, 1x1-inch mesh or smaller | Caulk and foam for small gaps |
| Birds roosting under solar panels | Bird netting with clips designed for panel frames, 1-1/8 to 2-inch mesh | Spikes on roof edge around the array |
| Swallows nesting under eaves (outside nesting season) | Physical blocking of nesting surfaces with netting or hardware cloth | Reflective tape during transition period |
| Mixed/unknown birds, light activity | Reflective tape and visual deterrents short-term, then inspect for access points | Chemical repellent as a temporary measure |
| Recurring problem after previous DIY attempts | Professional inspection and commercial-grade exclusion system | Full perimeter audit before any new installs |
For a deeper look at how these strategies translate to other areas of your property, the same physical exclusion logic applies whether you are dealing with birds on a deck or trying to keep them off a balcony railing. And if you have a boat that sits outdoors, birds treat it almost the same way they treat a flat rooftop, so the approaches in a guide to bird deterrents for boats overlap heavily with what works on roofs.
Your next steps, in order
- Identify the bird species and behavior (roosting, nesting, or perching) and map every surface where activity is occurring.
- Check for active nests before doing anything. If you find one belonging to a protected species, wait until it is inactive before proceeding.
- Choose your primary deterrent based on the scenario table above. For most homeowners, this means bird spikes or mesh screening.
- Buy the right product for your bird size. Match mesh or spike spacing to the species you are dealing with.
- Install with full coverage. No gaps, no skipped ledges, no corners cut.
- Add a secondary visual or sensory deterrent if you want faster pressure on birds while the physical install settles.
- Revisit after one week and check for new activity or missed areas.
- If the problem persists after a complete physical exclusion install, call a professional.
For more detail on protecting specific roof-adjacent areas, the rooftop bird deterrent guide covers commercial and flat-roof scenarios in more depth. And if birds are also causing problems on outdoor entertaining spaces, the best bird deterrents for patios covers the additional tactics that work well in open, human-traffic areas where you need something less obtrusive than spikes or heavy netting.
FAQ
Can I install spikes or netting if I see birds near a roof but I am not sure if they are nesting?
Before installing spikes or netting, confirm the birds are not using an active nesting cavity inside the same eave or soffit line. Exclusion done while young are present can trap them or prevent adults from feeding, which raises humane and legal risk.
Should I seal entry holes before or after I install spikes, netting, or both?
If you plan to seal attic entry points (vents, soffits, gaps) you should do it before or at the same time as exclusion. Sealing first can push birds deeper into the attic, while excluding first without sealing can simply move their landing to the next open gap.
How do I know which parts of the roofline to cover, so I do not miss the “next” spot birds will use?
For spikes, align coverage with how birds actually land. If you see droppings on specific segments like only one half of the gutter run, treat that whole run and any adjacent ledges, because birds typically shift to the nearest uninterrupted flat surface.
How long should I wait before concluding a deterrent is not working?
Do a “response window” check. If birds keep appearing and roosting after 2 weeks with spikes or netting, assume there is either an uncovered secondary landing surface, insufficient mesh spacing, or an active access point you did not seal.
What is the most common product selection mistake, and what should I change first?
Mesh size mistakes are common. If small birds are still landing, use tighter-spaced barriers (or spikes) rather than assuming larger mesh is “more flexible.” For attic vents, do not use overly tight mesh without checking airflow needs, because it can reduce ventilation.
Can I patch or repair my roof after installing deterrents, or will that mess up the system?
Yes, but only if you can remove the bird access without breaking the roof assembly or trapping birds. In general, the safer approach is to install a barrier that still allows proper water shedding and ventilation, then repair cosmetic gaps afterward.
If I use methyl anthranilate repellent, how do I plan for maintenance so it actually works?
For chemical liquids like methyl anthranilate, treat it as a bridge, not a permanent solution. Rain and roof runoff reduce residual effect quickly, so plan for reapplication schedules and apply only to the surfaces birds are trying to land on.
Are gel bird repellents a good alternative to spikes or netting on roofs?
Do not use gel-based sticky products on roofs. They can entangle small birds or leave residue, and outdoor conditions make them collect dust and debris, which reduces effectiveness and increases humane concerns.
What is the right way to use reflective tape or predator decoys, so they do not just become ignored?
Use visual deterrents when the bird activity is low, and accept that they often fail when birds habituate. If you use them, rotate position every couple of days and pair them with a physical block on the actual landing and entry points.
My attic vents have birds, should I rely on ultrasonic devices instead of sealing and excluding?
If birds are entering through vents or soffit gaps, ultrasonic devices are unlikely to solve the root cause outdoors. The practical move is to seal and exclude with hardware cloth or appropriate barriers sized for the birds, then reassess activity after installation.
What should I inspect after heavy rain or wind to prevent birds from “coming back”?
After rains, do a quick perimeter inspection for lifted adhesives, torn netting edges, or bird-sized gaps at corners. Even small failures at perimeter anchor points can restart the problem by giving birds a new bypass route.
When is it better to hire a professional instead of continuing DIY deterrents?
If you cannot safely reach the full perimeter, especially on steep roofs, or if birds are entering through hidden or high entry points, professional help is the fastest way to get correct coverage. Professionals can also verify species and handle exclusion without repeatedly exposing you to ladder and fall risk.
How do I keep birds from relocating to another part of my property after I fix the roof?
Yes. Treat the roof as part of a wider staging area. If pigeons are roosting on the roof, check nearby ledges like porch entries, covered walkways, or railings that provide a safe landing sequence to the roof.
Next Article
Best Bird Deterrent for Patios: Top Options That Work
Find the best bird deterrent for patios with barrier and sensory options, placement tips, and safety for lasting results