
To disable a bird scarer safely, start by identifying exactly what type of device you have, then cut its power source or fuel supply, release any stored pressure, and physically secure or remove the unit. The right steps differ significantly depending on whether you are dealing with a passive visual decoy, a reflective CD streamer, a sonic speaker, a propane gas cannon, or a pneumatic cannon. Getting the sequence wrong, especially with gas or pressurized systems, creates real hazards. This guide walks through each device type in plain language so you can act confidently without causing injury or breaking the law.
How to Disable a Bird Scarer Safely: Methods, Laws, Tips

Marcus Weatherby
4 Aug 2026
Who this guide is for and what it covers
This guide is written for homeowners, property managers, farmers, groundskeepers, and maintenance staff who need to temporarily pause or permanently decommission a bird scarer on land they own or manage. It also addresses the specific extra steps required when a device is located on or adjacent to an airfield, where aviation safety rules add a layer of legal obligation that overrides normal property decisions.
The guide covers temporary disabling (pausing the device while you carry out work, host an event, or allow wildlife to move on naturally), permanent removal, and decommissioning. It does not provide instructions for tampering with devices you do not own, bypassing safety systems on regulated airport equipment, or any action that would constitute illegal interference with another person's property or a certified airfield's wildlife hazard management plan.
One important note before you start: if you are a hired contractor rather than the property owner, you need written authorization from the owner before touching any device. Keep a dated record of that authorization. If the scarer is part of a formal wildlife management program at a commercial farm, golf course, or airport, check with the site manager first because disabling it may breach a compliance requirement or a permit condition.
Identifying what you are dealing with
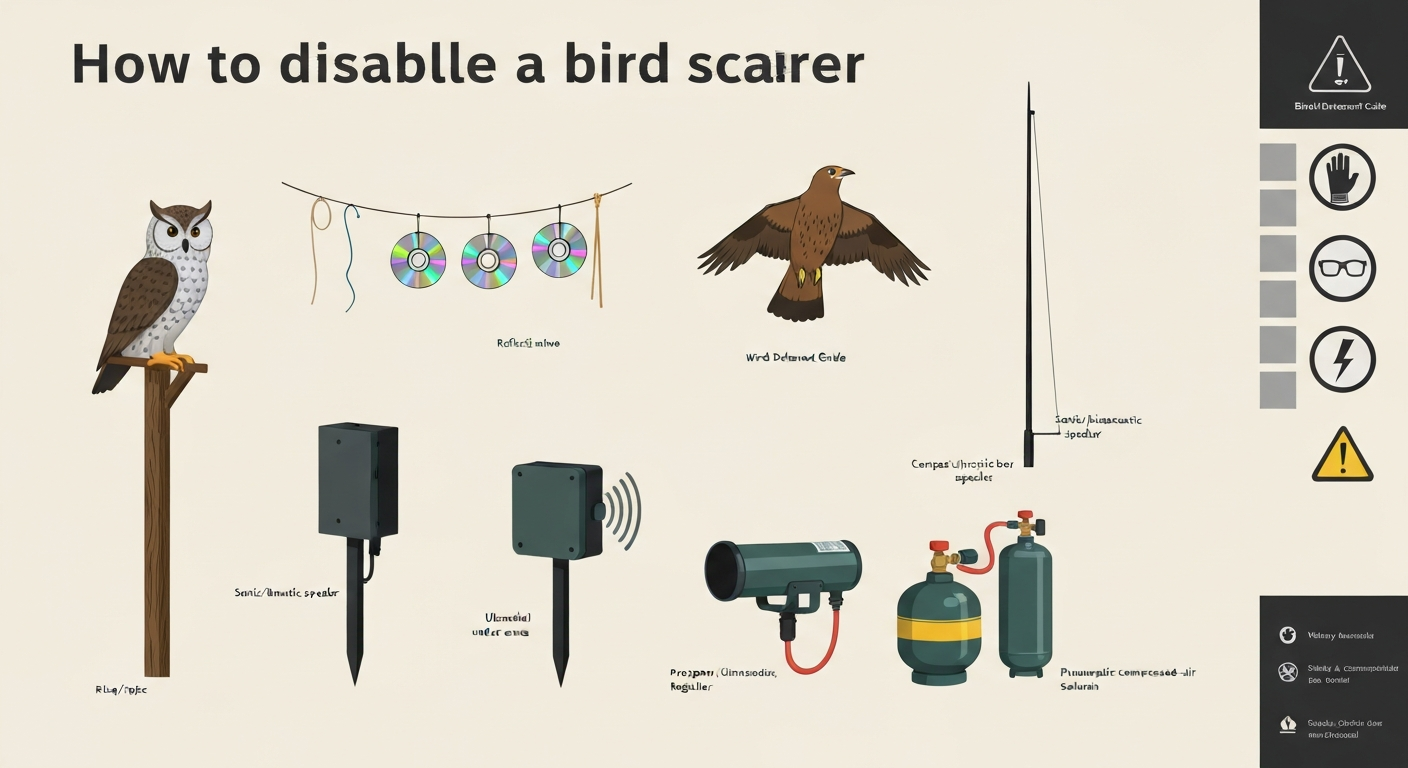
Before you do anything, spend two minutes identifying the device type. This matters because the disable procedure for a passive plastic owl is nothing like the one for a propane cannon, and mixing them up wastes time or creates risk. Here are the eight main categories you are likely to encounter. Transport Canada’s report 'Evaluation of the Efficacy of Products and Techniques for Airport Bird Control (TP 13029)' catalogs common bird‑scaring devices and their operational limits Transport Canada’s report 'Evaluation of the Efficacy of Products and Techniques for Airport Bird Control (TP 13029)' catalogs common bird‑scaring devices and their operational limits..
| Device type | What it looks like | Power or fuel source | Typical locations |
|---|---|---|---|
| Visual decoy (static) | Plastic owl, hawk, coyote, or heron figure on a post or roof mount | None (passive) | Gardens, patios, roofs, ponds, docks |
| Reflective CD streamers / tape | Shiny metallic strips, old CDs on string, holographic ribbon | None (passive) | Gardens, fences, orchards, vineyards |
| Hawk / predator kite decoy | Fabric or plastic hawk silhouette on a tall pole, moves in wind | None (passive, wind-driven) | Fields, sports pitches, large gardens |
| Sonic / bioacoustic unit | Weatherproof speaker box with a digital player or SD card, sometimes caged | Mains plug, 12V battery, or solar panel | Agricultural land, warehouses, car parks |
| Ultrasonic unit | Compact plastic box with circular transducer grilles, LED indicator | Mains plug, 9V or AA batteries, or USB/solar | Attics, patios, under eaves, small gardens |
| Propane / gas cannon (bird banger) | Steel or cast-iron barrel on a frame, connected to a small propane cylinder via regulator and timer | Propane LP gas, battery-powered igniter and timer | Open farmland, vineyards, airfields |
| Pneumatic / compressed-air cannon | Metal pressure vessel with an air reservoir, solenoid valve, and nozzle | Electric compressor or pre-charged cylinder | Airfields, large commercial agricultural sites |
| Homemade / DIY devices | Variable: CDs on string, plastic bags on poles, foil strips, hand-assembled electronics | Usually passive or low-voltage battery | Allotments, small gardens, hobby farms |
If you can see a gas cylinder attached to the device, treat it as a propane cannon regardless of its size. Small tabletop units that fire every few minutes are just as much a gas appliance as a large commercial cannon. If there is a compressor or a pressure tank visible, treat it as a pneumatic system and follow the pressure-release steps before any handling.
Legal and regulatory checklist before you touch anything
Disabling a bird scarer sounds like a simple physical task, but several legal layers can turn a straightforward job into a liability problem if you skip them. Work through this checklist first.
- Confirm ownership or written authority. You must own the device or have written permission from the owner to disable, alter, or remove it. Tampering with another person's property, including a neighbour's garden deterrent that overhangs your fence line, can constitute criminal damage in most jurisdictions.
- Check for neighbour agreements or shared-boundary arrangements. If a scarer was installed as part of a boundary or shared-land agreement, disabling it may require the other party's consent. Document any agreement in writing before acting.
- Review local noise ordinances. Many municipalities restrict the operating hours of sonic devices. If your reason for disabling is a noise complaint, note that switching the unit off during prohibited hours is your legal right, but check whether an ordinance already requires the owner to restrict hours before assuming you can disable it yourself.
- Airport and airfield proximity. If the device is within 10,000 feet of an airport runway or is part of a certified airfield's Wildlife Hazard Management Plan (required under 14 CFR 139.337 for certificated airports in the US), it must not be disabled without written authorization from the airport operator and, in many cases, coordination with FAA and USDA Wildlife Services. Unauthorized interference with airfield wildlife control equipment can constitute a federal offense.
- Wildlife protection laws. In the US, the Migratory Bird Treaty Act (MBTA) prohibits the take, pursuit, or harm of protected migratory bird species. Disabling deterrents at a critical period, such as active nest disturbance season or during a hazard management program, could theoretically increase protected-species mortality and create secondary MBTA exposure. If you manage a site where regulated species are present, consult USFWS before permanently decommissioning deterrents. In EU member states, the Birds Directive (2009/147/EC) sets equivalent protections, with national transpositions adding local permit requirements.
- Depredation permits. If the deterrent was installed as part of a USDA-WS or USFWS depredation permit or an airport depredation permit, disabling it without notifying the permit holder may breach permit conditions. Contact the permit holder first.
- Record your actions. Whether the disable is temporary or permanent, write down the date, time, reason, and steps taken. This is especially important on commercial, agricultural, and aviation-adjacent sites.
General safety precautions for any disable action
Regardless of device type, certain safety habits apply across the board. These are not bureaucratic formalities. They reflect the same thinking behind OSHA's Lockout/Tagout standard (29 CFR 1910.147), which requires workers to isolate and verify all energy sources before servicing equipment. Electrical Safety-Related Work Practices -- Inspection Procedures and Interpretation Guidelines | OSHA (references NFPA 70E) provides guidance on electrical isolation, voltage boundaries, PPE categories, and verification procedures for working on energized equipment. Even if you are a homeowner rather than a regulated employer, the logic is sound and the risks are real.
- Electrical isolation: disconnect mains power at the socket or circuit breaker before touching any wired sonic or electronic unit. Use a non-contact voltage tester to confirm the circuit is dead before proceeding. For solar-powered units, cover the panel with an opaque cloth or cardboard to stop it generating current, then disconnect the battery leads (negative first).
- Gas shutoff: for any propane device, close the cylinder valve completely by turning it clockwise until it stops. Do this before you touch the regulator, timer, or barrel. Do not attempt to disconnect the regulator hose while the valve is open.
- Pressure release: for pneumatic systems, relieve stored pressure through the manufacturer's bleed valve or drain valve before removing any fittings. Never loosen a pressurized fitting. If you cannot identify a bleed valve, treat the system as pressurized and call a qualified pneumatic technician.
- Fall protection: many scarers are roof- or pole-mounted. Use a suitable ladder rated for your weight plus tools, maintain three points of contact, and have a second person on the ground. For heights above 6 feet (1.8 m), a safety harness is worth using even for a quick job.
- PPE basics: wear safety glasses when disconnecting hoses or working near compressed systems; wear work gloves when handling sharp-edged reflective tape or metal pole brackets; use hearing protection (minimum SNR 25 dB / NPR 25 earmuffs) if the device may fire unexpectedly during shutdown, particularly for sonic or gas cannon units.
- Lockout/tagout mindset: if you are disabling a device that others on the same site could inadvertently re-energize (for example, a sonic unit on a shared timer circuit), physically tag the switch or breaker with a dated note and, where possible, use a lockout hasp so the circuit cannot be re-closed by someone who does not know work is in progress.
- Qualified electrician threshold: if a wired sonic or electronic bird deterrent is hard-wired into a mains distribution panel (rather than plugged into a socket), or operates above 50V AC, isolating it at the panel before any work is required. If you are not trained to work in a mains panel, arrange for a licensed electrician to isolate the supply. OSHA 29 CFR 1910.331-335 sets training and competency expectations for electrical work; at mains voltage, unqualified personnel should not work on exposed conductors.
Disabling visual deterrents and static decoys
Static visual decoys, plastic owls, herons, hawks, and coyote figures are the safest and simplest devices to handle because they contain no energy source. The main concern is their mounting method and the height at which they are placed.
Temporary removal
For a temporary pause, the easiest approach is simply to face the decoy away from the area you want to protect, or to drape a cloth over it. This leaves the mount undisturbed and makes it easy to restore the deterrent later. If the decoy is on a spike pushed into soil, pull it straight up and store it upright in a shed or garage out of UV exposure, which degrades plastic over time.
Relocation
If the decoy was working well in one area but you need to clear that space, relocate it rather than removing it. Most spike-mounted decoys can be repositioned in under five minutes. Moving a decoy periodically also helps maintain its effectiveness since birds habituate to stationary figures within one to two weeks.
Permanent removal and disposal
For permanent removal, unscrew or unclip the decoy from its base, fill any spike holes in turf or soil, and patch screw holes in hard surfaces to prevent water ingress. Hard plastic decoys can go into general household waste in most areas unless local rules require landfill diversion for plastics. If the decoy is in good condition, donate or repurpose it before discarding. Check that any wall or roof bracket left behind is either removed and the hole sealed, or is made safe so it does not create a snagging hazard.
Removing reflective CD streamers and lightweight hanging deterrents
Reflective tape, CD strings, holographic ribbon, and metallic foil strips are passive deterrents with no energy source, but they create their own removal challenges: they tangle easily, can leave adhesive residue, and the small pieces of reflective material that break off can become litter or a minor wildlife entanglement risk.
Safe removal steps
- Work from the anchor point inward. Untie or unclip the mounting cord at its highest point first, then let the assembly drop into your hands rather than pulling from the bottom, which causes tangles.
- Collect everything as you go. Have a bag in one hand as you work. Loose reflective ribbon scattered on the ground can be mistaken for food by birds or can snag on garden machinery.
- For adhesive-backed reflective tape stuck to glass or surfaces: wet the tape with warm soapy water and let it soak for two minutes before peeling. A plastic scraper removes residue without scratching glass. Avoid metal scrapers on window glass or painted surfaces.
- Inspect the attachment points. Check nails, hooks, and cable ties for rust or sharp edges. Remove them cleanly and dispose of them in a puncture-proof container.
CD-based streamers, which are a popular DIY solution (and a method worth reading about in more detail if you plan to reinstall something similar later), are one of the most common homemade deterrents in gardens and allotments. They are quick to take down but the nylon cord used to hang them can persist in the environment for years if left to fall. Collect every piece.
Disposal
Most reflective tape and ribbon is a metallized plastic film and goes into general waste. CDs are polycarbonate plastic and are accepted by specialist disc-recycling schemes in many areas. Check your local authority's recycling guidance before putting CDs in the kerbside recycling bin, as they can contaminate glass streams if sorted incorrectly.
Managing hawk kites and predator decoys
Hawk kites and predator decoys mounted on tall poles are passive devices but they present a height and wind-load challenge during removal. The poles are often 3 to 10 meters tall, and the kite assembly at the top can catch wind unexpectedly when you are working at height.
Safe removal procedure
- Check wind conditions before climbing. Avoid removal in winds above 15 mph (24 km/h). A kite that catches a gust while you are at the top of a ladder creates a genuine fall risk.
- Lower the kite before attempting to detach the pole. Most commercial hawk kite poles have a telescoping or collapsible design. Extend the pole to its full height, detach the kite assembly, and bag it before collapsing the pole sections.
- For ground-socket-mounted poles: grip the pole low, rotate it a quarter turn if there is a locking mechanism, and lift straight up. These poles are often heavier than expected. Use two people for poles above 6 meters.
- Inspect for wildlife before removal. Check that no real bird has taken a fancy to the kite frame as a perching or nesting site. In the UK and many EU jurisdictions, active nests of all wild bird species are legally protected regardless of the structure they are built on. If you find a nest, leave the structure in place until the nest is no longer active and consult your national wildlife agency for guidance.
- For permanent retirement: disassemble the pole into sections for storage or disposal. Fiberglass poles can go to a builder's waste facility. Metal poles can be recycled at a scrap metal dealer. Clean the socket or stake hole to prevent standing water.
If you are permanently retiring the device but still have a bird pressure problem at the site, a hawk kite is worth replacing rather than simply removing. The homemade hawk decoy approach, which involves creating a silhouette from simple materials, is a cost-effective alternative worth exploring if budget is the reason for permanent removal.
Avoiding unintended wildlife harm
Removing a predator decoy from a pond edge, for example, may allow herons to return within hours. If the device was protecting fish stock or a water feature, plan a replacement deterrent before removal rather than after. This is especially relevant near water bodies used by protected wading species, where a sudden removal of deterrents could concentrate birds in ways that create MBTA or Birds Directive exposure (see the legal checklist above).
Sonic and ultrasonic units: shutdown, isolation, and restart
Sonic and ultrasonic bird repellers are the most varied category electronically, and the right shutdown sequence depends on how they receive power. Getting this wrong on a mains-connected unit is the most common way a simple disable job becomes an electrical hazard.
Mains-powered sonic units
- Locate the power socket or circuit that supplies the unit and switch it off at the wall first.
- Use a non-contact voltage tester at the device's power inlet to confirm it is de-energized before unplugging.
- Unplug the unit from the socket. Do not pull by the cable; grip the plug body.
- If the unit is hard-wired rather than plug-connected, isolate it at the circuit breaker and apply a lockout clip or tape the breaker in the off position with a note. Arrange for a licensed electrician if you need the wiring disconnected permanently.
- To store for reuse: coil the cable loosely, bag the unit in its original packaging or a dry plastic bag, and store above floor level to prevent moisture ingress.
Battery-powered sonic and ultrasonic units
For units running on AA, C, D, or 9V batteries, the shutdown is simply removing the batteries. Open the battery compartment (usually a screw-secured lid on outdoor units), remove the batteries, and note the polarity orientation with a quick phone photo before doing so to make reinstallation easier. Store batteries in a cool, dry place. Do not store lithium batteries loose in a drawer where they can short against metal objects.
Solar-powered units
- Cover the solar panel completely with an opaque material (a piece of cardboard taped in place works fine) to stop it generating charging current.
- Locate the internal battery connection inside the unit's housing. This is usually a small connector between the battery pack and the control board.
- Disconnect the battery connector (negative lead first if terminals are accessible).
- To store: keep the unit indoors and the panel covered. Fully discharge the internal battery before long-term storage to reduce lithium degradation risk.
- To restart: remove the panel cover, reconnect the battery, and allow the panel to charge the battery for a full day before testing the unit.
Adjusting settings and scheduling instead of full shutdown
For many situations, a full power-off is not necessary. Most modern sonic units have a built-in programmable timer that can restrict operation to specific hours. If your reason for disabling is noise during certain hours (a neighbour complaint, an outdoor event, early morning operations on a farm), programming a restricted schedule is a better long-term solution than repeated physical shutdowns. Check the user manual for the timer programming procedure. Common models allow 30-minute increment scheduling. Setting the unit to operate only between 6 AM and 8 PM, for example, addresses most residential noise complaints without reducing the device's long-term effectiveness.
Ultrasonic units specifically
Ultrasonic units operate above the nominal human hearing range (typically 15 to 25 kHz for bird repellers) but the boundary between audible and ultrasonic is not clean, and some units emit tones that humans and domestic animals can detect. OSHA's Technical Manual references ACGIH Threshold Limit Values for ultrasound exposure, which set ceiling values for subharmonic frequencies. In practice, for the low-power consumer units used in gardens and patios, the exposure risk to the person disabling the device is minimal at normal working distances. However, if a unit is mounted at face height in an enclosed space (an attic, for example) and you are uncertain whether it is operating, stand to the side rather than directly in front of the transducer grille before reaching for the power switch.
Disabling propane and gas cannon bird scarers
Propane gas cannons (also called bird bangers or exploders) are the most hazardous device type covered in this guide. They combine a flammable fuel source, a pressurized gas system, an ignition mechanism, and a timed firing cycle. Treat every gas cannon as if it could fire at any moment during the disable process, because with a faulty timer, it can.
Before you approach
Stand upwind and at least 15 meters to the side of the barrel (not behind or in front of it) and watch one full firing cycle if the unit is operational. This tells you the firing interval, confirms the igniter is working, and lets you time your approach for maximum distance from the next firing. Wear hearing protection: propane cannons typically produce peak sound pressure levels between 100 and 130 dB at close range, well above OSHA's 90 dB PEL for 8-hour exposure and capable of causing acute hearing damage on a single impulse. Standard foam earplugs (NRR 33) provide adequate protection for the brief close-range work involved.
Shutdown sequence for a propane cannon
- Approach from the side, never from in front of the barrel, immediately after a firing cycle.
- Locate the cylinder valve (the handwheel on top of the propane cylinder). Turn it clockwise until it stops. This is the primary isolation step.
- Wait 60 seconds. This allows residual gas in the supply line to dissipate or be consumed by any pending ignition cycle.
- Locate the timer or controller (usually a box attached to the frame with a battery). Switch the timer off or remove its batteries. This prevents any further trigger signals to the igniter.
- Once the timer is disabled and the cylinder valve is confirmed closed, you can disconnect the regulator hose from the cannon body. Turn the regulator nut counterclockwise. Some propane regulators have a check valve that vents a small puff of gas when disconnected; keep your face away from the fitting.
- If removing the cylinder for storage or transport: keep the valve closed, fit the protective cap onto the valve outlet, and store the cylinder upright in a ventilated space away from ignition sources. Under DOT/PHMSA regulations (49 CFR), cylinders must be transported in an upright, secured position in a ventilated vehicle compartment. Non-refillable cylinders (marked DOT-39) must not be refilled and must be disposed of through a certified propane disposal or exchange program.
- Tag the disconnected cannon with a dated label noting the gas supply has been isolated and the timer disabled. This is particularly important on farm sites where multiple workers may encounter the equipment.
Permanently decommissioning a gas cannon
For permanent removal, follow the shutdown sequence above, then contact your propane supplier for cylinder return or exchange. Most suppliers provide free cylinder collection for properly closed cylinders. Do not attempt to puncture, crush, or incinerate propane cylinders under any circumstances. The cannon body itself (steel barrel, frame, and regulator) can be taken to a scrap metal facility once the gas system is fully disconnected and purged. Remove the igniter battery and dispose of it separately in a battery recycling bin.
Fixed and permanently-installed commercial systems
Large commercial propane exploders, particularly those installed at airfields or vineyards with permanent piped gas supplies, fall under NFPA 58 (the Liquefied Petroleum Gas Code) and OSHA 1910.110. These systems have remote emergency shutoff valves, excess-flow protection, and sometimes telemetry-linked controllers. For these installations, the shutoff is handled at the remote emergency shutoff valve (RESOV), which should be clearly labeled on the site plan. Do not work on the piping or gas train on a permanently-installed system without a qualified LP-gas technician present. The NFPA 58 provisions for emergency remote shutoff and piping isolation are designed for trained technicians, not general maintenance staff.
Disabling pneumatic and compressed-air cannons
Pneumatic bird cannons use a stored-air reservoir and a solenoid valve to produce a loud report. The hazard is stored mechanical energy in the pressure vessel. If fittings are loosened on a pressurized system, stored air can eject components at serious velocity.
- Isolate the electrical supply to the solenoid valve and compressor first (switch off at the breaker and verify with a voltage tester).
- Locate the system's bleed valve or drain valve, which is typically a small quarter-turn ball valve or a T-handle petcock on the reservoir. Open it slowly to release stored pressure. Do not stand in line with any open port.
- Confirm depressurization by checking the system's pressure gauge. It should read zero before you touch any fittings.
- For permanently installed systems with a pressure vessel rated above 15 psi, the reservoir may fall under ASME Boiler and Pressure Vessel Code requirements for certified pressure vessels with rated relief devices. If you are unsure whether the vessel has a functional pressure relief valve, do not attempt to service it yourself. Contact a qualified pressure systems engineer.
- Once depressurized, disconnect the airline fittings, remove the solenoid valve wiring, and secure all open ports with threaded caps.
- Tag the isolated system as above and record the date.
Dealing with homemade and DIY bird scarers
Homemade bird scarers are by definition non-standardized, so you cannot rely on a manufacturer's shutdown procedure. The most common types are passive (CD streamers, foil strips, plastic bag wind spinners) and present no energy hazard. The section on reflective streamers above covers their removal.
DIY electronic or battery-powered homemade units (home-assembled MP3 players with outdoor speakers, for example) should be treated the same as any battery-powered sonic unit: disconnect the battery before touching internal components. If the wiring is improvised and you cannot clearly identify the power source, trace the cable to its supply rather than guessing.
Homemade gas-based devices using propane are rare in residential settings but do appear at small farms. For safety context, consult information on how to make gas gun bird scarer (informational only) so you understand potential hazards before attempting any intervention. Any device with a propane cylinder attached must follow the full gas cannon shutdown sequence regardless of how informally it was built. Improvised gas connections are more, not less, likely to have faulty check valves or worn seals, so treat them with greater care than a commercial unit.
Airfield and aviation-adjacent rules
If a bird scarer is located on or adjacent to an airport, the regulatory picture changes entirely. Under 14 CFR 139.337, certificated airports in the US must maintain a Wildlife Hazard Management Plan (WHMP). Any bird control device referenced in that plan, or in the Airport Certification Manual, is effectively a safety-critical item. Disabling it without authorization is not just a property matter; it may affect the airport's Part 139 certification and could expose the person who disabled it to federal liability.
The authorized parties for wildlife control device decisions at certificated airports are the airport operator, FAA Wildlife Specialists, and USDA APHIS Wildlife Services personnel who operate under formal letters of authorization. If you are a contractor or neighboring landowner and a device on or near the airfield boundary needs to be temporarily disabled (for a construction project, for example), the correct process is to submit a written request to airport operations, await written approval, coordinate timing with the wildlife management team, and document every step. There is no shortcut on airfield property.
FAA Advisory Circular AC 150/5200-33C addresses hazardous wildlife attractants on and near airports and underscores that any change to wildlife hazard management activities in the aircraft movement area or within the specified wildlife buffer zone (generally 10,000 feet for certain aircraft types) requires formal coordination. This includes pausing deterrents, even temporarily.
After disabling: documentation, signage, and restart
Keeping records
Whether you are a homeowner who removed a plastic owl or a farm manager who isolated a gas cannon, write down what you did. A simple site log entry with the date, device description, reason for disabling, and method used takes two minutes and provides essential context if a wildlife incident or neighbour dispute arises later. For commercial or agricultural sites, this log becomes part of your due diligence record.
Signage for ongoing work
If a device is disabled for a period of days or weeks rather than permanently, post a brief notice at the device location noting that it is temporarily out of service. On shared sites, this prevents a colleague from assuming the device is broken and attempting to service it while it is intentionally isolated. A simple laminated card reading 'Device isolated: [date] [name] [reason] [expected return to service]' is sufficient.
Restarting service safely
Before restoring any device, do a brief inspection: check cables for rodent damage (common on outdoor units left dormant for weeks), check that no birds have nested in or around the housing, verify the gas connections are tight and show no signs of corrosion, and test the battery voltage if the device has been in storage. For gas cannons, open the cylinder valve slowly to allow the regulator to pressurize the system gradually rather than slamming it open. Then stand clear and allow one or two firing cycles to confirm normal operation before leaving the site.
When to call a professional instead
Some situations genuinely call for professional help rather than a DIY approach, and it is worth knowing the threshold.
- Hard-wired mains electrical connections at any voltage: arrange a licensed electrician.
- Fixed commercial propane systems with piped gas supply, permanent regulators, or RESOV installations: require a qualified LP-gas technician.
- Pneumatic systems with pressure vessels above 15 psi where you cannot identify or access the bleed valve: require a qualified pressure systems engineer.
- Airfield wildlife control equipment: require authorization from airport operations and qualified wildlife management staff.
- Any device where you suspect structural damage, gas leaks (smell of mercaptan), or electrical faults: do not attempt to disable; secure the area and call a professional.
- Any situation involving protected species nesting on or immediately adjacent to the device: consult a wildlife management professional or your national wildlife agency before proceeding.
Alternatives to disabling: adjustments that keep the deterrent working
In many cases, the goal behind wanting to disable a bird scarer is actually to resolve a specific problem: noise at certain hours, a device that is frightening domestic animals, a scarer that has lost effectiveness through habituation, or an installation that is affecting non-target species. Full disabling is not always the best answer. Consider these targeted adjustments first.
| Problem | Adjustment rather than disable | Result |
|---|---|---|
| Noise complaints from neighbours or household at night | Program timer to restrict operation to dawn-to-dusk hours | Complaint resolved; deterrent maintained |
| Birds habituating to a static decoy | Reposition the decoy to a new location every 5-7 days | Renewed effectiveness without removal |
| Gas cannon firing too frequently for the site | Increase timer interval to every 15-20 minutes instead of every 5 | Reduced disturbance; maintained deterrent value |
| Sonic unit disturbing pets indoors | Adjust frequency band away from dog/cat hearing range (below 20 kHz); move unit further from the building | Pet disturbance reduced; deterrent continues |
| Reflective streamers becoming tangled or worn | Replace with fresh ribbon rather than removing entirely | Appearance and effectiveness restored |
| Hawk kite not moving in low wind | Switch to a counterbalanced or motorized rotary decoy | Consistent deterrent in variable conditions |
If you are permanently retiring a device because it has stopped working rather than because you no longer need deterrence, it is worth exploring alternative deterrent types before assuming the problem is solved. Physical barriers such as bird spikes and exclusion netting provide passive, low-maintenance protection that does not require power or fuel, and they work continuously without scheduling. For situations where a replacement active deterrent makes sense, DIY options including homemade streamers and repurposed materials can fill the gap at low cost while you evaluate a longer-term solution. For step-by-step instructions, see how to make homemade bird scarers.
FAQ
Which primary regulatory and standards documents must be reviewed to ensure safe electrical, mechanical, and gas isolation when disabling bird scarers?
OSHA lockout/tagout (29 CFR 1910.147) for control of hazardous energy; OSHA electrical safety standards and training rules (29 CFR 1910.331–335); NFPA 70E for electrical work practices and PPE; OSHA 1910.110 and NFPA 58 for LP‑gas storage, piping and shutoffs; ASME/API codes for pressure vessels and relief devices; PHMSA/DOT hazardous materials and cylinder rules (49 CFR) for propane cylinders; and OSHA/NIOSH guidance on noise and ultrasound exposure.
What device‑class specific research questions should be answered for electrical/solar/ electronic bird‑scarers?
Identify power sources (mains, DC battery, solar panels, internal batteries), control components (timers, relays, solenoids, printed circuit boards), wiring and exposed conductors; determine de‑energization points (service disconnect, DC isolator, battery disconnect), safe voltage boundaries, PPE and verification procedures per NFPA 70E/OSHA; training/qualification thresholds requiring a licensed electrician; manufacturer instructions and model‑specific wiring diagrams; and safe disposal/recycling pathways for batteries and electronics.
What concrete questions must be answered for propane/gas cannons and mobile propane bird‑scarers?
Determine cylinder type and certification (DOT specification), location of service and emergency shutoff valves, regulator and solenoid/ignition circuitry, recommended purge/isolation steps per NFPA 58 and OSHA 1910.110, requirements for remote emergency shutoff or excess‑flow valves, safe procedures for disconnecting/transporting/disposing cylinders (PHMSA/DOT), and whether a certified gas technician is required for any requalification or permanent decommissioning.
What must be researched for pneumatic cannons, compressed‑air reservoirs, and homemade pressure devices?
Establish whether tanks/reservoirs meet ASME pressure‑vessel definitions and applicable registration/inspection standards; identify pressure relief devices, isolation and venting procedures, safe depressurization steps and lockout of compressors, hazards from stored energy, required certified personnel for repairs, and documentation/recordkeeping for decommissioning or modification.
Which facts and measurements are needed for sonic and ultrasonic devices?
Manufacturer sound‑pressure level (SPL) specs across frequency bands, peak and SEL values, safe standoff distances based on OSHA (29 CFR 1910.95) and ACGIH/TLV guidance, ultrasound exposure metrics (1/3‑octave SPL where applicable), recommended hearing protection, and assessment methods for measuring output before and after disabling to ensure personnel safety.
What research topics address visual deterrents and common DIY scarers (reflective streamers, decoys, CD streamers, hawk decoys)?
Catalogue typical materials and mounting methods, anchor points and fall hazards, attachment/removal steps that avoid property damage or wildlife disturbance, safe working‑at‑height practices, when removal could create wildlife welfare or legal issues (nesting season), and humane alternatives or repositioning strategies instead of permanent removal.
Next Articles
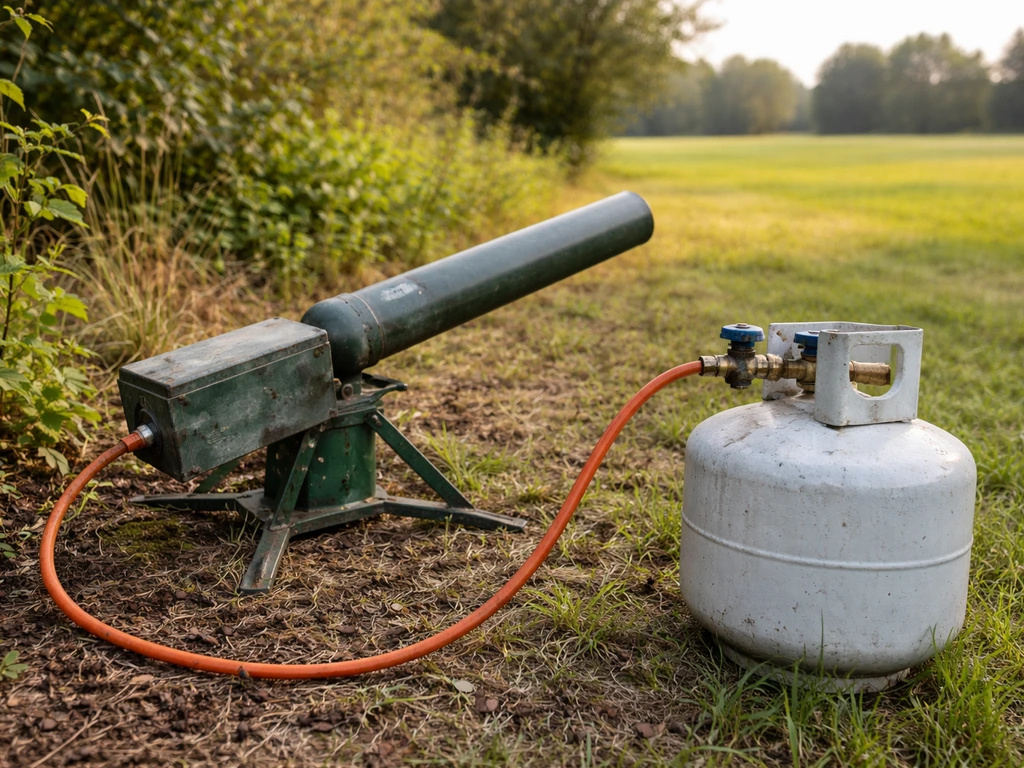
How to Make a Gas Gun Bird Scarer More Effective
Improve gas gun bird scarer performance with setup, timing, placement, pattern changes, troubleshooting, and safe add-on
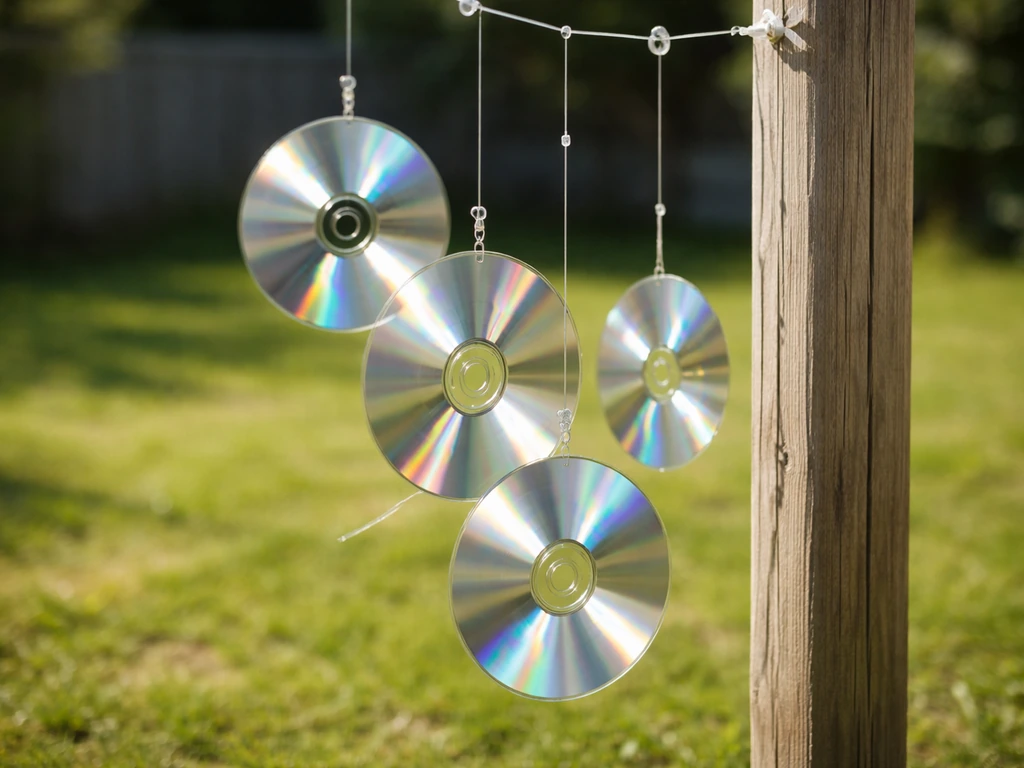
How to Make a Bird Scarer with Old CDs Step by Step
Step-by-step DIY guide to make an effective bird scarer from old CDs with smart mounting, spacing, and placement tips
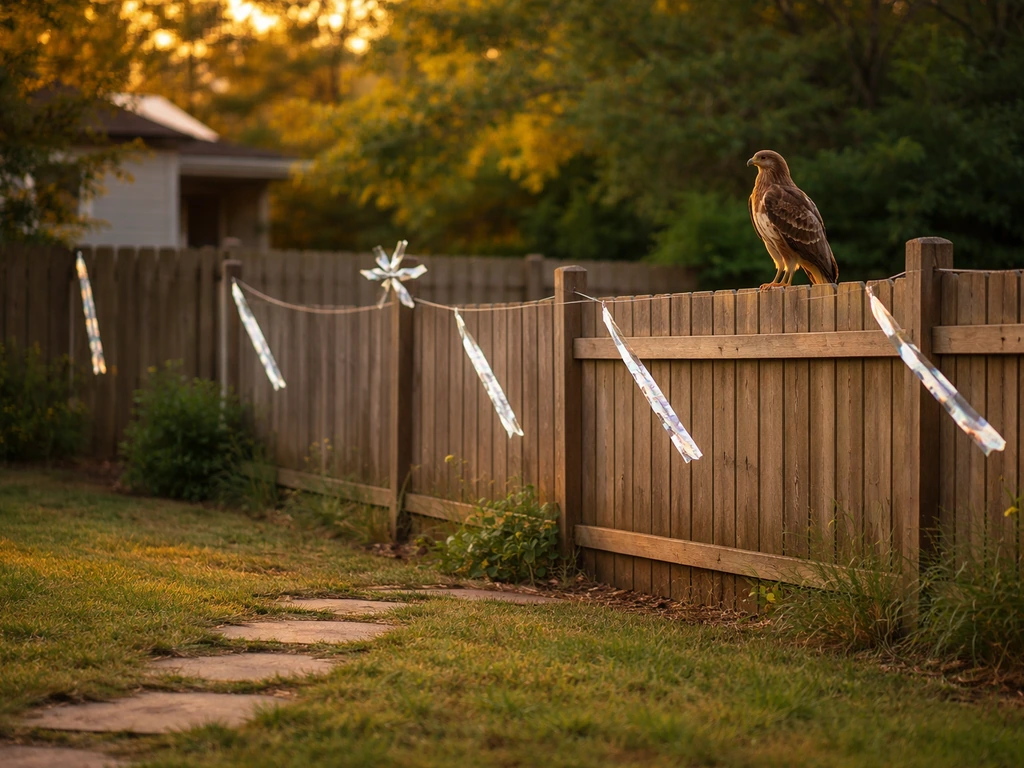
How to Make a Hawk Bird Scarier: Safe Deterrence Steps
Step by step safe, nonlethal hawk deterrence: remove attractants, use visual motion cues, and secure access to reduce ri