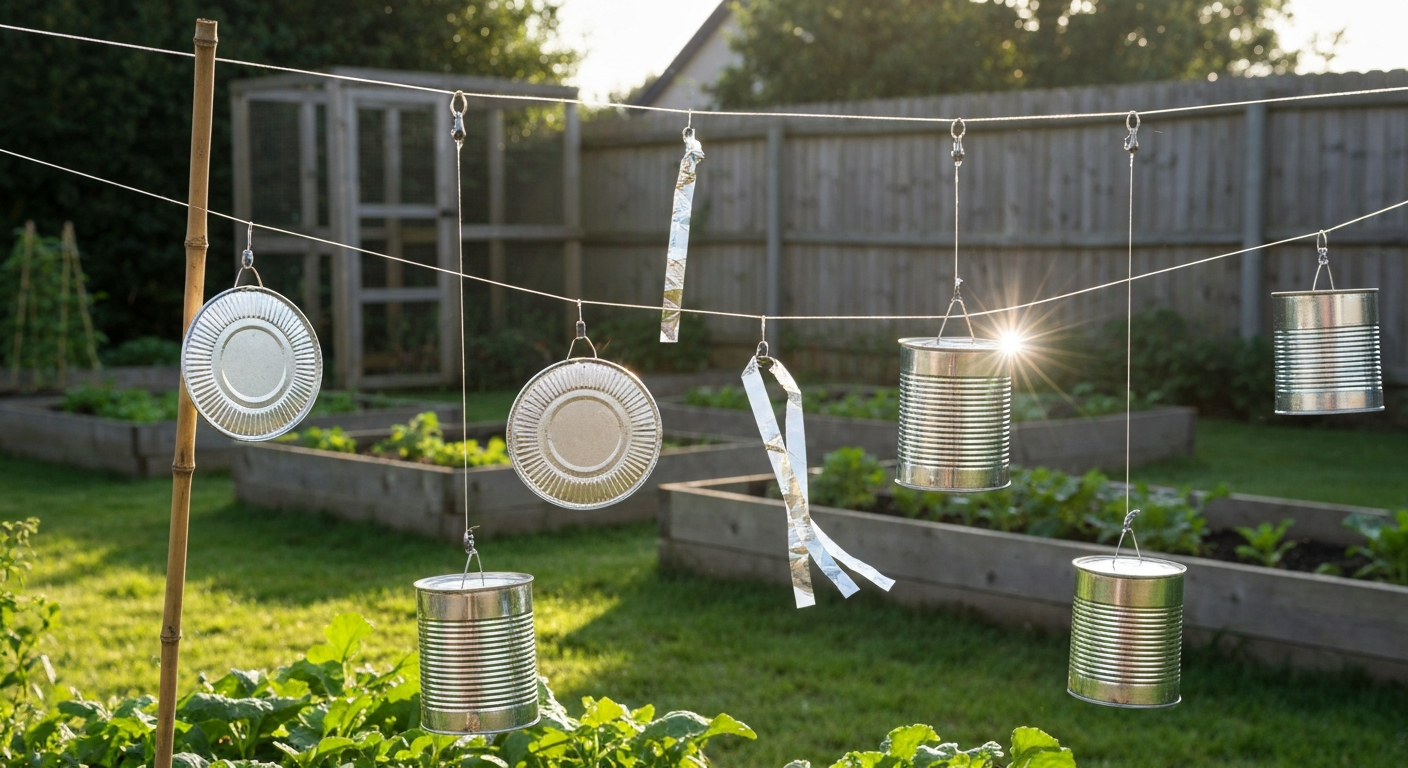
A tin-can bird scarer is a lightweight, homemade visual deterrent, typically built from aluminum pie tins, recycled cans, or reflective strips strung so they spin, flash, and clatter in the breeze. Birds detect the sudden movement and reflected light as a potential threat and fly off, at least temporarily. They cost almost nothing to make, and for small gardens, allotments, patios, and fruit cages they work well enough to protect a crop for a few weeks, especially when you keep moving them around.
Tin Can Bird Scarer: DIY Guide for Gardens, Roofs, Panels

Marcus Weatherby
17 Jul 2026
How a tin-can scarer actually works
Birds have exceptional visual acuity and a strong response to sudden motion and light flashes. A tin can or pie tin spinning in the wind catches and scatters sunlight unpredictably, and the looming, flickering signal triggers the same avoidance instinct that an approaching predator would. The deterrent effect is essentially novelty: the bird cannot immediately classify the stimulus as safe, so it keeps its distance.
That novelty wears off. Research from systematic reviews and USDA field trials consistently shows that static or repetitive visual devices lose their effect within roughly 10 to 30 days, sometimes faster with pigeons and corvids. The birds simply learn that nothing bad happens. This is why rotation and movement are not optional extras but the core maintenance task for any reflective scarer.
Who should use tin-can scarers and where they work best
Tin-can scarers are a good fit for home gardeners, allotment holders, smallholders, and anyone managing a modest outdoor space who wants a free or near-free solution and is prepared to move the devices regularly. They are genuinely useful in these situations:
- Kitchen gardens and raised beds where birds are raiding seedlings or soft fruit
- Fruit cages and small orchards during the harvest window
- Patios and decked areas troubled by gulls or pigeons scavenging food
- Pond edges where herons make early-morning visits
- Small commercial growing plots or allotments where budget is the main constraint
They are a poor fit for large flat roofs, solar panel arrays, open water (pools, reservoirs), or any site where pigeons have already established a permanent roost. Pigeons in particular habituate to visual devices quickly, and peer-reviewed trials confirm that exclusion methods such as spikes, wire, or netting are almost always required for lasting pigeon control. If you are dealing with a roof, the best bird scarer for roof situations will typically combine physical exclusion with deterrents rather than relying on reflective devices alone.
What you need: materials and tools
The list below covers everything needed to build a standard hanging tin-can scarer as well as the tin-can kite variant described later. Quantities shown are for a run of roughly 6 to 8 units, enough to protect a 10 m garden row or a small patio.
Materials
- 6 to 8 aluminum foil pie tins (20 cm diameter) or empty steel food cans with labels removed
- Reflective Mylar tape or bird-scare tape, 1 roll (approximately 50 ft / 15 m) — available for around US$9 to $11 or £7 to £11
- Nylon monofilament fishing line (0.3 mm to 0.5 mm, rated for outdoor UV exposure) or garden twine
- Wooden garden stakes or bamboo canes, 90 cm to 120 cm tall
- Cable ties or S-hooks for attaching lines to stakes or wires
- Swivel clips (the kind used in fishing tackle) — these allow the tin to spin freely and are the single best upgrade you can make to a basic build
- Optional: old CDs or DVDs for extra reflective surface area
- Optional: small jingle bells or metal washers to add an auditory component
Tools
- Hammer and a nail (for punching suspension holes in pie tins or can bases)
- Scissors or wire cutters
- Permanent marker
- Tape measure
- Ladder or step stool if mounting above head height — follow ladder-safety guidance and, for any roof work, use appropriate fall protection as required by OSHA standards (29 CFR 1910/1926)
Materials, cost, and how well they work
Not all reflective materials are equal outdoors. The table below gives a realistic comparison based on retail pricing and outdoor durability notes from manufacturer product listings and field use.
| Material | Estimated Cost | Outdoor Durability | Deterrent Effectiveness (short-term) | Notes |
|---|---|---|---|---|
| Aluminum foil pie tins | Under $1 / £1 each | 2 to 4 months before warping/corrosion | Good — reflects and spins well | Cheap and widely available; replace seasonally |
| Recycled steel food cans | Free | 6 to 12 months (will eventually rust) | Moderate — heavier, less flash, more rattle | Add auditory cue; rough edges need filing |
| Mylar / bird-scare tape (commercial) | $9 to $11 / £7 to £11 per 50 ft roll | 3 to 6 months in direct sun/wind | Very good — high reflectivity, strips flutter actively | Best value per metre; UV and wind degrade it over time |
| Old CDs / DVDs | Free | 1 to 2 seasons (UV hazing reduces flash) | Good — large reflective disc, spins freely | No cost; combine with swivel clips |
| Stainless or powder-coated commercial reflectors | $40 to $45 / £25 to £35 for a 10-pack | 2 to 5 years | Very good — maintains reflectivity longer | Higher upfront cost; best for semi-permanent installations |
| Tin cans + bells/washers | Under $2 / £2 per unit | 6 to 12 months (can body) | Good — adds sound to visual cue | Sound component helps delay habituation |
Step-by-step: building a standard hanging tin-can scarer
These instructions produce a single spinning reflective unit. Build six to eight at a time, as density across the protected area matters more than any one perfectly constructed device.
- Mark the centre of a foil pie tin with a permanent marker and punch a single hole through it using a hammer and nail on a wooden offcut. The hole should be just large enough for your monofilament line to pass through.
- Cut a 40 to 50 cm length of monofilament line. Thread one end through the hole in the tin and tie it off with a double overhand knot so it cannot pull through.
- Attach the other end of the line to a swivel clip. This is the critical step: without a swivel, the tin wraps the line and stops spinning within an hour of installation.
- Cut a second 30 cm line and tie it from the swivel clip up to whatever mounting point you are using: a bamboo cane, a horizontal wire, or a fence post.
- Optional: thread two or three metal washers or a small jingle bell onto the lower line before tying the tin. They will rattle against the tin in even light winds.
- Optional: use a strip of Mylar tape, cut 20 to 30 cm long and 2 to 3 cm wide, and tape or tie it to the rim of the tin so it flutters independently below the disc.
- Test the unit by holding the mounting line and blowing gently on the tin. It should spin freely through at least 360 degrees. If it does not, check the swivel is not jammed.
- Attach the unit to a cane or stake pushed firmly into the ground or to a horizontal line strung between posts, keeping the tin at roughly crop-canopy height or just above the surface you want to protect.
Once you have built a set, the most important thing you can do is move them every five to seven days. Even shifting a device 1 to 2 metres from its previous position registers as a new stimulus to birds. If you leave them stationary, expect noticeable habituation within two weeks.
The tin-can bird scarer kite: when to use it and how to build one
A kite variant attaches the tin or reflective material to a kite frame so it flies 3 to 6 metres above the ground, combining aerial movement with flash. This is worth building when you need to cover a larger area, such as a full vegetable plot, a small orchard, or a flat roof, and when wind is reliable enough to keep it aloft. The movement at height mimics a soaring predator more convincingly than a ground-level device, and field trials comparing aerial moving deterrents to static reflectors consistently show better and longer-lasting results with aerial approaches. A peer‑reviewed field trial found that an artificial predator, the RobotFalcon, drove away flocks of corvids, gulls, starlings and lapwings more reliably than static visual devices, indicating moving predator mimics outperform static reflectors for some species Deterrence of birds with an artificial predator, the RobotFalcon (Field trial, 2022).
Kite build instructions
- Cut two bamboo canes to 60 cm and 50 cm respectively. These form the spine and cross-spar of a simple delta kite.
- Notch the ends of both canes with a craft knife so a loop of monofilament line can seat in the notch without slipping.
- Lash the canes together in a cross shape, placing the 60 cm cane vertically and the 50 cm cane horizontally, crossing at a point roughly 18 cm from the top of the vertical cane.
- Run monofilament around the perimeter of all four notched ends to form the kite's frame outline. Keep the line taut.
- Cut a piece of Mylar tape or silver foil approximately 55 cm x 45 cm to form the sail. Attach it to the frame using short strips of Mylar tape folded over each cane where they contact the sail.
- Punch three holes in the sail for the bridle: one at the top-centre, one at each lower corner. Attach a 30 cm bridle line to each hole and join all three to a single central bridle ring.
- Tie a 5 to 10 m flying line to the bridle ring. Attach the other end to a ground stake or fence post so the kite flies tethered.
- Attach one or two pie tins on short lines (20 to 30 cm) to the lower corners of the kite frame. They will spin and flash independently during flight.
- Test in light wind (Beaufort scale 2 to 3, roughly 6 to 12 km/h) before leaving unattended. Adjust the bridle angle if the kite dives: shorten the upper bridle leg to tilt the nose up slightly.
Kite-style scarers work best in open areas with consistent breeze. They are less useful in sheltered gardens with buildings on all sides, where wind is gusty and unpredictable rather than steady. For a more refined version of this concept, purpose-made bird scarer kites shaped like hawks or falcons offer better predator mimicry. Bird scarer kite instructions for purpose-made hawk kites follow the same tethering and placement principles but are available ready-to-fly. For detailed bird scarer kite instructions, see the hawk-kite build guide (reference 68c858d8-7de1-446b-8d33-eb70f18d3f78).
Installation and placement: spacing, mounting, and orientation
Placement has more impact on performance than build quality. These are the practical rules I follow:
Spacing and density
For ground-level reflective devices, one unit every 1.5 to 2 metres along a row is a reasonable starting point for small gardens. In larger areas such as orchards or fields, research from Transport Canada airport bird-control evaluations and extension guidance suggests one visual deterrent per 1.0 to 1.1 hectares for larger balloon-type devices, but for small tin-can scarers you need much denser coverage, approximately one device per 4 to 6 square metres of protected surface. Think of it as creating a perimeter of disturbance rather than a single central deterrent.
Mounting height and orientation
- Mount the tin at or just above the height of what you are protecting: canopy height for fruit bushes, roughly 30 cm above soil level for seedbeds, table height for patios
- Position devices so direct sunlight hits them during the time of day birds are most active, typically early morning for garden birds and pigeons
- On windows where bird strikes are a concern, the window-safety research principle of roughly 10 cm (4 inches) maximum spacing between vertical hanging elements applies; for standard garden use, 1.5 to 2 m between individual units is fine
- Orient horizontal lines of scarers perpendicular to the prevailing wind direction so each device gets maximum spin time
- On flat roofs or solar panel arrays, mount units at the panel edge or along ridge lines, not flat against the surface where they cannot catch wind
Mounting methods
- Horizontal line method: run a length of monofilament between two stakes or fence posts and hang multiple tins at 1.5 m intervals using the swivel-clip attachment described above
- Single-stake method: attach one or two tins to the top of a bamboo cane using a short leader line; good for between rows
- Fence-post method: tie scarers directly to the top strand of a post-and-wire fence so they hang just above fence height
- Overhead grid method: for patios or pond edges, string a loose grid of monofilament above the area and hang tins and Mylar strips at each intersection
Troubleshooting, habituation, and knowing when to switch tactics
If birds return within a few days of installation, the most likely cause is that the devices are stationary, the swivels are jammed, or the wind exposure is too poor to generate movement. Fix swivels first, then relocate the units. If birds return within one to two weeks despite relocation, you are seeing habituation, not a fixable installation problem.
Habituation is unavoidable with pure visual devices. USDA field trials with pigeons found little deterrent effect remaining after 10 to 30 days. When this happens, the most effective response is to layer a second type of deterrent alongside the reflective devices: predator-call audio, a hawk-kite flown overhead, or physical exclusion netting over the specific crop. For pigeons on roofs specifically, physical exclusion (spikes, wire, netting) is almost always the only reliable long-term answer.
Starlings and smaller garden birds habituate at a similar rate to pigeons but are somewhat more disturbed by erratic movement. Combining tin-can scarers with reflective Mylar strips and moving the whole setup every five days extends useful life to four to six weeks in most gardens.
Safety, legal, and wildlife ethics
Tin-can scarers are harmless to birds: they cause no physical contact and no lasting stress beyond the normal avoidance response the bird would show to any surprise. In most jurisdictions, using visual deterrents like these requires no permits and is consistent with wildlife protection legislation, which prohibits injuring or killing protected species but not deterring them from specific areas.
The main safety consideration for people is the installation itself. On flat roofs, elevated structures, or any surface where you need a ladder, treat it as a fall-hazard task. Use a stable, properly footed ladder, and for any work on a pitched or high roof follow applicable fall-protection requirements. In the US, OSHA standards under 29 CFR 1910 and 1926 set the requirements for fall protection when working at height. OSHA, Walking‑Working Surfaces and Personal Fall Protection Systems (FAQ & guidance) explains employer requirements and best practices for fall protection under those standards OSHA — Walking‑Working Surfaces and Personal Fall Protection Systems (FAQ & guidance). If you are uncertain, hire someone to do the roof installation rather than improvise.
Also check whether any bright reflective devices attached to a fence or wall face toward a road or cycle path. In rare cases, concentrated reflections from Mylar tape or polished metal at low angles early in the morning can be temporarily dazzling at short range.
Maintenance and seasonal care
Foil pie tins will warp, dull, and eventually corrode outdoors. Plan to replace them every two to four months in exposed conditions. Mylar tape degrades faster in high-UV climates and typically needs replacing every three to six months in full sun. Inspect swivel clips monthly because they are the most common failure point: even stainless clips can seize with grit and salt.
In winter, birds visit gardens for food more persistently and may push through their initial avoidance of a scarer faster because hunger overrides caution. Increase relocation frequency to every three to four days during the autumn and winter feeding season. Store Mylar tape rolls indoors between seasons to preserve the reflective coating.
How tin-can scarers compare to other bird deterrents
Knowing what tin-can scarers cannot do is as useful as knowing what they can. The table below gives a direct comparison across the main deterrent categories.
| Deterrent Type | Approx. Cost | Setup Effort | Effectiveness (short-term) | Long-term Reliability | Best For |
|---|---|---|---|---|---|
| Tin-can / pie-tin scarer (DIY) | Free to $5 / £5 | Very low | Moderate | Low (rapid habituation) | Small gardens, seedbeds, patios |
| Commercial reflective kite / hawk kite | $15 to $40 / £12 to £30 | Low | Good (aerial movement is more convincing) | Moderate with relocation | Open gardens, orchards, allotments |
| Reflective Mylar tape (commercial) | $9 to $11 / £7 to £11 | Very low | Good | Low to moderate (degrades in UV) | Fence lines, crop rows, window protection |
| Sonic / ultrasonic bird scarer device | $30 to $150 / £25 to £120 | Low to medium | Good initially | Low to moderate (habituation, legal noise limits apply) | Gardens, patios, pool areas |
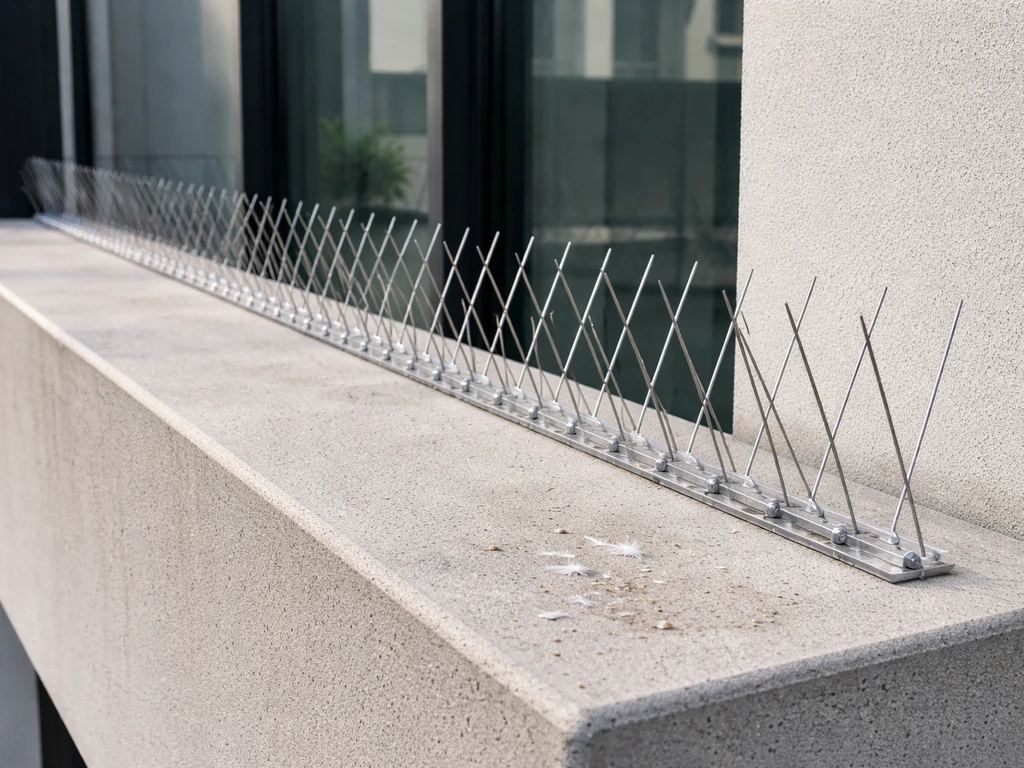
| Spikes (plastic or stainless) | $20 to $60 / £15 to £50 per metre-run | Medium | Excellent at ledges/ridges | High (physical exclusion) | Roofs, ledges, window sills, solar panels |
| Bird netting | $20 to $100+ / £15 to £80+ | High | Excellent | Very high (physical exclusion) | Fruit cages, orchards, large roof areas |
| Robotic / moving predator decoys | $100 to $500+ | Medium | Excellent (active movement mimics real predator) | High relative to passive devices | Farms, airports, large commercial sites |
For most home gardeners dealing with small birds or occasional pigeon visits, the right sequence is: start with tin-can scarers or commercial reflective tape for quick, cheap protection; add a hawk-kite style scarer if you have open space and reliable wind; move to physical exclusion (netting or spikes) if the problem persists past six weeks or involves roosting pigeons. If you want to explore ready-made options before committing to DIY, comparing the best bird scaring devices on the market for your specific location gives you a solid baseline for what each category actually costs and delivers. For product comparisons, see a roundup of the best bird scaring device options to match durability, coverage, and budget. For roof-specific options, see our roundup of the best bird scarer for roof to compare devices suited to flat and pitched surfaces. For pigeon-specific solutions, see a roundup of the best bird scarer for pigeons to compare devices tailored to rooftop and roosting problems. See our guide to the best bird scarer for garden to compare ready-made options and find the right model for your location.
Should you buy a commercial scarer or hire a professional?
Build DIY tin-can scarers yourself if: the problem is seasonal and confined to a small area, you are willing to move the devices regularly, and the total area affected is under roughly 50 square metres. The cost is near zero and the build takes under an hour.
Buy a commercial reflective or kite-style scarer if: you want a more durable, ready-to-use version of the same principle without the maintenance overhead of foil tins. Commercial Mylar reflectors and hawk kites are not dramatically more effective than well-made DIY versions, but they last longer and require less frequent replacement.
Hire a professional pest controller if: the problem involves a permanent pigeon or gull roost on a roof or structural ledge, there is a hygiene or health risk from accumulated droppings, or you need work at height on a complex roof structure. A professional will typically recommend and install physical exclusion (netting, spikes, or wire deterrent systems) as the primary solution, with visual and sonic deterrents as supplementary tools.
Image and diagram suggestions for this article
The following shot list covers publication-ready images and diagrams that would support this guide. These are editorial suggestions for a photographer or illustrator.
- Completed hanging unit (product-style photo): a single finished pie-tin scarer hanging from a bamboo cane against a garden background, showing the swivel clip, monofilament leader, and a Mylar tape strip attached to the rim. Natural outdoor lighting to capture the reflective flash. Caption: 'A finished tin-can scarer with swivel clip and Mylar strip, ready to install on a garden cane.'
- Spacing diagram (line illustration): a top-down schematic of a 6 m garden row showing a horizontal monofilament line strung between two stakes, with six tin-can scarers hanging at 1.5 m intervals. Annotate the 1.5 m spacing and the stake depth (minimum 20 cm). Caption: 'Recommended spacing: one unit every 1.5 m along a crop row, hung just above canopy height.'
- Step-by-step build panel (flat-lay photography): tools and materials laid out flat (pie tin, swivel clip, fishing line, Mylar tape strip, nail, hammer) with numbered annotations matching each build step. Caption: 'Everything needed for one unit, costing under £2 / $2.'
- Mounting method comparison diagram (line illustration): three side-by-side sketches showing (a) the horizontal line method with multiple tins between two posts, (b) the single-stake method with a tin at the cane tip, and (c) the overhead grid method above a patio table. Caption: 'Three common mounting configurations for different locations.'
- Kite variant in flight (action photograph): the DIY Mylar kite described in the instructions flying tethered at roughly 4 m height in an open garden, with the attached tin spinning below. Caption: 'The kite variant flies 3 to 6 m up, combining aerial movement with reflective flash for wider area coverage.'
- Habituation comparison (infographic): a simple timeline graphic showing bird activity level on the Y axis and days since installation on the X axis, with a curve indicating typical effectiveness decline from day 1 to day 30, and a marked point at day 5 to 7 showing the recommended relocation interval. Caption: 'Visual scarers lose effectiveness within 10 to 30 days without relocation. Move devices every 5 to 7 days to reset the novelty response.'
- Roof installation example (photograph): a close-up of a tin-can scarer attached to a roof ridge line or fence-post top, with a safety annotation reminding readers to use appropriate fall protection for elevated installation. Caption: 'When installing at roof height, use a stable ladder and appropriate fall protection.'
FAQ
What core topics and specific content must the guide include to be publication‑ready for homeowners, gardeners, property managers, and aviation/facility staff?
A complete guide must cover: 1) Clear definition and mechanism: concise definition of tin‑can (pie‑tin/reflective disc) bird scarers and explanation of visual deterrent mechanisms (novelty, motion, flash/looming). 2) Materials & tools: full parts list (variants by budget/durability) with exact specs, purchase sources and per‑unit cost ranges. 3) Step‑by‑step DIY build: numbered instructions, fastener types, tie/knot notes, windproofing, corrosion‑resistant options. 4) Installation & placement: recommended spacing/density rules, mounting examples for gardens, patios, roofs, solar panels, pools, windows; placement diagrams or image suggestions. 5) Effectiveness by target & location: species‑specific guidance (pigeons, starlings, corvids, gulls) and habitat notes (urban ledges vs. open fields). 6) Habituation & timelines: expected short‑term effectiveness and likely time to habituation; recommendations to delay habituation (rotation, motion, combination tactics). 7) Troubleshooting & limitations: common failure modes (insufficient density, fixed devices, poor mounting), measurable checks and fixes. 8) Safety, legal & ethical considerations: ladder/roof safety, local wildlife protection laws, non‑lethal ethics, aviation/airport restrictions. 9) Maintenance & seasonality: inspection intervals by material and climate, storage overwinter, replacement schedules. 10) Alternatives comparison: concise pros/cons of commercial scarers, sonic/ultrasonic devices, kites/predator kites, spikes, netting, and recommended use‑cases. 11) Cost‑effectiveness tables: materials vs. cost, durability and expected persistence. 12) Buy vs. DIY vs. hire decision criteria and checklist for when to call professionals. 13) Image & diagram requirements: spacing diagrams, mounting close‑ups, completed unit photos, failure examples and species‑response photos (with permissions). 14) Citations & evidence: peer‑reviewed studies, extension guides, government evaluations and manufacturer specs cited inline and in a references list.
Which primary scientific and authoritative sources are required to back claims about mechanism, habituation, and species responses?
Include tier‑1 and reputable tier‑2 sources: 1) Peer‑reviewed articles on visual deterrent mechanisms and habituation (e.g., systematic reviews like Proc. R. Soc. B 2019; MDPI 2023). 2) Government/agency evaluations (USDA APHIS, USDA‑NWRC, Transport Canada airport bird control reviews). 3) Recent field trials comparing static reflectors vs. moving predator mimics (e.g., RobotFalcon study, 2022). 4) Extension service and university guidance on deployment densities and combination tactics (UMass, state extension). 5) Species fact sheets from state wildlife agencies (CT DEEP, Nevada Dept. of Agriculture). 6) Product/manufacturer technical specifications and retail pages for durability and pricing (Home Depot, Lowe’s, Bird‑X). 7) Occupational safety standards for installation (OSHA ladder/fall‑protection regulations). 8) Any relevant regional/airport regulations for avian deterrence on airfields. Cite each claim to at least one primary source; prefer recent (≤10 years) for efficacy data but include seminal older reviews for historical context.
What practical, measurable data should be collected or presented to demonstrate effectiveness and guide recommendations?
Provide: 1) Baseline bird‑activity metrics (counts/min or visits/day) before/after installation. 2) Treatment density and spatial distribution (devices per m2 or per hectare). 3) Time‑series effectiveness (days/weeks until response declines), with sample timelines (e.g., 0–3 days strong; 7–21 days decline). 4) Species‑level outcomes (presence/absence, reduced roosting, reduced foraging). 5) Environmental covariates: wind, visibility, nearby roosts/food sources. 6) Device specifications: reflectivity, diameter/depth of tins, mounting freedom to move. 7) Maintenance/replacement frequency and failure rates. 8) Simple cost metrics: upfront cost, annualized cost, labor hours for installation/maintenance. Present sample datasets or example calculations so readers can estimate expected outcomes for their scenario.
Which experts and stakeholders should be consulted or cited to ensure practical accuracy and compliance?
Consult or cite: 1) Ornithologists with experience in behavioral ecology (habituation, visual cues). 2) Wildlife biologists at government agencies (USDA Wildlife Services, state wildlife agencies). 3) University extension specialists (fruit/crop specialists, urban wildlife). 4) Airport wildlife managers/avian hazard specialists (for aviation‑relevant advice). 5) Professional pest/wildlife control companies (for buy/hire decision criteria). 6) Safety officers or OSHA‑knowledgeable contractors for rooftop installation protocols. 7) Manufacturers/retailers for product specs and real‑world durability data. 8) Ethicists or wildlife rehabilitation organizations if legal/ethical edge‑cases arise.
What images, diagrams and tables are required to meet the article brief and what captions/metadata should accompany them?
Required visuals and metadata: 1) Spacing diagram: plan view for gardens and roofs showing device density (e.g., devices per m2 and examples like 1 per 10 m2, 1 per 0.25 acre, or per ac/hectare equivalents). Caption: recommended spacing and rationale. 2) Mounting examples: photos/illustrations for garden stake, patio overhang, roof edge with anchor, solar panel mounting (non‑penetrative options), window line. Caption: hardware and safety notes. 3) Completed unit close‑up: photo of assembled tin can scarer with suspension detail and reflective side. Caption: parts list annotated. 4) Motion example: short sequence or diagram showing wind movement and swivel attachment. Caption: importance of motion to reduce habituation. 5) Failure modes: photos of poor installations (tied too tight, rusted tin, low density). Caption: troubleshooting tips. 6) Species response montage (permissioned): pigeons vs. starlings vs. corvids near devices. Caption: variable species responses. 7) Tables: materials vs. cost/effectiveness/durability; pros/cons comparison matrix with alternatives; maintenance schedule by material and climate. Include alt text, photographer credit, resolution, licensing, and date.
What exact materials, tools, specifications and estimated costs must be listed so readers can build variants from low‑cost to long‑life?
List must include for each variant (budget, mid, durable): 1) Reflective disc options: disposable aluminum pie tins (diameter, gauge), stainless or powder‑coated metal reflectors, PET/mylar reflective discs — list typical diameters (6–12 cm/2.5–5 in), hole sizes for suspension. 2) Suspension hardware: nylon cord (gauge), stainless steel swivel snaps, monofilament line, cable ties, split rings, eye screws, S‑hooks, carabiners. 3) Mounts: garden stakes, gutter hooks, magnetic roof clips (non‑penetrating), adhesive outdoor Velcro for certain surfaces. 4) Fasteners & weatherproofing: stainless steel screws, zip ties, UV‑stabilized tape. 5) Tools: drill with small bit, metal snips, hammer, ladder, safety harness (if roof work). 6) Estimated per‑unit cost ranges (US/UK examples): pie tins $0.30–$1 each; low‑end mylar disc $0.50–$1.50; commercial reflective tape $8–$45 per roll; stainless reflectors $2–$8; swivels/cord $0.50–$3 per set. 7) Lifespan estimates by material and climate (e.g., foil pie tin: months; mylar/PET: 6–24 months; stainless/powder coat: years). Provide source or retail link for price examples.
Next Article
Best Bird Scaring Device: How to Choose and Install
Choose the best bird scaring device by bird type and location, with placement, setup, and humane legal guidance.