
The best bird-proof dryer vent solution for most homes is a wide-mouth louvered hood with an integrated or removable bird guard, like the Deflecto RVHAW4. If you are also thinking about solar, you may be wondering how much to bird proof solar panels before adding any deterrents. It keeps birds and nests out without restricting the 4-inch exhaust opening, stays code-compliant, and is easy to clean.
Best Bird Proof Dryer Vent: How to Choose and Install

Marcus Weatherby
2 Jun 2026
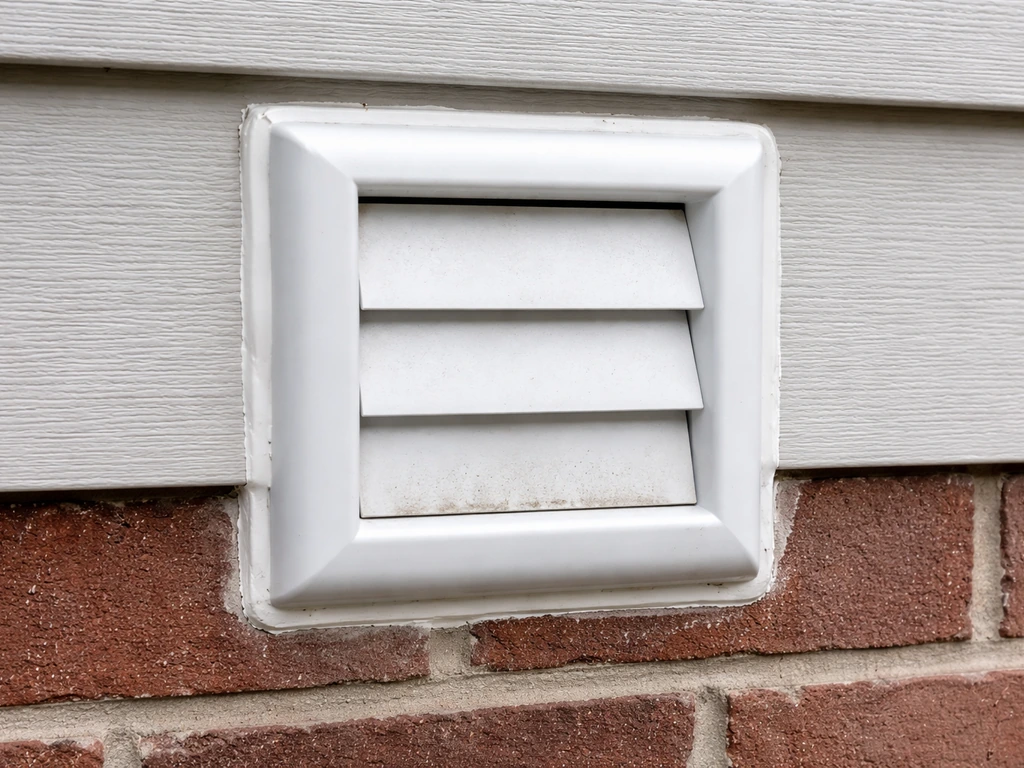
If you are dealing with an active nest, remove it first, clean the duct, then swap in a bird-resistant cap and blank" rel="noopener noreferrer">seal the perimeter with caulk.
Once your dryer-vent bird guard is sorted, you can use the same bird-exclusion mindset to plan bird guard installation on solar panels bird guard on solar panels.
Why birds target dryer vents in the first place
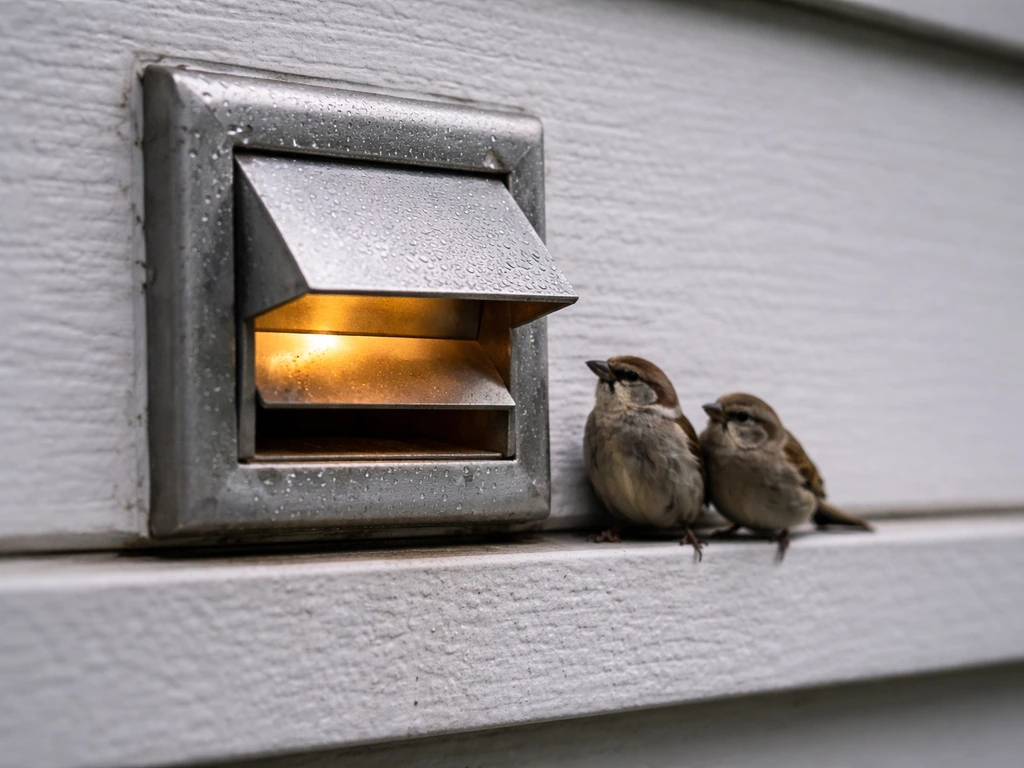
Dryer vents are genuinely attractive to birds. The opening is warm, sheltered from rain, faces outward like a natural cavity, and the exhaust flap often stays slightly open or loose. Sparrows, starlings, and house finches are the most common culprits. They squeeze through the flap gap when the dryer is off, pack nesting material inside, and block airflow before you even notice anything is wrong.
The termination point, meaning the exterior cap or hood where the duct exits the wall or soffit, is where almost all bird entries happen. The duct behind it is narrow metal, so birds are not burrowing in from random points. They are walking straight in through a flap that was designed to open freely. Old-style metal covers with a loose single flap are especially vulnerable because the flap can be pushed open by a bird weighing just a few ounces.
Nesting material is the real danger here. A compact nest of twigs, lint, and feathers inside the duct creates a genuine fire hazard. Lint from your dryer adds to it every cycle. Dryer Vent Wizard has specifically flagged bird nests as one of the leading causes of duct blockage and elevated fire risk, and the NFPA identifies lint accumulation in exhaust ducts as a primary ignition source in dryer fires. So this is not just a nuisance issue.
What to look for in a bird-proof dryer vent cap
The critical rule first: the International Mechanical Code (IMC) and most state mechanical codes explicitly prohibit screens at the termination of a clothes dryer exhaust duct. Portland's Building Official Determination 19-08 makes this clear, and the ICC IMC repeats it. Fine mesh blocks lint fast and creates a fire risk. So any solution involving a standard window screen or mesh insert is both a code violation and a safety hazard. That rules out a whole category of DIY fixes you might find online. If you are still comparing approaches, see what is bird proofing to understand how bird-resistant vent caps fit into the bigger prevention strategy.
What IS allowed and effective is a louvered or flap-style termination hood with a bird guard built in. Look for these specific features when you are shopping:
- 4-inch diameter opening to match standard dryer duct, with no restriction to the exhaust area (look for descriptions like "full 4 inches of free air")
- Single flap or louvered flap design that opens under exhaust pressure and closes when the dryer is off
- Integrated or removable bird guard: a coarse guard or cage around or inside the hood that blocks birds without trapping lint
- Corrosion-resistant material: aluminum or UV-stabilized plastic that won't rust and seal shut
- Smooth interior surfaces with no protruding screws or sharp edges that trap lint
- Wide-mouth or deep-hood profile that shelters the flap from wind, reducing backdraft that keeps the flap propped open
The Deflecto RVHAW4 wide-mouth hood with removable bird guard is a well-documented example that meets all these criteria. It is stocked at major home improvement retailers, reasonably priced, and the removable guard means you can clean it without tools. If you are trying to budget your project, you can also compare these bird-proof vent options with how much does bird proofing cost in your area reasonably priced.
Products like this are designed specifically to solve the bird entry problem without compromising exhaust performance. A good best dryer vent bird guard should fit the dryer vent opening type and keep birds out without restricting exhaust airflow designed specifically to solve the bird entry problem. Choosing the best bird deflectors for your dryer vent helps prevent entry, nesting, and airflow problems without sacrificing exhaust performance Products like this.
Avoid generic cheap plastic caps with no bird guard, foil accordion transition ducts (which trap lint and add to fire risk), and any cap that uses window-screen-style mesh. Also avoid anything with protruding sheet metal screws on the interior duct connections, since UL 2158A transition duct guidance flags those as lint-trapping hazards.
Comparing options by situation
| Situation | Best Cap Type | Key Features to Prioritize | Notes |
|---|---|---|---|
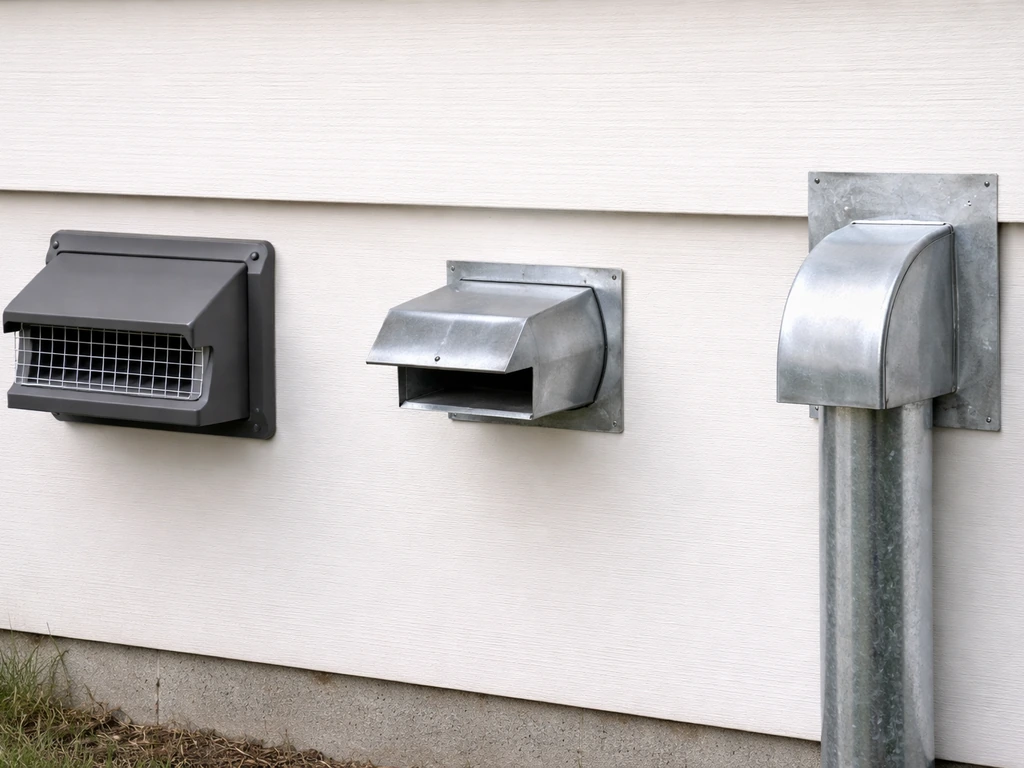
| Single-family home, exterior wall mount | Wide-mouth louvered hood with removable bird guard (e.g., Deflecto RVHAW4) | Full 4" airflow, removable guard, aluminum or durable plastic | Most common setup; straightforward DIY replacement |
| Single-family home, roof or soffit mount | 90-degree elbow termination with bird guard or pest cap rated for upward exhaust | Weather cap design, gravity-close flap, corrosion resistance | Harder to access; consider a pro for installation and annual cleaning |
| Multi-unit residential / apartment building | Commercial-grade aluminum louvered termination with integrated pest guard | Heavy-duty construction, tamper resistance, high-volume exhaust capacity | Multiple units mean more bird pressure on each cap; durable materials matter more |
| Commercial / light industrial (e.g., laundry facilities) | Heavy-gauge aluminum bird-resistant termination hood, code-rated for commercial exhaust volumes | High CFM rating, easy-clean access, corrosion-proof | Professional installation recommended; fire marshal inspections apply |
| Any setting near active bird colonies or aviation-adjacent facilities | Bird-resistant cap PLUS perimeter deterrents (spikes or physical barriers on nearby ledges) | Cap must still allow full exhaust; deterrents address the broader congregation issue | Cap alone may not be enough if birds are highly concentrated in the area |
For most readers on this site, the single-family exterior wall scenario is the one that applies. The wide-mouth hood with a removable bird guard covers it cleanly. If you are managing multiple units or dealing with a particularly aggressive bird population, layering on physical deterrents near the vent opening (not inside or blocking the exhaust) can help reduce repeated nesting attempts.
How to replace a dryer vent cap with a bird-resistant one
Before you install a new cap, deal with any existing nest. Zerorez specifically advises removing the bird nest and then inspecting the vent or cover so airflow can resume correctly afterward removal and then inspection of the vent/cover is needed so airflow can resume correctly after the nest is removed.
If you hear peeping or scratching, or if clothes are taking longer than usual to dry, there may already be a bird or nest inside. Shut off the dryer, go outside, remove the old cap, and check the duct opening visually. Remove any nest material by hand with gloves, then use a dryer vent cleaning brush kit to clear lint from inside the duct.
PNNL recommends disconnecting the duct from the dryer end first so you can run the brush through the full length. If you are ready to finish the job, follow a step-by-step process for how to install a dryer vent bird guard so the hood stays secure and airflow stays unobstructed how to install dryer vent bird guard.
- Turn off the dryer and unplug it or switch off the circuit breaker.
- Go outside and remove the old vent cap. Most are held by two to four screws at the wall flange. Some are also caulked around the perimeter.
- Clear any nesting material, lint, or debris from the duct opening and as far into the duct as you can reach.
- Run a dryer vent brush kit through the duct from the outside in, then from the dryer end out, to clear the full duct length.
- Check the duct itself: it should be rigid or semi-rigid metal, 4-inch diameter, with smooth interior walls and no foil accordion sections. If you see accordion foil duct, this is a good time to replace it with rigid metal.
- Fit the new bird-resistant cap into the duct opening. Most 4-inch caps slide directly into the duct collar.
- Apply a bead of exterior-grade caulk around the entire perimeter flange where the cap meets the wall. This seals the gap that birds can exploit and also prevents water intrusion.
- Secure the cap flange with screws appropriate for your wall material (wood, vinyl, masonry).
- Reconnect the dryer duct from inside and plug the dryer back in.
- Run the dryer on a short cycle and go outside to confirm the flap opens under exhaust pressure, airflow is strong, and the cap is seating properly.
One thing worth checking during installation: the duct behind the cap should be smooth-wall metal per IRC guidance (28-gauge minimum, 4-inch diameter). If the duct inside the wall is kinked, has too many bends, or exceeds the manufacturer's maximum total equivalent length (usually around 25 feet for a standard dryer), airflow will be poor regardless of the cap. Address duct routing issues at this stage rather than after.
What not to block: airflow and lint fire risk
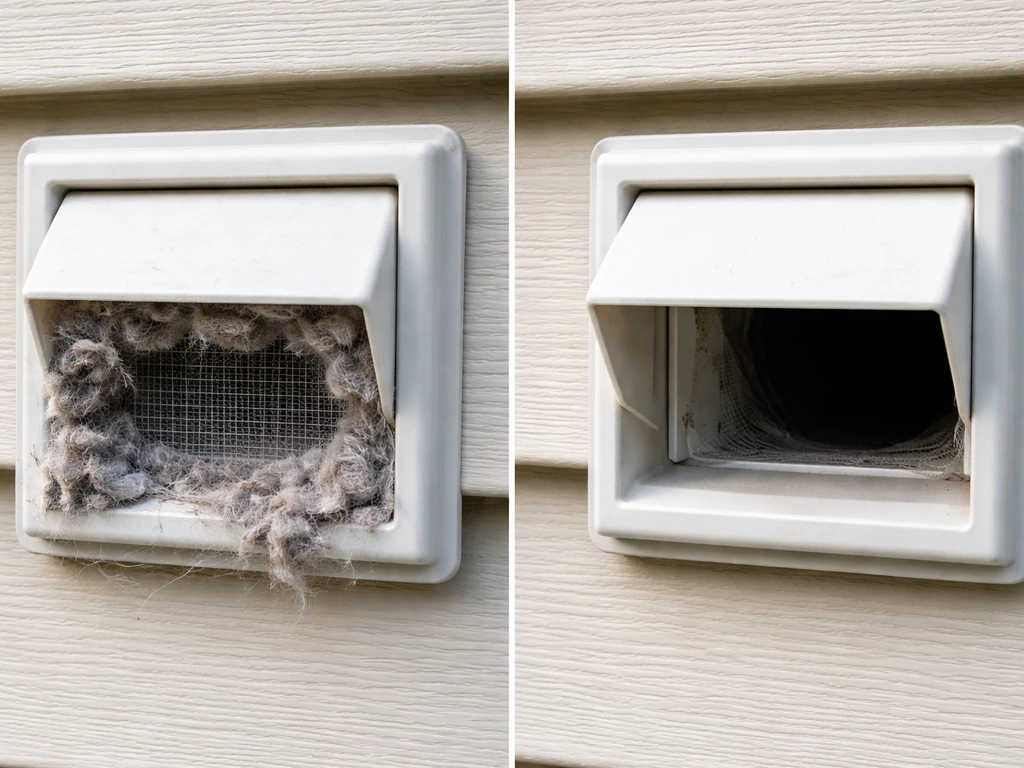
This is the point where good intentions can create dangerous outcomes. Never install anything inside the duct or at the termination that restricts exhaust airflow. The whole reason mesh screens are code-prohibited is that lint accumulates on them within a few cycles and creates a blockage. That blockage raises heat inside the dryer, which combined with accumulated lint is the exact recipe for a dryer fire. The NFPA and UL both identify lint buildup in the exhaust path as a leading cause of dryer fires.
- Do not use window screen, hardware cloth, or any mesh finer than a large-opening bird guard at the duct termination
- Do not install sheet metal screws that protrude into the interior of the duct at any connection point
- Do not use foil accordion flexible duct for transition sections; it traps lint and collapses under pressure
- Do not allow the bird guard to collect lint without cleaning it; even a coarse guard needs periodic inspection
- Do not install a cap smaller than 4 inches in diameter or one that reduces the effective exhaust opening
- Do not use chemical repellents inside the duct or near the exhaust termination; dryer exhaust heat can volatilize chemicals and pull them into the home
The bottom line is that the bird guard should only block birds, not airflow. If you hold your hand near the cap while the dryer is running and barely feel any exhaust, something is blocking the duct and you need to investigate immediately.
What to do if birds still get in after installing a new cap
If birds are still entering after you have installed a bird-resistant cap, work through these checks systematically. The entry point is almost always a gap you have not sealed yet.
- Check the caulk seal around the cap flange. Caulk shrinks and cracks over time, especially with temperature swings. Run your finger around the perimeter and look for gaps. Re-caulk with exterior-grade silicone or paintable sealant.
- Check whether the flap is closing fully when the dryer is off. A flap stuck open even slightly is an invitation. Clean the hinge area with a rag, remove any lint or debris, and confirm the flap swings freely and seats flat.
- Inspect the bird guard for damage. Plastic guards can crack in cold weather. Metal guards can corrode or bend. Replace the guard or the entire cap if it is compromised.
- Look for secondary entry points: gaps where the duct enters the wall from inside, openings around the cap body if the wall material has deteriorated (common with old wood siding), or spaces between the cap flange and the wall.
- Consider whether the duct itself has a break or gap inside the wall cavity. A disconnected duct joint inside the wall creates a hidden cavity that birds or pests may reach from the soffit or another opening. This requires a professional duct inspection.
- If birds are persistently targeting the cap area, add a physical deterrent like bird spikes on the surrounding ledge or sill to make landing near the vent less attractive. The cap handles entry; spikes handle congregation.
Also consider whether the problem is birds or something else. Mice and squirrels also enter dryer vents, especially in fall when they seek warmth. Their entry behavior and the damage they cause is similar but the deterrent approach may differ. A pest control inspection can confirm what you are dealing with if you are unsure.
Maintenance schedule and when to call a pro
A bird-resistant cap is not a set-and-forget solution. Here is a practical maintenance routine to keep everything safe and working:
| Interval | Task |
|---|---|
| Every 1-3 months | Visually inspect the exterior cap from the ground. Check that the flap is closing and the bird guard is intact. |
| Every 6 months | Remove the bird guard (if removable) and clean it. Pull any lint off by hand, then rinse or brush it clean. |
| Annually | Full dryer vent cleaning with a brush kit from duct end to termination. Check and re-caulk the cap seal if needed. Inspect the flap for wear. |
| After any nesting season (spring/early summer) | Extra inspection for nesting material even if no symptoms are obvious. Birds may have started a nest that did not progress. |
| If clothes take longer to dry, dryer feels hot, or vent flap doesn't open | Inspect and clean immediately; do not wait for the scheduled interval. |
Tom's Guide notes that clothes taking longer to dry is the single most telling sign of a blocked vent. InterNACHI frames a poorly exhausting dryer as both inefficient and a fire risk. Do not dismiss slow drying as just an aging dryer issue until you have confirmed the duct and cap are clear.
Call a professional dryer vent cleaning service or HVAC technician when: the duct run is longer than about 15 feet or involves multiple bends (making DIY brush cleaning difficult), the termination is on the roof or a high soffit you cannot safely access, you suspect a duct disconnection inside the wall, or you have had a confirmed nest inside the duct and are not confident the full duct length is clear. Professional cleaning typically uses a rotating brush system and a vacuum collection unit, which is significantly more thorough than a consumer brush kit in complex duct runs.
For multi-unit residential and commercial settings, annual professional inspections are worth budgeting for. The fire liability exposure from a lint-blocked duct in a shared building is significant, and some jurisdictions require documented vent maintenance for rental properties. If you are also managing other bird-related issues at the property, like solar panel nesting or rooftop congregation, coordinating a broader bird control assessment at the same time makes practical sense.
FAQ
Can I use a bird screen or mesh insert to stop birds from getting into the dryer vent?
No. For a clothes dryer, the bird guard should be louvered or a flap-style hood designed for the full exhaust cross-section. If you choose a guard that narrows the 4-inch opening, you can get higher lint buildup and heat, even if birds stop entering.
How do I know whether my new bird-proof dryer vent cap is restricting airflow?
If you feel little or no exhaust at the termination while the dryer runs, stop immediately and inspect for a blockage or an airflow restriction. Also check that the cap is not installed backward, is fully seated, and that the duct behind it is smooth-wall metal, not crushed or kinked.
Birds are still getting in after I installed a bird-resistant cap. What should I check first?
If you still see birds entering after installation, the most common cause is a gap around the outside of the hood or perimeter caulk. Recheck the seal at the wall or soffit opening, and confirm the guard is properly locked so it cannot lift or shift in wind.
What should I do if I find an active nest in the dryer vent?
During active nesting, do not vacuum or blast the duct without first removing the nest. Loose material can fall deeper inside and worsen blockage. Wear gloves, remove the nest carefully, then run a dryer vent brush kit from the best access point (often disconnecting at the dryer end so you can brush the full length).
How do I confirm the bird-proof dryer vent hood will fit my current vent size and termination type?
Use the louvered hood intended for clothes dryer termination, and match the hood’s design to your vent type (most are 4-inch). If your duct size or opening type does not match, you can end up with partial coverage that still allows entry or creates leaks at the perimeter.
If the dryer seems to work, is it still possible the bird-proof cap is unsafe?
Do not rely on airflow alone. After installation, schedule a dryer test and then check lint accumulation by running a normal load and inspecting the vent duct later. Persistent slow drying, repeated lint clogs, or frequent bird activity usually means there is still an entry gap or a duct routing issue.
How can I tell whether the problem is birds or rodents in my dryer vent?
Yes, pests other than birds can enter. Mice and squirrels often leave droppings, gnaw marks, or shredded nesting material at the termination, and they may need a different exterior exclusion strategy in addition to a bird-resistant hood. If you are unsure, a pest inspection can confirm species before you add deterrents.
How often should I clean a bird-proofed dryer vent?
Cleaning should be more frequent if you see lint buildup, if you have a long duct run, or if you recently had a confirmed nest. A practical approach is to check performance indicators (dry times, unusual heat, lint around the termination) and plan a brush cleaning at least seasonally, then professional service based on duct complexity.
Is it ever okay to add a second barrier inside the duct to stop birds?
You generally should not. Any accessory placed inside the duct or at the termination that reduces cross-sectional area can trap lint and increase fire risk. If you want extra protection, it should be the exterior hood’s bird guard design and a properly sealed perimeter, not an interior insert.
When should I hire a professional instead of using a consumer brush kit?
Yes. If the duct run is longer than about 15 feet, has multiple bends, is difficult to access at the termination, or you cannot confirm the full length is clear after a nest, professional cleaning is recommended. For high soffits or roof terminations, using a service also reduces the risk of an unsafe ladder or incomplete disassembly.
Next Article
How to Bird Proof Solar Panels: Step-by-Step Guide
Step-by-step bird-proofing for roof or ground solar panels to stop landing, roosting, nesting, and droppings safely.