The best bird spikes for most people are stainless steel strips with polycarbonate bases, spaced to match the bird species you're dealing with and installed with no gaps across every available landing surface. That one sentence covers about 80% of buying decisions. The rest comes down to your specific surface, the birds causing the problem, and whether you're screwing, gluing, or clipping the strips in place.
Best Bird Spikes Guide: Types, Spacing, and Installation Tips

Marcus Weatherby
8 Apr 2026
What bird spikes are and where they work best
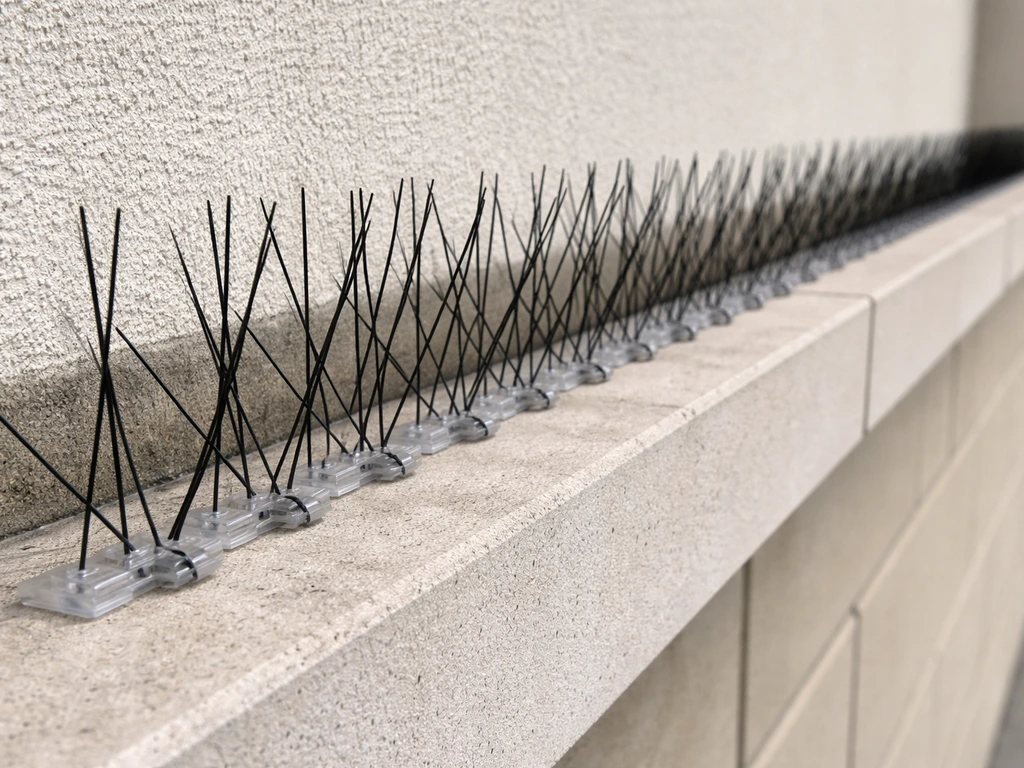
Bird spikes are physical barrier strips fitted with upward-projecting wires or tines. They don't injure birds. What they do is eliminate the stable foothold a bird needs to perch, roost, or nest. When a pigeon tries to land on a ledge covered with spikes, there's no flat surface to grip, so the bird moves on. That's the entire mechanism: removal of a usable landing area.
If you want a fuller breakdown of how the product category works before diving into buying decisions, the what are bird spikes overview covers the fundamentals in detail. But for this guide, what matters most is that spikes are a passive, physical solution, not a chemical or sensory one.
They work best on horizontal or near-horizontal surfaces where birds regularly land: parapet walls, window ledges, roof edges, sign tops, HVAC units, solar panel frames, patio beams, and fence tops. They're less useful on steeply pitched surfaces where birds don't actually perch, and they're not meant for mid-air deterrence or wide open areas.
A practical rule of thumb: any ledge or flat surface that's 65mm (about 2.5 inches) wide or more is wide enough for a bird to land on, and wide enough to justify installing spikes. Narrower than that and most birds won't bother anyway.
Choosing the best bird spikes by surface and bird type
Not all spike products are created equal, and the right choice depends on two things: the surface you're protecting and the species you're trying to deter. These two factors determine the spike height, wire spacing, and base width you need.
Matching spikes to bird species
Larger birds like pigeons and seagulls need taller spikes with wider spacing between tines. Pigeons are the most common target, and most standard stainless steel spikes are designed with pigeon control in mind. For smaller birds, sparrows or starlings for example, you need narrower-gauge, more densely packed spikes because smaller birds can squeeze between wider-spaced tines and still land. If small birds are your main problem, check out the best bird spikes for small birds guide, which goes deep on this specific challenge.
Swallows are a separate case entirely. They nest on vertical faces and under overhangs rather than perching on flat ledges, which means standard ledge spikes often don't address the real problem. The best bird spikes for swallows article covers the positioning and product adjustments needed for that specific scenario.
Matching spikes to your surface
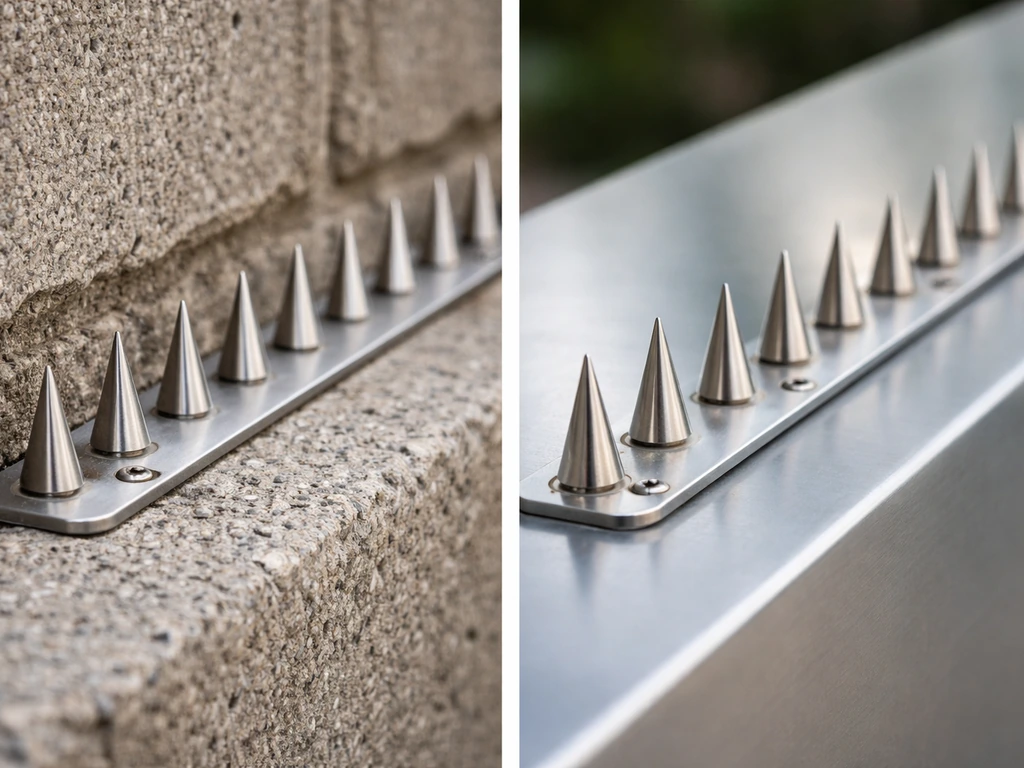
Stainless steel spike systems can be mounted on virtually any surface: masonry, metal, glass, wood, canvas, flat or curved. That flexibility makes them the go-to for commercial buildings, rooftops, and irregular architectural features. The base width of your spike strip should match or slightly exceed the surface you're covering. If your ledge is 4 inches wide, use a strip with a base that covers the full width, not one that only covers the middle.
For solar panel frames and areas where you want minimal visual impact, low-profile plastic (polycarbonate) base strips tend to blend in better. For long-term heavy-use areas like commercial rooftops or coastal installations where salt air and UV exposure are factors, stainless steel spikes on UV-stabilized polycarbonate bases are the most durable combination.
Material, design, and spacing: what to look for
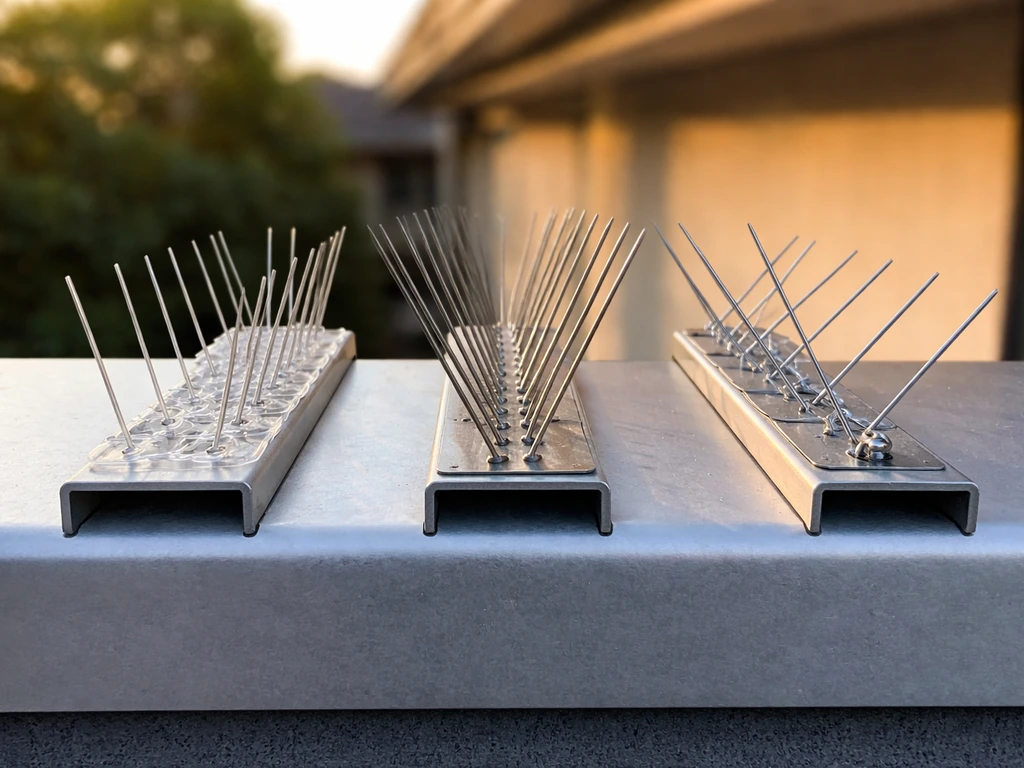
There are three main material types: stainless steel spikes, plastic (polycarbonate) spikes, and blunted galvanized wire systems. Each has trade-offs worth understanding before you buy.
| Material | Durability | Best Use | Visual Profile | Cost |
|---|---|---|---|---|
| Stainless Steel | Excellent (10+ years) | Commercial, rooftops, heavy bird pressure | Moderate | Medium-High |
| Polycarbonate (Plastic) | Good (5-7 years, UV-stabilized) | Residential ledges, window sills, light use | Low (clear) | Low-Medium |
| Galvanized Wire (e.g., Nixalite) | Very High | Heavy commercial, long perimeter runs | Low | Medium-High |
Stainless steel is the best all-around recommendation for most people. It doesn't rust, doesn't degrade in UV light, and handles physical stress from weather and occasional contact without bending out of shape. A quality stainless system like Nixalite's Model S configuration delivers at least 120 wire points per foot, which is a useful minimum benchmark for wire density when comparing products.
Polycarbonate spikes are fine for lighter applications, such as window sills or patio railings, where the bird pressure is lower and you want something nearly invisible. They're less expensive and easier to cut to length, but they do degrade faster under prolonged sun exposure.
Spacing between spike tines is the spec most buyers overlook. Wider spacing works for large birds (pigeons, gulls) but lets small birds land between the tines. If you're dealing with a mix of species, go with the narrower spacing. You can always use a wide-spaced product for pigeons and a denser product in secondary areas where smaller birds have found gaps.
Base width matters just as much as tine spacing. If your surface is three to four times wider than a single spike strip, one row will not be enough. You'll need parallel rows, and Nixalite is explicit about this: don't stretch the recommended spacing between rows beyond manufacturer specs. When in doubt, go tighter rather than leaving any flat space between rows.
For anyone who wants to dig further into what separates good products from mediocre ones, the best bird deterrent spikes comparison covers the top-performing products across categories with more product-specific detail.
Installation steps and common mistakes
Good installation is where most DIY setups either succeed or quietly fail over the following weeks. The product itself is rarely the problem. The problem is gaps, wrong placement, and inadequate adhesion.
Step-by-step installation
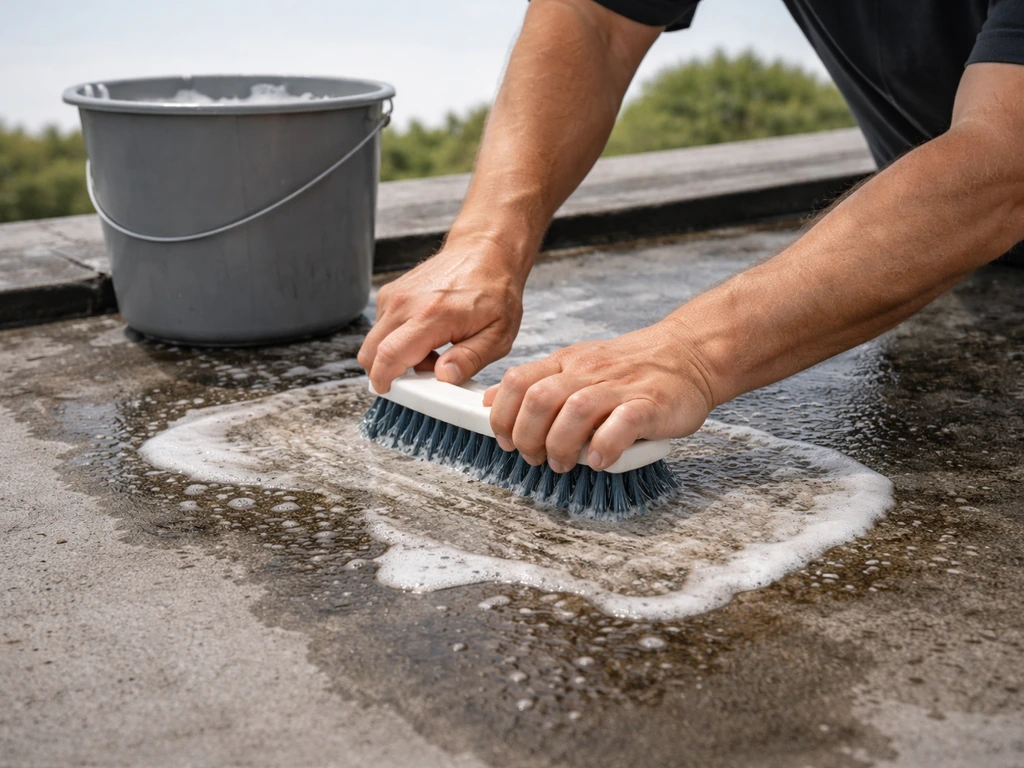
- Clean the surface. Remove all droppings, nesting debris, dirt, and grease. Spikes glued to a dirty surface will detach within weeks. Use a stiff brush, warm water, and mild detergent, then let it dry completely.
- Measure the surface width. Measure in inches (or cm) so you know how wide a strip you need and whether you need single or multiple rows. Plan this before you open anything.
- Start at the highest point. If the area has multiple levels, spike from the top down. Birds pushed off a higher perch will immediately look for the next available ledge below, so you want those covered before you push them off the top.
- Cut strips to length. Most spike strips are pre-scored to snap or cut at standard intervals. Cut cleanly so strip ends butt up tightly together with no gaps.
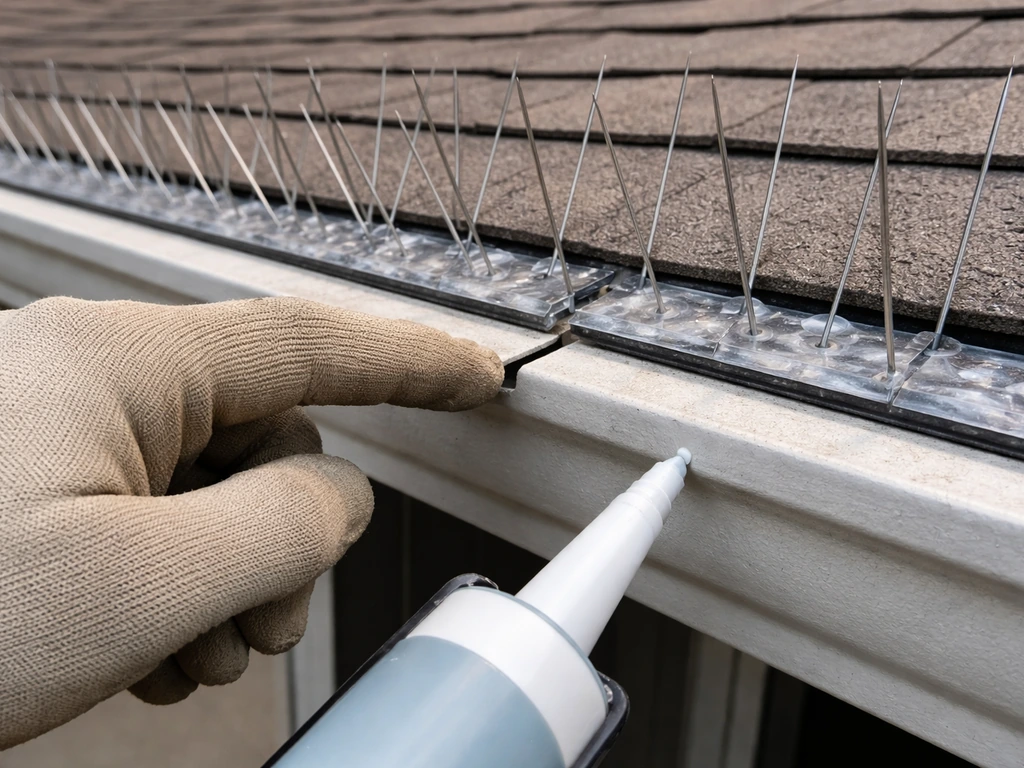
- Apply adhesive. If gluing, apply a continuous ribbon of adhesive (roughly 1 cm thick) along the full length of the strip's underside base. One tube of Bird-X Spikes Special Adhesive covers approximately 20 linear feet, so calculate how many tubes you need before you start.
- Press firmly along the full length. Push the strip down until adhesive squeezes out from the edges and through any base holes. This forms a mechanical lock in addition to the chemical bond. Don't just press the ends.
- Extend spikes to the outer edge. The tines must project out over the edge of the surface, not sit back from it. A flat exposed lip at the front of the ledge gives a bird exactly the landing zone you're trying to remove.
- Cover all potential landing areas. Every ledge, every beam, every nearby horizontal surface. Birds simply move to the next available perch if you only spike one area.
- Let adhesive cure before testing or disturbing the installation. Check manufacturer specs, but most require at least 24 hours.
Mounting method options
You have three main options: adhesive, screws/nails, or clip systems. Adhesive is preferred when you can't or don't want to penetrate the surface (painted masonry, glass trim, solar panel frames). Bird-X says its “Bird Spikes Special Adhesive” is supplied in a tube that covers approximately 20 linear feet of spikes. Screws and nails give a stronger mechanical hold on wood and some metals. Clip systems, like Nixalite's GlueClip approach, combine both for extra security on long runs. For temporary setups, clamps or heavy-duty Velcro can work, but don't expect them to last through strong winds or freeze-thaw cycles.
If you're undecided on adhesive products or want to make sure you're using the right formula for your surface material, the best adhesive for bird spikes guide covers compatibility and holding strength across surface types.
The mistakes that cause installations to fail
- Leaving gaps between strips. Even a small gap of an inch or two is enough for a pigeon to wedge itself in and start nesting. Strips must butt up tightly end-to-end.
- Not covering nearby perches. Spiking the front ledge but leaving the window sill, AC unit, or adjacent wall cap un-spiked is a common failure. Birds just shift 18 inches.
- Installing spikes too far back from the edge. If the outer lip of a ledge is exposed and flat, birds will land there. Spikes need to extend to (and slightly over) the edge.
- Poor surface prep. Adhesive applied over dust, bird droppings, or moisture will fail. This is the single most common reason glued spikes fall off within a season.
- Wrong row spacing on wide surfaces. One row centered on a wide ledge leaves flat space on both sides. Use multiple rows and don't exceed manufacturer-recommended row spacing.
- Incorrect angle or alignment. Strips installed at the wrong angle, especially on parapet tops in windy locations, can shift before adhesive fully cures. Hold them in place or tape them temporarily while the adhesive sets.
Safety, legality, and humane considerations
Bird spikes are a humane deterrent when installed correctly. The goal is to deny landing, not to injure. Properly installed spikes don't trap or wound birds; they just make the surface uncomfortable and inaccessible as a perch. This is recognized in commercial bird management as a standard exclusion approach, and it's the framing used by pest control professionals and property managers alike.
That said, there are some real considerations around installation safety and legal compliance.
Physical safety during installation
Roof and ladder work is where most installation injuries happen, not from the spikes themselves. Use a stable ladder, have a second person spot you, and don't overreach. On commercial rooftops or multi-story buildings, professional installation is worth considering simply because of fall risk. The spikes are the easy part; getting to the surface safely is the challenge.
Spike strips have sharp tines. Handle them with work gloves during installation. Cutting strips to length generates sharp ends that can cut through thin gloves, so use heavy-duty leather or cut-resistant gloves.
Legal and wildlife protection considerations
In most jurisdictions, deterring common pest birds (pigeons, starlings, house sparrows) with physical barriers is perfectly legal. However, some migratory or protected species may have different legal standing depending on your location. If you're dealing with birds that seem unusual, or if you're in a jurisdiction with specific wildlife protection rules, check local regulations before installing. This is particularly relevant in commercial or aviation-adjacent contexts.
It's also worth noting that if birds have already selected your structure as a nesting site (not just a perching site), spikes alone may not solve the problem. Active nests of certain protected species may require professional removal handled under permit. Spikes work best as a preventive measure or immediately after a roost is cleared.
If spikes aren't the right fit for your situation for legal, aesthetic, or structural reasons, it helps to know what other options exist. The alternative to bird spikes article covers netting, wire systems, and other physical barriers that might suit your setup better.
Effectiveness, maintenance, and troubleshooting results
When installed correctly with full coverage and no gaps, bird spikes are highly effective. Birds stop landing on treated surfaces within days in most cases. The timeline depends on how established the roost is. A pigeon that's been using the same ledge for two years needs more time to accept that the spot is gone than one that was just exploring the area.
The biggest effectiveness limitation is partial coverage. If you spike the front parapet but not the roof edge, birds move to the roof edge. If you spike the window ledge but not the AC unit beside it, they use the AC unit. Meridian's research makes this clear: spikes may do little to change bird behavior if nearby alternate perches remain available. Total coverage of all landing surfaces is what makes a spike installation work long-term.
What to do when birds are still landing after installation
- Walk the full perimeter and look for gaps between strip ends, exposed ledge lips, or any flat surface you missed. Even a 2-inch gap can become a new perch point.
- Check that spikes extend fully to the outer edge of each surface. If there's any flat front lip, add another row or reposition the strip to overhang the edge.
- Look for nearby perches you haven't spiked. A nearby pipe, windowsill, or neighboring ledge might be the new landing zone.
- Inspect adhesive bond. If strips are lifting or shifting, the adhesive failed. Strip them, clean the surface thoroughly, and reinstall with fresh adhesive.
- Consider adding a secondary deterrent for stubborn roosts. Optical gel or wire systems can complement spikes in areas where birds are highly persistent.
Maintenance and long-term care
Bird spikes are largely set-and-forget, but they do need occasional inspection. Check installations once or twice a year for bent tines, detached strips, and debris accumulation (leaves or twigs packed into the base can give birds a platform to stand on above the tines). Replace damaged or missing spikes immediately, because even a single compromised section invites birds back to the entire run. Anyone doing ladder work, window cleaning, or rooftop painting near spike installations should be warned not to knock or stand on the strips.
Stainless steel systems in good conditions can last 10 years or more with minimal maintenance. Polycarbonate base systems may need replacement after 5 to 7 years if exposed to intense UV. If you're unsure whether a product qualifies as an anti bird spike system for commercial compliance purposes, the spec sheet and installation manual from the manufacturer will usually clarify the product's rated use and any certifications it carries.
The bottom line: buy stainless steel for anything permanent or exposed to weather, use polycarbonate for light residential use, and always size your coverage to the full surface width with no flat gaps. Install with the right adhesive or mechanical fasteners for your surface, extend spikes to the edge, and cover every nearby perch in the same session. That combination is what separates installations that work from ones that leave you wondering why the pigeons came back.
FAQ
Can I install bird spikes on a surface that has paint, sealant, or window film?
Yes, but plan for surface bonding and edge seal issues. Adhesive systems can fail if the substrate is dusty, flaking, or heavily sealed, so clean to bare, stable material when needed. For window film or glossy coatings, do a small test patch and check that the base fully bonds to the coating, not just the top residue.
What should I do if birds are landing on the wall above the spiked ledge instead of on the ledge itself?
Add coverage to the vertical and adjacent horizontal transition area. Spikes only deny a usable landing perch, so if there is a new foothold higher up (parapet face, coping edge, nearby railing), birds will switch. The fix is expanding the treated area to include the entire landing and approach zone, not just the original ledge.
How do I avoid gaps at corners, joints, and where two spike strips meet?
Use full-length runs that reach the ends, then butt strips tightly or overlap only as the manufacturer specifies. Gaps at corners are a common failure point, birds use them to gain a foothold. If you can’t maintain full coverage due to geometry, plan additional shorter strips to keep the base continuous across every landing route.
Do bird spikes still work if the weather causes dust or debris to accumulate on the ledge?
They work less reliably if debris builds up into a platform. Leaves, twigs, or grime can bridge over the tines and create a level stance. Schedule simple seasonal cleaning, especially in fall, and inspect after storms to confirm the spikes remain unobstructed.
Is it okay to mix different spike spacings, for example dense spikes near small-bird areas and wider spacing near pigeon routes?
Yes, but only if you keep the coverage continuous and the sections are installed as designed. Mixed density can be effective when birds have distinct favorite zones. The key is preventing any flat “transition strip” where one section ends and the next begins.
Will installing spikes on a sloped roof or eave actually deter birds?
Often, but only when birds can still physically perch. On steep slopes, birds may not use the surface as a landing point, which reduces spike value. Before buying, observe where they land and pause, then target the coping, eave edge, and any near-horizontal sections they contact.
Do I need one row of spikes or multiple rows?
Use multiple rows when the protected surface is wider than a single strip can cover. If the surface width is roughly three to four times the width of one spike base, one row usually won’t deny a foothold across the whole perch. Avoid stretching row-to-row spacing beyond the manufacturer’s spec, add parallel rows instead.
What’s the best way to cut stainless steel or polycarbonate strips without damaging the edges?
Cut with the method the manufacturer recommends to avoid deforming the base and creating sharp burrs. After cutting, remove or blunt sharp ends so you do not compromise the base fit at the edge of the ledge. Use cut-resistant gloves, thin gloves often fail once the cut end is exposed.
How long do spikes need before birds stop trying the area?
Typically days, but longer is common for established roosting behavior. The more frequently a bird has used the same perch over months or years, the more time it takes to accept removal of that landing spot. If activity continues after a couple of weeks, the usual cause is partial coverage or a nearby alternate perch still available.
What’s the safest approach if I suspect a nest is already present?
Do not rely on spikes alone. If birds are nesting, especially for protected species, removal may require permits and professional handling. The safest workflow is confirm whether it is active nesting versus roosting, then follow local rules before excluding or removing birds.
How often should I inspect and maintain spike installations?
Inspect once or twice per year, and after major weather events. Look for bent or missing tines, lifted bases, and debris that can bridge over the spikes. Replace compromised sections immediately, since even a small untreated gap can allow birds to reclaim the entire run.
Are clip-on or temporary attachment methods acceptable for long-term results?
They can work short term, but they’re more likely to loosen under wind and freeze-thaw cycles. For permanent installations on exposed ledges, adhesive or mechanical fasteners that match the substrate tend to hold better. If you use temporary attachments, plan for frequent re-tightening and re-check coverage.
How do I know if a product is suitable for commercial compliance and certifications?
Check the manufacturer’s spec sheet and installation manual for rated use, surface compatibility, and any compliance or certification language. If the product claims commercial use, it should also specify recommended installation spacing and attachment method. When in doubt, match the installation method to the manual, not a generic “best practice” approach.