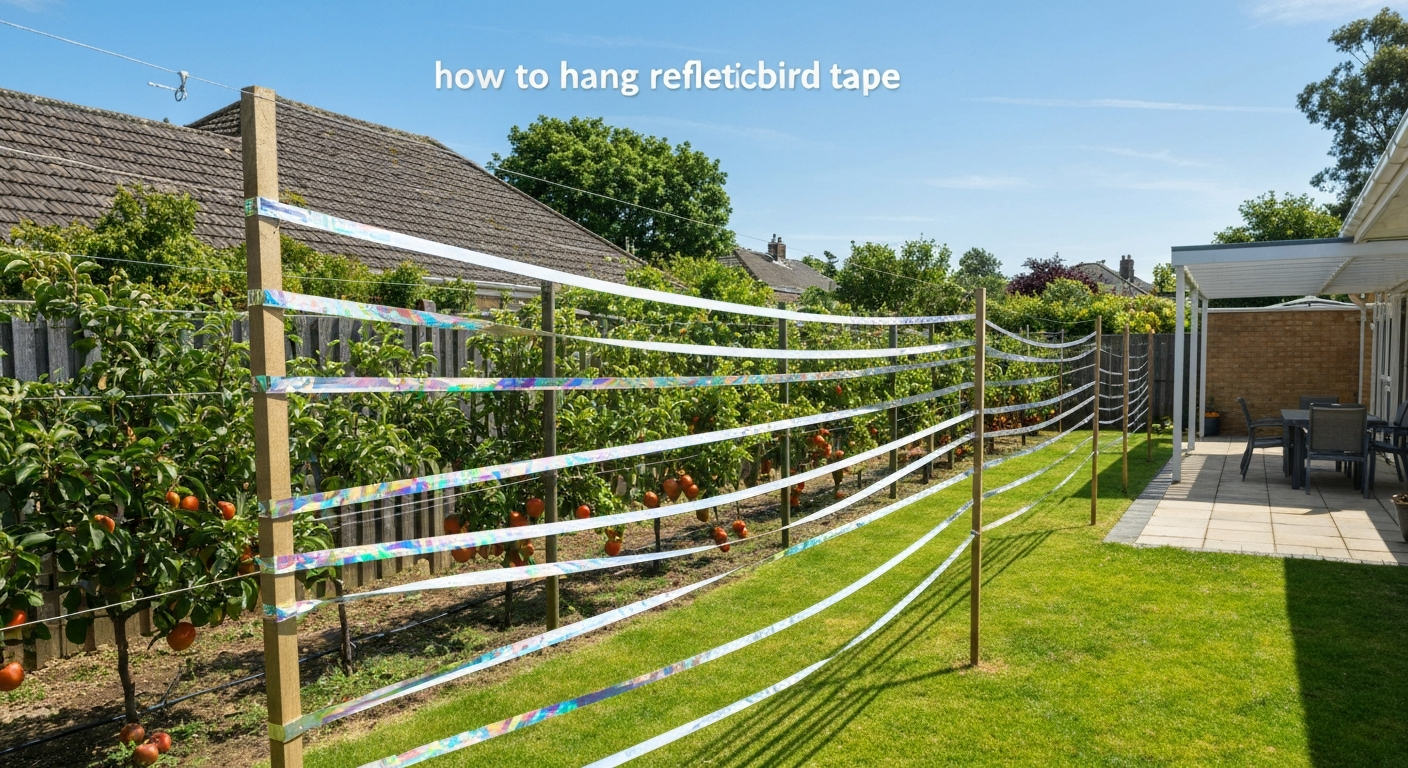
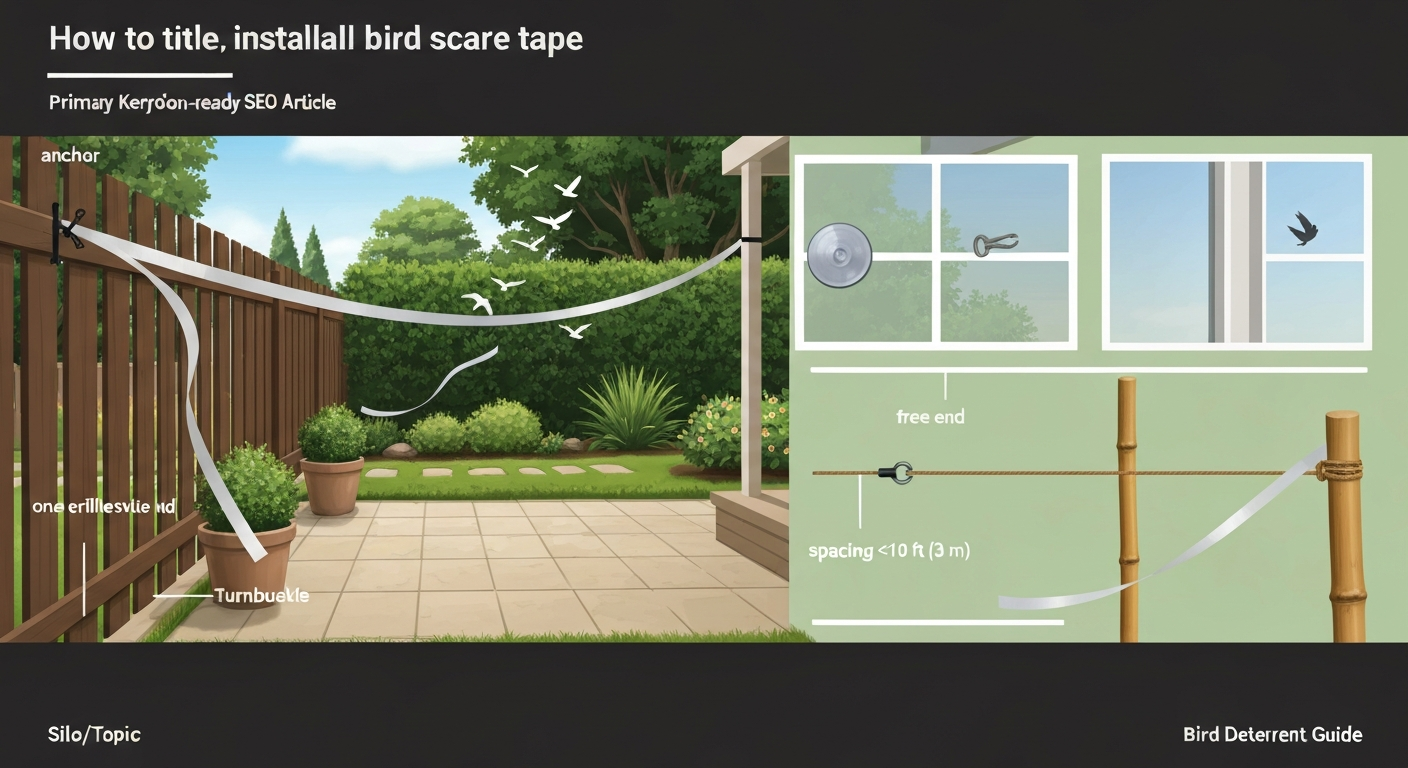
To install bird scare tape, cut strips 12 to 36 inches long, tie or clip one end to a fixed anchor point (a fence rail, stake, wire, or suction cup), and let the free end hang or flutter in the breeze. Space parallel lines roughly 10 feet (3 meters) apart, position tape at or just above the height birds are landing or approaching, and make sure the reflective side faces outward into open light. That core setup works for most patios, gardens, and balconies. The details below cover every variable: which tape type to choose, what hardware to use, scenario-specific spacing, and how to avoid the legal and safety pitfalls that trip people up. For step-by-step instructions and practical tips, see our guide on how to use bird repellent tape.
How to Install Bird Scare Tape: DIY Guide for Homes & Roofs

Marcus Weatherby
11 Aug 2026
What bird scare tape actually is
Bird scare tape goes by a lot of names: bird repellent tape, reflective bird tape, Mylar tape, Irri-Tape, bird blinder tape, holographic tape, and flash tape. The product is essentially a thin strip of metalized polyester film (BoPET, sometimes called Mylar) that is either single-sided reflective, double-sided reflective, or printed with holographic patterns. Standard retail rolls are typically 1 inch (25 mm) wide and come in 50-foot lengths, though agricultural rolls can be several centimeters wide. The tape weighs almost nothing, which means even light wind gets it moving.
Common uses span residential gardens, patios, balconies, fruit trees, vegetable plots, boat docks, window lines, roofs, solar panel arrays, commercial flat roofs, and orchard rows. It is one of the most affordable and widely available visual deterrents on the market, which is why it tends to be a first-attempt solution for a lot of homeowners and facility managers.
How the deterrent effect actually works
Three mechanisms combine to make birds avoid an area where tape is installed: reflection, movement, and sound.
- Reflection: The metalized surface bounces sunlight in unpredictable directions. Because most diurnal birds are tetrachromatic (they see into the ultraviolet range, unlike humans), a UV-reflective Mylar surface appears even more visually disruptive to them than it does to us. That spectral mismatch is part of why the tape can work even when it looks like a fairly ordinary silver strip to the installer.
- Movement: A free-hanging strip twists and flutters in wind, creating an erratic visual signal that birds associate with danger. Tape that is tightly pinned at both ends and cannot move loses most of its deterrent value.
- Sound: As the tape flutters it produces a faint crinkle and hum. The acoustic signal is minor compared to dedicated sonic deterrents, but it adds another sensory cue.
Species response varies. Starlings, blackbirds, pigeons, house sparrows, swallows, crows, and seagulls are commonly deterred in residential and light commercial settings. Larger birds like Canada geese or turkey vultures, which top the FAA's aviation hazard ranking, are less reliably moved by visual tape alone. Research from USDA field trials going back to the 1980s confirms that reflective tape can reduce crop damage from blackbirds in some settings, but results are inconsistent when spacing is too wide or when the reflective face becomes obscured.
The most important limitation to understand upfront: habituation. Published reviews consistently show that most visual deterrents produce their strongest effect in the first days to weeks and then decline as birds learn the tape poses no real threat. Rotating tape positions, combining tape with other deterrents, and removing food or roosting attractants are the countermeasures that keep effectiveness from dropping off.
The three main tape types compared
The product category breaks into three practical families. Here is how they compare across the factors that matter most for installation decisions.
| Type | Material/Finish | Best For | Pros | Cons | Typical Durability |
|---|---|---|---|---|---|
| Reflective (single or double-sided) | Metalized BoPET/Mylar, silver finish | Open areas with direct sunlight: gardens, patios, orchards, boat docks | Lowest cost, widely available, strong flash in bright light, UV-visible to birds | Needs sunlight to work well; can oxidize and dull in months; minimal effect in shade | 3 to 12 months depending on UV exposure and weather |
| Holographic | Metalized polyester with rainbow/prismatic print | Patios, balconies, window areas, gardens with partial shade | Produces multi-angle color flashes; works in lower light than plain silver; visually disruptive across wider range of angles | Slightly higher cost; same habituation risk; print can wear and fade | 6 to 18 months; holographic layer may peel in harsh UV |
| Blinder/Opaque | Solid or semi-opaque film, sometimes colored | Situations where you want to block a sightline rather than flash: windows preventing collisions, enclosed spaces | Does not rely on sunlight; blocks direct line of sight; reduces window-strike risk | No reflective deterrent effect; purely a visual barrier; less effective as a wide-area roost deterrent | 12 to 24 months; no UV-degradation of a reflective layer to worry about |
My recommendation: if you have a sunny outdoor area and want the broadest deterrent coverage, start with standard double-sided reflective tape. If your space gets indirect light or you want a more visually refined look, holographic tape is worth the modest price premium. Blinder tape is the right call specifically for window collision prevention, not for open-area roost deterrence. For step-by-step guidance on installing and positioning blinder tape on windows, see our guide on how to use bird blinder tape.
Decision checklist before you buy anything
Work through these questions before ordering tape. The answers determine width, length, quantity, and finish.
- What is the target species? Smaller birds (sparrows, starlings) are deterred by standard 1-inch tape. For large birds like pigeons or gulls, wider tape (2 inches or more) produces a more visible disturbance.
- How much direct sunlight does the area get? Good sun: reflective or holographic. Shaded or indoor: blinder tape or supplement with other deterrents.
- Is the area open enough for wind movement? Enclosed patios, covered pergolas, and dense hedgerows offer little wind. In those spots, plan to attach tape to a line strung above the area so at least the hanging portion moves freely.
- How long do the strips need to be? Longer strips (24 to 36 inches) flutter more dramatically but tangle more easily in crowded plantings. Shorter strips (12 inches) suit tight spaces and window frames.
- What will you attach the tape to? If there are no existing anchor points (fence rails, posts, wires), you need to budget for poles, stakes, or suction cups.
- Are there HOA or building codes that restrict visible deterrents? Check before installing anything that hangs on a shared fence or exterior-facing wall.
- Are you within a few miles of an airport? Read the aviation section of this guide before proceeding.
- What is the area's maintenance schedule? If no one will inspect the site for months, choose a durable tape and use hardware that won't release in wind.
Tools, hardware, and supplies you will need
The right hardware makes the difference between tape that stays up and works versus tape that tangles, sags, or blows away after the first storm. Here is what to gather before you start.
Tape and line
- Bird scare tape roll in your chosen type and width (1 inch is the standard retail size; get agricultural widths of 2 to 4 inches for large coverage areas)
- Clear monofilament fishing line (20 to 30 lb test) or UV-resistant polypropylene twine for stringing horizontal anchor lines between posts. Note: monofilament must be kept taut and inspected frequently because loose lengths are a documented entanglement risk for birds.
- Scissors or a utility knife for clean cuts
Fasteners and clips
- Small zip ties (4-inch, UV-rated black nylon) for attaching tape ends to wires, rails, or mesh
- Binder clips or small butterfly clips for temporary attachments to gutters or fabric shade structures
- Suction cups with hooks (rated at least 2 lbs each) for smooth surfaces like glass or polished metal, such as window frames and skylights
- Stainless steel screw eyes or cup hooks for attaching anchor lines to wooden posts, eaves, or pergola beams
Support structures
- Bamboo garden stakes (36 to 48 inches) or fiberglass rods for freestanding installations in soil: push in firmly so at least 12 inches are buried
- Telescoping flag poles or short EMT conduit for elevated installations above rooflines or solar panels
- In-line cord tensioners or small turnbuckles for keeping horizontal lines taut over longer spans (anything over 10 feet should be tensioned)
Adhesives (use selectively)
Adhesive mounting is only appropriate for hard surfaces where mechanical fasteners are not viable, such as tile roofs or glass balustrades. Use UV-resistant outdoor double-sided tape or a clear silicone adhesive rated for outdoor use. Avoid standard indoor mounting tape: it fails in sun and moisture within weeks and leaves a residue that is difficult to remove.
Safety, legal, and environmental cautions
This is the section most DIY guides skip, and it is the one most likely to cause you a real problem.
Entanglement and injury risk
Loose, sagging, or damaged tape and monofilament line are documented causes of bird entanglement. Conservation organizations including the RSPB warn that any loose netting, string, or line near areas birds frequent can trap feet, wings, and necks. Keep every line taut, trim any loose tape ends to at least 2 inches above ground level, inspect installations every two to four weeks, and remove any degraded or tangled material immediately. Chicago Bird Collision Monitors, Entanglement guidance and rescue advice emphasizes never using thin, loose lines or long streamers near areas birds frequent, gives stepwise instructions to free entangled birds safely, and recommends timely inspection and removal of failed deterrent hardware Chicago Bird Collision Monitors — Entanglement guidance and rescue advice. If you find an entangled bird, contact a licensed wildlife rehabilitator: attempting to free a bird without experience can cause additional injury.
Wildlife protections
In the United States, the Migratory Bird Treaty Act protects most native bird species. Bird scare tape is a passive, non-lethal deterrent and is generally legal to use, but any installation that traps, injures, or kills protected birds could create legal exposure. The entanglement prevention steps above are not optional niceties: they are part of what keeps your installation legally and ethically sound.
HOA and municipal rules
Many homeowners' associations have aesthetic guidelines that restrict what can be attached to fences, balconies, or exterior walls. A line of silver tape fluttering along a shared fence is the kind of thing that generates complaint letters. Check your HOA covenants and local ordinances before installing tape on any shared or visible structure. In commercial settings, property managers and facility directors should review lease terms as well.
Airport and aviation restrictions
This applies to any property within a few miles of a certificated airport. FAA Advisory Circular AC 150/5200-33 and regulations under FAR Part 139.337 require certificated airports to manage hazardous wildlife near movement areas and to control land uses that concentrate birds near runways. While installing scare tape on your backyard property is unlikely to fall directly under FAA jurisdiction, any bird-deterrent project at or adjacent to an airport, on airport property, or on facilities within the defined buffer distances must be coordinated with the airport's wildlife management officer. If you work in aviation facilities or on-airport property, do not install any deterrent hardware without that clearance. Large birds like geese and vultures rank highest on the FAA's aviation hazard scale, and visual tape alone is considered insufficient for those species in any context.
Working at height
Installing tape on a roof, above a second-story balcony, or on a commercial flat roof brings fall protection requirements into play. Under OSHA 29 CFR 1926 Subpart M, work at height in construction and roofing contexts requires guardrails, safety nets, or a personal fall arrest system. Even for a DIY homeowner, using an extension ladder to access a sloped roof to hang tape is genuinely hazardous. If the installation requires more than a few steps up a ladder on stable ground, seriously consider hiring a contractor who carries the appropriate safety equipment and training.
General installation best practices
These principles apply regardless of scenario. Follow them and your installation will be both more effective and safer.
- Anchor the top, free the bottom. Tie or clip the top of each strip firmly to a fixed point. Leave the bottom end completely free to flutter. Both ends tied means zero movement and zero deterrent effect.
- Face the reflective side outward toward the open area or the direction birds approach from. If you use double-sided tape, this is not an issue, but single-sided tape oriented inward wastes most of its effect.
- Hang tape at bird-approach height, not above it. If pigeons are landing on a fence rail at 4 feet, your tape line should be at or slightly above 4 feet, not 8 feet in the air.
- Check attachment strength before you call it done. Tug each strip and each anchor point. A zip tie or clip that is going to fail in a strong wind will usually feel loose at installation. Replace it.
- Keep anchor lines taut. A sagging horizontal line allows tape strips to clump together, reducing flutter and increasing tangle risk. Use tensioners on any span longer than 10 feet.
- Rotate positions every two to three weeks to counter habituation. Moving strips 3 to 5 feet along a fence line is enough to reset birds' threat assessment in many cases.
- Remove damaged tape promptly. Once the metallic film starts to wrinkle, oxidize, or tear, replace it. Damaged tape is less effective and creates more entanglement risk.
Quick-reference spacing and placement guide
Field research (including USDA trials cited in peer-reviewed reviews) points to roughly 10 feet (3 meters) between parallel tape lines as a practical threshold for open-area installations. Wider spacing reduces effectiveness significantly. The table below gives scenario-specific figures.
| Scenario | Target Birds | Strip Length | Spacing Between Lines/Strips | Preferred Height | Wind Notes |
|---|---|---|---|---|---|
| Patio / deck | Sparrows, starlings, pigeons | 18 to 24 inches | 6 to 10 ft between hanging strips | At or just above seated head height (5 to 6 ft) | In low-wind areas, use a line strung overhead so strips hang and can twist freely |
| Garden / vegetable beds | Blackbirds, finches, starlings | 12 to 18 inches | 8 to 10 ft between parallel stake lines | Just above crop canopy or top of bed frame | Stakes should allow strips to clear neighboring plants; add more lines in still spots |
| Windows (collision prevention) | Any species approaching glass | 12 to 18 inches | 4-inch gaps between vertical strips across the window face | Full window height, hanging from top frame | Window installations need minimal wind; the visual break is the mechanism, not flutter |
| Roof / flat commercial roof | Pigeons, gulls, starlings | 24 to 36 inches | 8 to 10 ft between anchor lines across the roof | At parapet height or on short poles 12 to 18 inches above the roof surface | Rooftop wind is typically sufficient; use strong UV-rated hardware rated for sustained wind |
| Solar panels | Pigeons, starlings | 18 to 24 inches | 10 ft between lines along panel rows | At panel-frame level, attached to frame rails | Avoid loose ends below panels where birds nest; inspect monthly |
| Pool area / boat dock | Gulls, cormorants, herons | 24 to 36 inches | 8 to 10 ft around the perimeter | At or just above railing or deck edge height | Combine with horizontal lines strung over the water surface for waterbird deterrence |
| Orchard / crop rows | Blackbirds, starlings, crows | 18 to 24 inches | 10 ft maximum between parallel lines along rows | 2 to 3 ft above canopy | More lines needed in low-wind valleys; wider strips (2 to 4 inches) suit larger open areas |
For wind specifically: strips shorter than 12 inches rarely develop enough flutter in light winds to be effective. In consistently still environments (covered patios, enclosed courtyards), attach strips to a low-tension horizontal line that you can periodically move or jog by hand, or switch to a method that does not depend on wind movement at all, such as a sonic deterrent or physical barrier.
Maintenance, lifespan, and troubleshooting
Standard reflective tape lasts roughly 3 to 12 months outdoors before UV exposure causes the metalized layer to oxidize, dull, or crack. Holographic tape typically lasts 6 to 18 months before the prismatic layer degrades. Both types shed effectiveness before they visually look destroyed, so plan on replacement at or before the manufacturer's stated lifespan even if the tape looks intact.
Habituation is the most common reason tape stops working. If birds return within a week or two after a previously effective installation, habituation is the likely cause, not installation failure. Rotate the tape to new positions, add a different deterrent type (a reflective pinwheel, predator decoy, or sonic device), and remove any food sources or roosting attractants from the area. Research confirms that combining visual deterrents with biologically salient methods (predator shapes, distress calls) gives stronger and longer-lasting results than visual tape alone. A British Columbia pilot study (Efficacy of bird deterrent devices pilot study) found reflective devices' effectiveness depends on light exposure, wind-driven movement, placement, and density, and recommended integrated approaches (tape plus netting or other methods) for better results A British Columbia pilot study (Efficacy of bird deterrent devices pilot study) found reflective devices' effectiveness depends on light exposure, wind-driven movement, placement, and density, and recommended integrated approaches (tape plus netting or other methods) for better results..
Inspect every installation every two to four weeks. Look for: tangled or sagging strips, broken anchor points, tape stuck against a surface and no longer fluttering, and any signs of entangled wildlife. Addressing these promptly keeps both effectiveness and safety intact.
When tape alone is not enough
Bird scare tape works best as part of a strategy, not a standalone fix. If you have a persistent roost, a nesting colony, or a large food attractant, tape by itself will almost certainly fail within weeks. In those situations, combine tape with physical barriers (netting, spikes), change the attractant (cover trash, remove standing water, trim roosting trees), or add an active deterrent like a propane cannon or distress-call speaker for large open areas.
Call a professional wildlife management company if: the bird pressure involves a protected colony or nesting site (removing active nests of protected species requires permits), if the installation requires working at significant height without proper fall protection equipment, or if you are on or near airport property and need coordinated hazard management. A licensed wildlife control operator can survey the site, identify species accurately, and deploy a legal, integrated strategy.
FAQ
What scientific evidence should I review before recommending or installing bird scare tape?
Review peer‑reviewed field trials and systematic reviews that test reflective tape effectiveness (Dolbeer/USDA series; recent reviews in Agriculture/MDPI and ScienceDirect). Key findings: reflective/Mylar tape can reduce some species' damage in some contexts but results vary by species, spacing, wind and visibility; visual devices commonly give short‑term benefits and often produce habituation. Also review avian sensory literature on UV and colour vision (Proc. R. Soc. B; Nature Communications) because birds see into the UV and species differences affect tape visibility.
Which authoritative regulatory and safety documents matter for installations at or near airports, commercial sites, and roofs?
For airports and aviation‑adjacent sites consult FAA Advisory Circular AC 150/5200‑33A and related AC 150 series guidance — airport operators must assess hazardous wildlife attractants and coordinate any bird‑attracting or deterrent installations with airport wildlife personnel; FAR/Part 139 provisions may require a Wildlife Hazard Management Plan. For work at height and roof installations consult OSHA fall‑protection standards (29 CFR 1926 Subpart M) and any local building codes or employer safety programs.
What tape materials and physical specifications should be recommended?
Recommend metalized polyester (BoPET/Mylar) for reflective/holographic tape; common retail widths ≈25 mm (1 in) and lengths in 10–50 ft rolls; agricultural/industrial products come wider and on larger rolls. Use streamers ~30–90 cm (12–36 in) long so they flutter in light wind. Choose UV‑stable, weather‑rated products for longer lifespan; expect outdoor life from months to a few years depending on UV, abrasion and wind. Vendor datasheets and product manuals give exact specs and replacement guidance.
How should I choose between reflective, holographic and opaque (blinder) tapes?
Match tape type to target species and site: reflective/holographic (metalized) rely on brightness and motion and work best where light and wind cause shimmering (patios, orchards, solar panels, pools); UV‑reflective/holographic variants may be more visible to many diurnal birds. Blinder/opaque tape provides contrast or blocking of sightlines and can help near nesting or roosting perches. For large flocks or high‑hazard species, tape alone is often insufficient—use as part of integrated methods.
What tools and mounting hardware are recommended and which materials should be avoided?
Recommended hardware: UV‑stable zip ties, stainless or coated clips, heavy‑duty suction cups for smooth glass, stainless or brass snap hooks, nylon rope or braided polyester line, poles or stakes for gardens, tensioners/turnbuckles for long runs. Use abrasion‑resistant knots and strain relief where film meets fasteners. Avoid thin monofilament, loose string, and unsecured long lines (high entanglement risk). Use small‑mesh, taut netting or rigid supports when netting is required.
What are clear, scenario‑specific installation steps for common situations (patio/balcony, window, pool, roof/solar panels, small commercial roof)?
Patio/balcony: attach short streamers (30–60 cm) at 1–3 m (3–10 ft) spacing along railings and overhead lines using suction cups or cable ties; ensure streamers can move in light breeze and are secured to avoid falling into planters or water. Windows: use short vertical strips just above glass or on eaves so reflections break up window outline; avoid direct contact adhesives on historic glass—use suction cups or removable clips. Pools: hang streamers above pool edge and from pergolas; keep length short to avoid wind tossing into pool. Roofs/solar panels: do not attach directly to panel face; install tape on perimeter bird‑exclusion lines or poles set off the panel array to flutter above the panels; maintain clearance to avoid shading. Small commercial roofs: use perimeter lines with poles or stakes, 1–3 m spacing between lines; combine with netting over small attractants and regular inspection. For all installs follow OSHA fall‑protection and safe‑access procedures when on roofs.
Next Article
How to Hang Reflective Bird Tape: Step-by-Step Guide for Gardens
Learn step-by-step how to hang reflective bird tape on roofs, panels, fences and patios to deter birds.