Bird repellent tape works best when you hang it in exposed, wind-catching spots at roughly 10-foot intervals, keep it moving freely, and combine it with at least one other deterrent if birds are still showing up after a week. Get those basics right and most common nuisance birds, pigeons, starlings, sparrows, seagulls, will avoid the treated area within a few days.
How to Use Bird Repellent Tape Step by Step Guide

Marcus Weatherby
4 Jun 2026
What bird repellent tape is and how it works
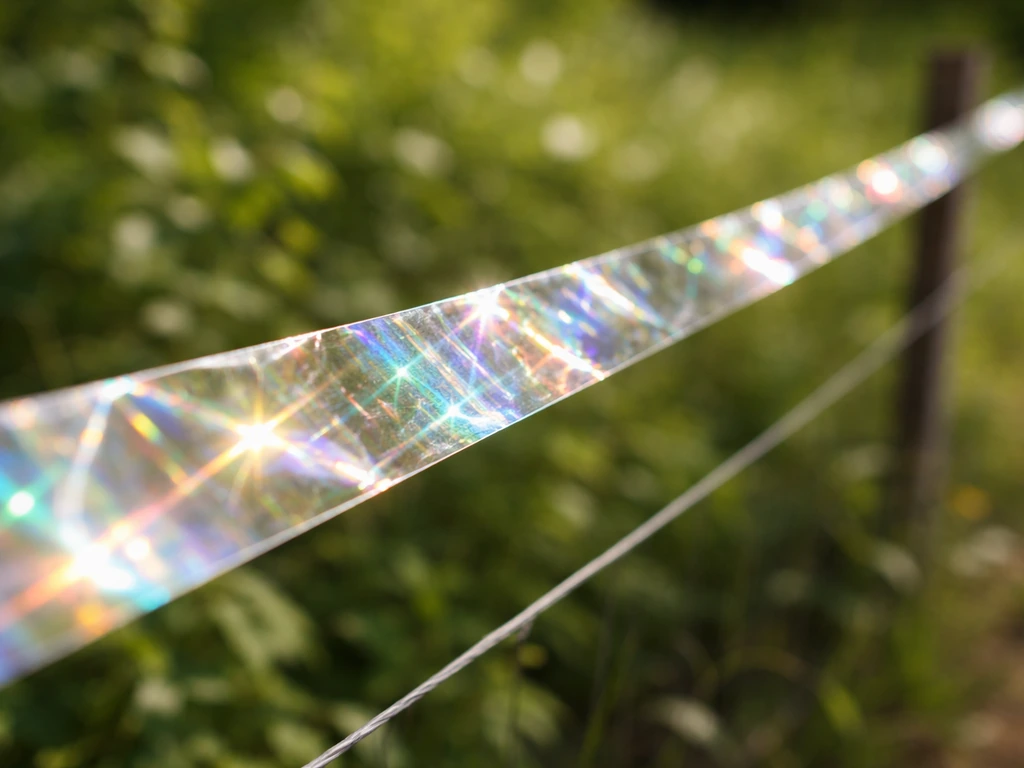
The term "bird repellent tape" gets applied to a few different products, so it helps to know what you're actually buying. The most common type is reflective scare tape, a thin Mylar or holographic ribbon (sometimes called flash tape or bird scare tape) that bounces light in unpredictable directions and makes noise in the wind. It's a purely passive, non-toxic deterrent with no chemicals involved.
The deterrence happens on two levels. First, the flickering reflections are visually disorienting to birds, whose vision is far more sensitive to light and movement than ours. Second, when the tape moves in a breeze it produces a humming or crackling sound that triggers a natural alarm response in most bird species. Products like Bird-X's Irri-Tape are specifically marketed as a "multi-sensory" deterrent for exactly this reason: both the visual and auditory cues work together.
A separate category sometimes sold under the "bird tape" label is window collision tape, thin strips or dots applied to glass to make windows visible to birds from outside. That's a very different product solving a very different problem. This article focuses on reflective/flash ribbon tape used to stop birds from landing or nesting on structures. If you're dealing with window strikes rather than perching, you'll want to look at window treatment products instead.
Choosing the best repellent tape for your situation
Not all reflective tape is built the same, and the right choice depends on where you're installing it and how long you need it to last. Here's a quick comparison of the main types you'll encounter.
| Type | Best For | Longevity | Notes |
|---|---|---|---|
| Standard Mylar flash tape | Gardens, fruit trees, patios, short-term use | A few weeks to 2 months outdoors | Loses reflective quality quickly in sun and rain; cheapest option |
| Holographic/iridescent ribbon | Roof edges, eaves, pool areas, longer perimeter runs | 2 to 4 months with quality brands | More durable coating; produces stronger multi-angle reflections |
| Adhesive bird tape (e.g., ABC BirdTape) | Window glass, smooth ledges, surfaces where hanging isn't possible | Varies by surface prep and weather | Requires strict surface cleaning protocol before application |
| Electric deterrent tape (e.g., Bird ZAP) | High-pressure spots where reflective tape has failed | Seasons with solar energizer | Uses embedded wires and a solar energizer to deliver a mild zap on contact; a pairing escalation, not a starter product |
For most homeowners dealing with ledges, railings, gutters, or garden areas, a quality holographic or iridescent ribbon tape is the right starting point. It's inexpensive, easy to install, and covers long runs quickly. Save the adhesive tape for surfaces where you can't hang anything, and consider an electric system only after reflective tape alone hasn't solved the problem.
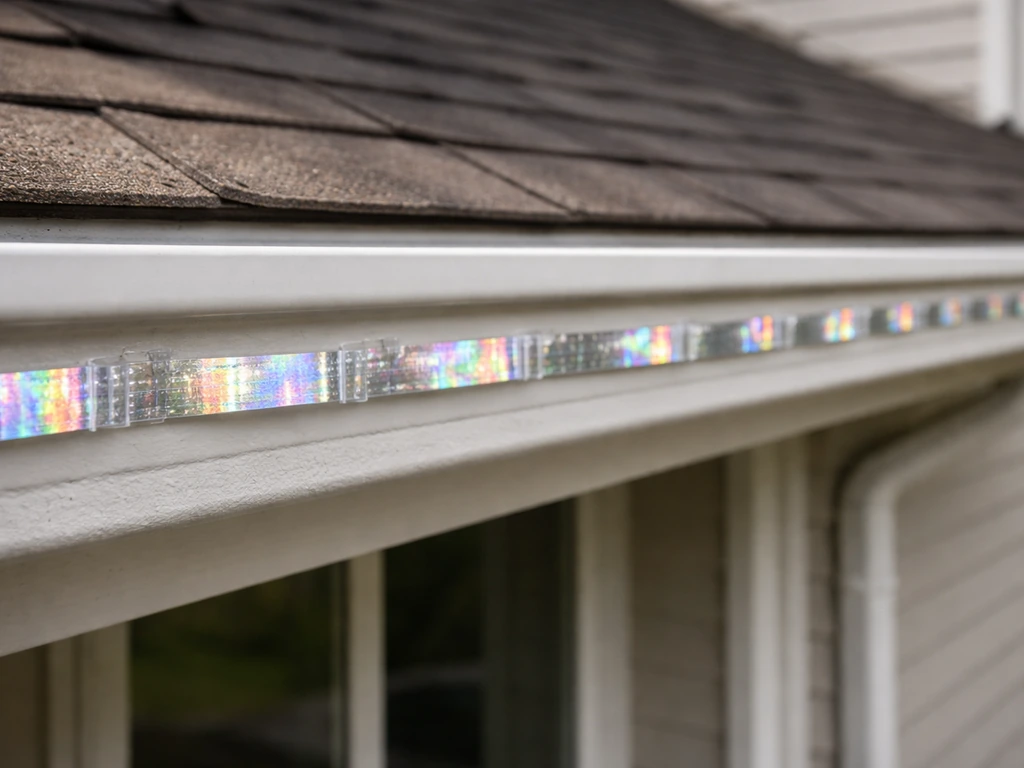
Where to apply it: high-impact locations around homes and businesses
The most effective placement is always where birds actually land or approach, not where you think they might land. Spend a few minutes watching where birds perch or arrive from before you install anything. Common high-impact zones include:
- Roof edges, eaves, and ridge lines where birds roost or nest
- Gutters and downspout areas where pigeons and starlings gather
- Window ledges and sills, especially south or west-facing ones that get afternoon sun
- Deck railings, fence tops, and pergola beams
- Patio covers and gazebo frames
- Pool surrounds and pool equipment enclosures
- Garden rows, fruit trees, and grapevines (flash tape is a classic use here)
- Solar panel edges and the gap under panels where pigeons nest
- Loading dock overhangs and commercial signage ledges
For solar panels specifically, tape along the exposed perimeter edges works as a first deterrent layer, though you'll likely need to pair it with mesh or spikes under the panels themselves, since the nesting cavity there is a strong enough draw that visual deterrents alone often aren't enough.
Step-by-step installation: prep, placement, and coverage patterns
Step 1: Measure your area
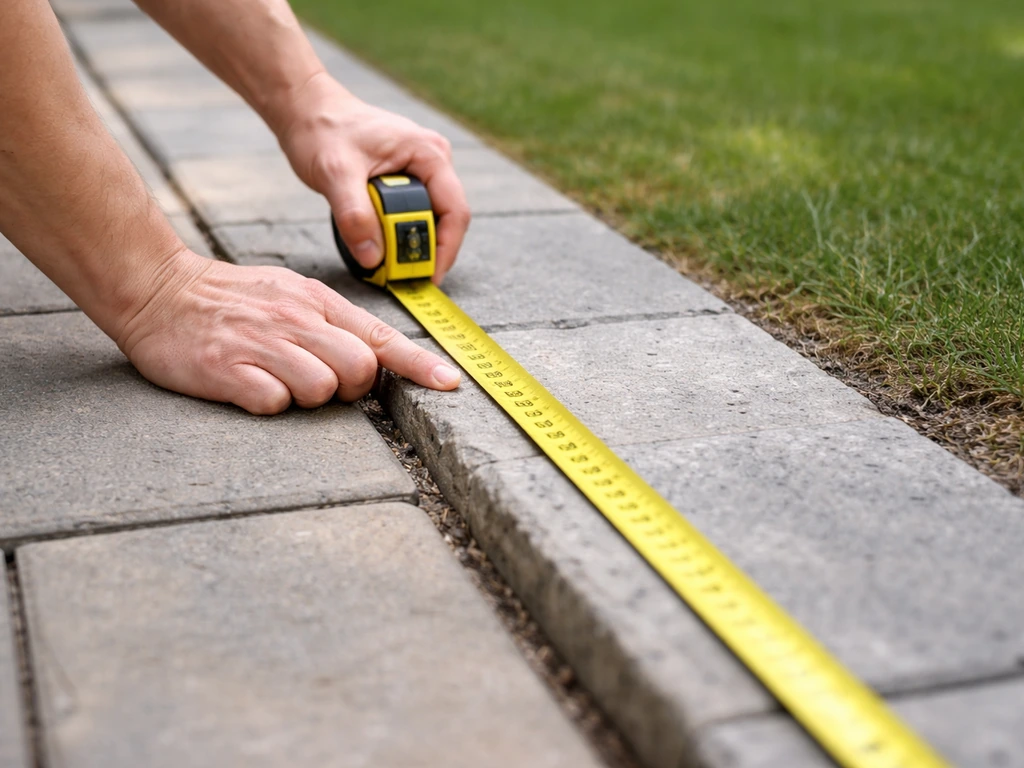
Walk the perimeter of the area you want to protect and measure it in feet. Then move to step-by-step placement by prepping the surface and hanging the strands at the right height for the birds you’re trying to stop hang the strands at the right height. For hanging tape runs (along railings, eaves, or fence lines), you'll plan one strand every 10 feet across the width of the zone. For grid-style coverage over an open area like a garden bed, plan parallel rows spaced about 10 feet apart. Having these numbers before you buy saves a lot of guesswork.
Step 2: Prep the surface
For hanging tape, surface prep is minimal: just make sure anchor points (eye hooks, staples, or zip ties) are solid and won't pull loose in wind. For adhesive tape applied directly to glass or smooth surfaces, surface cleaning is critical. Wipe the surface with a clean cloth and plain water, then let it dry completely. Avoid Windex and any spray cleaner that leaves a residue, because that residue will prevent the tape from adhering properly and you'll end up with peeling corners within days.
Step 3: Place tape at the right height and exposure
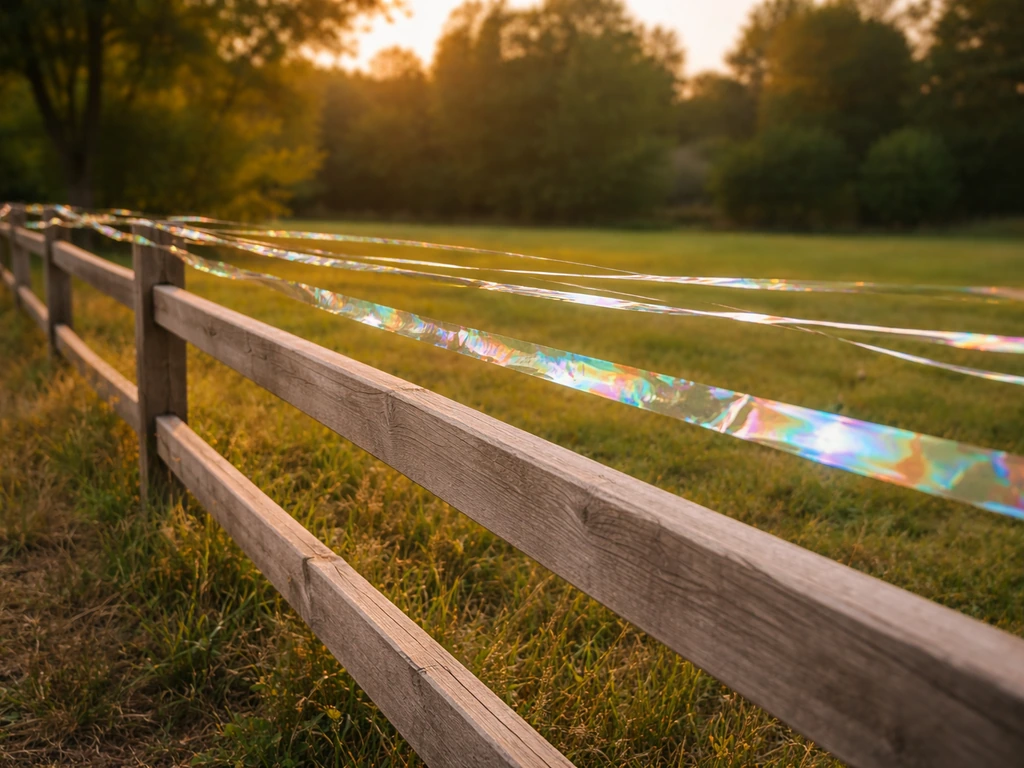
Height matters more than most people realize. The tape needs to be at or just above the level where birds are landing, not well below or several feet above. This same reflective scare tape is usually most effective when you hang it so it catches the wind and flutters freely. If birds perch on a railing cap, the tape should hang from the railing cap itself or just above it, so birds encounter it as they approach their usual spot. Tape hung too low simply doesn't register as a threat at the right moment.
Wind exposure is equally important. Tape that hangs limp in a sheltered corner does almost nothing. Position it where it will catch a breeze and move freely. To hang bird repellent tape effectively, place it where birds land or approach, secure the anchor points firmly, and position the tape so it catches a breeze and flutters how to hang bird repellent tape. Leave 2 to 4 inches of slack in each strand so it can flutter rather than pulling taut between anchor points.
Step 4: Follow the 10-foot spacing rule
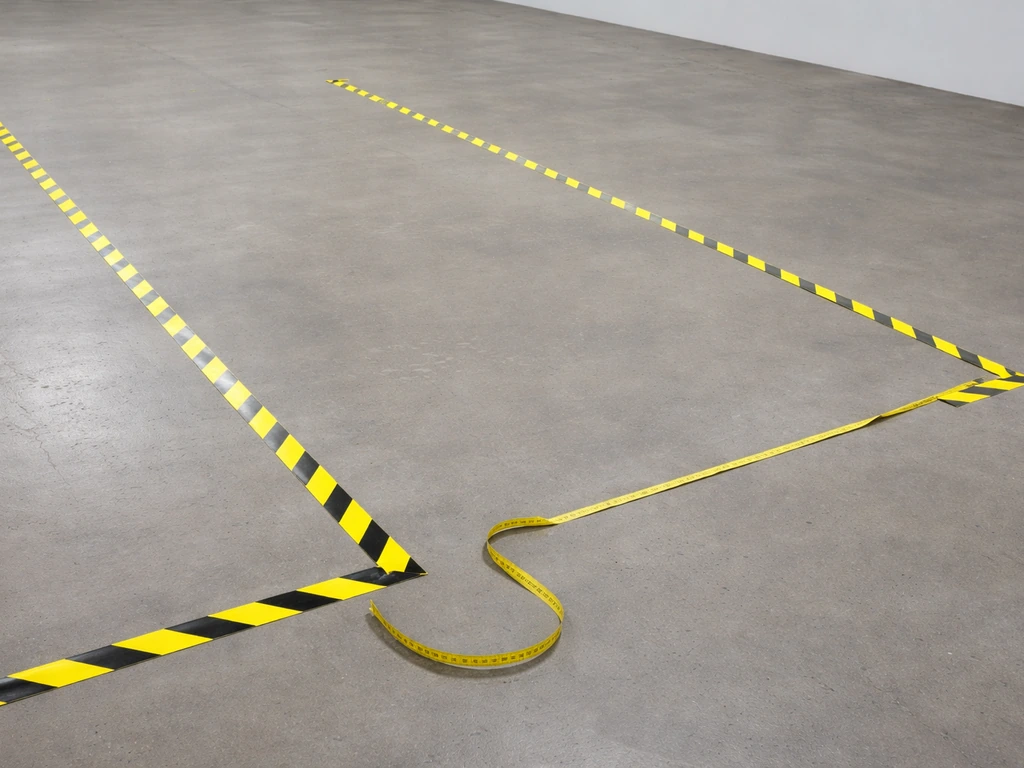
Research on reflective tape effectiveness consistently points to about 10 feet (roughly 3 meters) as the maximum spacing between tape lines for perimeter protection. To get the best results, follow a clear step-by-step routine for how to use bird blinder tape, including correct placement, spacing, and allowing it to flutter in the breeze. Wider gaps give birds a clear landing zone between strands and the deterrent stops working. If you're covering a long ledge or fence run, plan one anchor point every 10 feet and run a strand between each pair.
Step 5: Handle corners, seams, and curved edges
At corners, run the tape around the corner and anchor it on both faces rather than cutting it at the corner and leaving a gap. Birds often use corners as protected perching spots, so the corner itself needs coverage. For curved surfaces like round railings or arched eaves, use short overlapping segments of tape attached at multiple points rather than trying to stretch a single long strip, which will pull free.
When applying adhesive tape on glass or smooth surfaces, lift the corner edge of the backing before you start peeling to avoid tearing the tape itself. Apply from one end to the other in a single smooth motion and press firmly along the full length.
Step 6: Don't block human access
Run tape at heights and positions that birds encounter but people don't walk into. Along walkways, doorways, or gate openings, attach the tape above head height (at least 7 feet from the ground) or route it to the sides of the opening rather than across it. On patios, hang tape from the roofline or pergola beams so it flutters overhead without being at eye level.
Common mistakes and troubleshooting when birds return
If birds are still landing in the same spots after a week of tape being up, one of three things is usually happening: the spacing is too wide, the tape isn't moving freely enough, or the birds are starting to habituate to a purely visual stimulus that never actually harms them.
First, check your spacing. Walk the protected area and look for any gap wider than 10 feet between tape strands. If you find one, that's almost certainly where birds are getting through. Add a strand and give it a few more days.
Second, check for slack. Pull each strand gently and see if it moves freely. If tape is pinned flat against a wall or railing, it won't flutter and loses most of its effectiveness. Reposition the anchor points to let it hang with some give.
If you've checked both of those and birds are still returning at roughly the same rate after about two weeks, you're likely dealing with habituation. Birds are smart enough to figure out that flickering tape isn't actually dangerous once they've seen it enough times without consequence. The solution at this point is to rotate the tape to new positions (even shifting it a foot or two resets the novelty factor for a while) and add a second deterrent type, which is covered in the final section below.
- Tape gaps wider than 10 feet: add more strands
- Tape lying flat against a surface: re-anchor with slack so it can flutter
- Birds using the area below the tape: add a lower strand at bird landing height
- Tape visibly faded or crinkled: replace it, reflective quality degrades with UV exposure and rain
- Birds still present after 14 days at similar frequency: add a sonic or physical deterrent alongside the tape
Maintenance, longevity, and safe removal/replacement
Standard Mylar flash tape can start losing its reflective coating within a few weeks in direct sun and rain. Higher-quality holographic tape lasts longer, typically a couple of months before you'll notice it looking dull or crinkled. When you use holographic bird scare tape, expect better durability and stronger flashes than basic reflective tape in typical outdoor weather Higher-quality holographic tape. Once that happens, it needs to be replaced because a weathered strip is doing almost nothing.
Get into a habit of checking the tape every three to four weeks. Look for fading, tearing, or anchor points that have come loose. In windy climates, tape takes a beating and may need replacement more often. Budget for this when you buy: the cost of a fresh roll is minor compared to the hassle of birds re-establishing a nesting spot because the tape quietly stopped working.
To remove hanging tape, simply untie or unclip it from anchor points and dispose of it. For adhesive tape on glass or smooth surfaces, peel slowly from one corner. If any adhesive residue remains, a clean cloth dampened with warm water usually handles it. Avoid harsh solvents on painted surfaces or window seals, as they can strip finish or damage caulking. Unlike gel-based bird repellents that require a dedicated safety solvent cleaner to remove properly, reflective ribbon tape comes off without leaving chemical residue, which is one of its practical advantages.
Pairing tape with other bird control methods for tougher spots
Reflective tape is a great first line of defense, but it works best as part of a layered approach in high-pressure areas or where birds have been roosting for a long time. Birds that have established a nesting or roosting routine are much harder to dislodge with a single deterrent.
The most effective pairings are ones that hit birds on a different sensory channel than the tape already covers. Since tape handles the visual and some auditory cues, adding a sonic or ultrasonic repeller introduces a sound-based threat that makes the area feel dangerous on a second level. Bird-X specifically notes that combining deterrent types, such as a sound repeller alongside a visual scare, creates a multi-channel threat that is much harder for birds to habituate to than either method alone.
For ledges, eaves, and roof edges where birds are actually landing and perching, physical exclusion often makes more sense than relying on visual deterrents alone. Bird spikes on a ledge eliminate the landing surface entirely, while tape deters birds from approaching in the first place. Using both together means birds get discouraged before they reach the ledge and have nowhere comfortable to land even if they do approach.
In spots where reflective tape has repeatedly failed due to habituation, consider upgrading to an electric deterrent system. Products like Bird ZAP use a clear acrylic tape with embedded aluminum wires connected to a solar energizer. When a bird lands on the strip, it receives a mild, harmless electric shock that quickly teaches it to avoid the surface. This is a meaningful escalation from purely passive visual deterrents and works well on persistent roosting spots like wide ledges and parapet walls.
For garden and crop protection specifically, tape works well as a perimeter deterrent around raised beds or rows, but netting over the plants themselves is the only reliable way to physically exclude birds from food sources once they've identified your garden as a reliable food supply. Run tape around the perimeter and over the top of netting supports to keep birds away from the netting edges where they tend to probe for entry points.
The bottom line on pairing: start with tape for its ease and low cost, check results after one week, and if birds are still active by day 14, layer in a second method rather than just adding more tape. Rotating tape placement and adding a sonic deterrent or physical barrier almost always outperforms doubling down on a single approach that isn't working.
FAQ
Will bird repellent tape work if it does not flutter in the wind, for example on a sheltered porch or under an awning?
It usually underperforms when it hangs limp. If the location is wind-sheltered, add the tape to the nearest exposed edge where it can move, or adjust anchor points so there is 2 to 4 inches of slack in each strand. If you cannot achieve any movement, switch to a different deterrent type (for example, sound or physical exclusion) for that zone.
How do I tell the difference between reflective/flash ribbon tape and window collision tape before I install it?
Reflective scare tape is typically a thin, hanging ribbon meant to be tied or clipped along rails, eaves, or ledges and it is usually described as reflective, holographic, or flash tape. Window collision tape is applied to glass as dots or short strips to make the glass visible, and it is not meant to dangle to catch a breeze. Using collision tape on ledges will not create the same visual and movement cues.
What if birds are still perching after I install the tape, but the tape spacing is correct and the strands flutter?
Habituation, wrong landing height, or targeting the wrong spot are the common causes. Re-check that the tape is placed at or just above the birds’ typical perch or approach level, and confirm it covers corners and any protected entry routes. Also verify that there are no narrow, unprotected “shortcuts,” like gaps around downspouts or between rail sections.
Can I install bird repellent tape on a flat wall if there is no ledge for birds to land on?
You can, but only if birds approach and pause at that wall height. Reflective ribbon tape works best when birds encounter it during landing or approach, not when it is placed high on a face they never interact with. Spend a few minutes watching the route birds use, then place tape along the line where they actually move in close.
Is there a best time of day to do placement checks or to watch bird behavior?
Yes, mid-morning to late afternoon is often most informative because many nuisance birds are actively perching, feeding, or scouting. Watch where they approach from and which edges they use repeatedly, then map tape placement to those approach lanes rather than to your best guess.
What height should I use if birds are landing on a railing cap or fence top?
Place the tape so birds meet it as they approach their usual spot, typically hanging from the railing cap or immediately above it. If the tape is several inches below the top edge, birds may slip past it and land first, reducing the deterrent effect even if your spacing is perfect.
How often should I replace reflective bird repellent tape in harsh weather?
Check every 3 to 4 weeks, and plan for more frequent replacement if your area gets constant direct sun, heavy rain, or frequent high winds. Once the ribbon looks dull, crinkled, or less reflective, assume the flashes are weaker and replace. Weathered tape is functionally close to doing nothing.
Does the tape harm birds, pets, or people?
Reflective/flash ribbon tape is non-toxic and passive, but it is still a physical barrier that can create entanglement or trip hazards if strands are loose. Keep tape above walk paths and secure anchor points so strands do not fall or wrap around railings where pets could reach.
Can I use adhesive repellent tape on painted surfaces or only on glass?
Adhesive tape can work on smooth, clean surfaces, but painted or textured areas vary in adhesion. For best results, stick to surfaces that you can clean thoroughly and that are stable in outdoor conditions. Test a small section first, and avoid installing where the tape will be exposed to constant rubbing or moisture pooling.
What is the safest way to remove tape without damaging window seals or finishes?
Peel slowly from one corner, keep steady pressure, and remove adhesive residue with a cloth dampened with warm water. Avoid harsh solvents on painted trim and window seals, since they can strip finish or affect caulking. If a seal is already aging or cracked, removal can loosen it, so proceed gently.
Should I add more tape strands when birds return, or change something else first?
Start with verification, not escalation. If birds return, check for spacing gaps larger than 10 feet, ensure each strand has slack to flutter, and confirm corner and landing points are covered. Only after those fixes should you add a new deterrent type or rotate placement.
Will reflective tape work on nests that are already built or birds that are actively nesting?
It is much less effective once a nesting routine is established. In active nesting situations, you often need physical exclusion (for example, spikes or netting over the entry area) and you should also follow local wildlife rules before taking action. Treat tape as a deterrent for prevention and relocation, not a reliable method to remove established nests.
Next Article
How to Use Holographic Bird Scare Tape Step by Step
Step-by-step guide to use holographic bird scare tape: placement, mounting, coverage, limits, and fixes if birds return.