
A bird-scarer kite is a lightweight hawk or falcon-shaped kite flown on a fixed tether to mimic a predator in flight. Flown at 10–30 feet above a problem area, it deters pigeons, gulls, crows and many other pest species from landing or roosting nearby. For gardens, vegetable beds, patios, rooftops and solar panel arrays, a kite is one of the simplest and cheapest deterrents you can deploy, with commercial kits available from around US$5–$150 and DIY builds costing even less. For buying options and reviews of the best bird scarer kite, see our detailed guide. See our guide to the best bird scarer for garden for product picks and buying tips (ID: 6ca11eca-f79e-41b2-9177-91b8515dc5fa).
Bird Scarer Kite Instructions: Build, Rig, Deploy Guide

Marcus Weatherby
19 Jul 2026
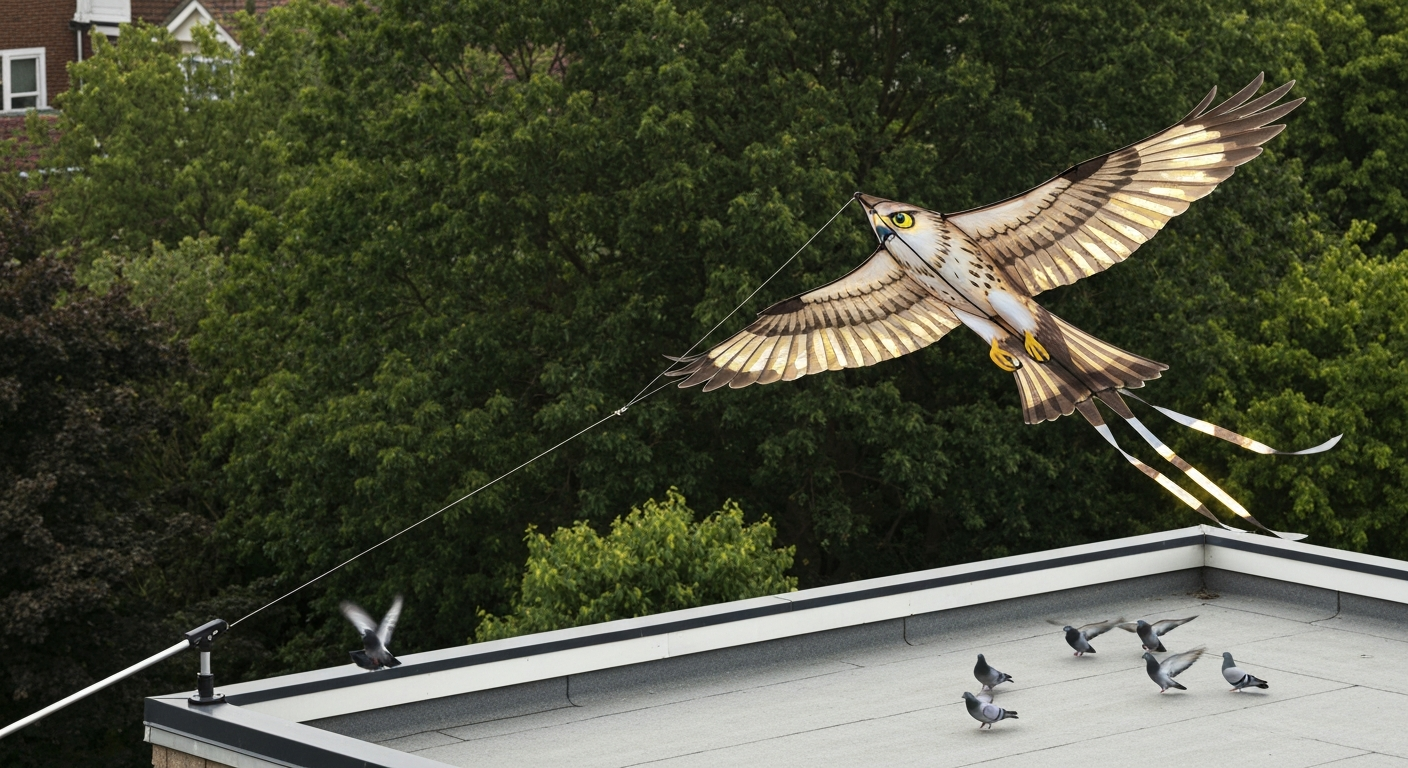
What bird-scarer kites are and when to use them
A bird-scarer kite works on instinct. Most pest birds, including pigeons, starlings, and gulls, have an innate wariness of large raptors. A kite shaped and colored like a hawk or peregrine falcon, moving unpredictably on a line, triggers that avoidance response. Unlike a static decoy, the kite has continuous motion driven by wind, which delays the habituation that kills the effectiveness of stationary deterrents.
They are most useful in open or semi-open spaces with consistent wind: gardens, allotments, flat or low-pitch rooftops, solar panel fields, patios, and smallholding paddocks. They are less practical in sheltered or enclosed courtyards where wind is unreliable, or in densely planted areas where the kite line could snag. For very enclosed situations or where aesthetics matter (such as balconies visible from a hotel lobby), other deterrents like netting or reflective tape may suit better.
Kites are also seasonal tools. Most residential users fly them during peak activity periods, such as spring and summer nesting season or harvest time, rather than year-round. For persistent, all-weather problems like pigeons roosting on a roof all winter, you will likely need to combine a kite with physical barriers or other deterrents to get lasting results.
Is a kite the right solution?
Kites sit in the middle of the deterrent effectiveness spectrum. Research and extension reviews rate predator kites as medium effectiveness at medium cost, which places them above low-cost reflective tape (low to medium effectiveness) but below physical exclusion like netting (high effectiveness, higher cost). The key limitation, supported by multiple field studies, is habituation: birds eventually learn the kite poses no real threat, especially if it is left in exactly the same position day after day.
That said, kites genuinely work well when used correctly. A peer-reviewed field trial using hawk kites combined with audio deterrents and flash tape recorded meaningful short-term reductions in bird activity. The takeaway from that and similar studies is that kites perform best as part of a combined, rotated program rather than as a standalone permanent fix.
Here is a quick comparison to help you decide whether a kite fits your situation or whether another device would serve you better.
| Deterrent type | Typical cost | Effectiveness | Habituation risk | Best suited to |
|---|---|---|---|---|
| Bird-scarer kite | US$5–$150 (kit); <$10 DIY | Medium | Medium-high without rotation | Open gardens, roofs, fields, patios |
| Reflective tape / tin-can scarer | <$5 | Low–medium | High | Garden beds, small patios |
| Sonic / ultrasonic devices | $30–$200+ | Low–medium | Medium | Enclosed spaces, rooftops |
| Spikes and physical barriers | $10–$100+ | High (targeted) | None (physical) | Ledges, gutters, roof edges |
| Bird netting | $20–$300+ | Very high | None (physical) | Fruit cages, solar panels, pools |
| Predator decoy (static) | $5–$30 | Low–medium | High | Small gardens, windowsills |
If you are dealing with a specific problem like pigeons on a roof ridge or gulls raiding a vegetable patch during peak season, a kite is a cost-effective first attempt. For product recommendations, see our guide to the best bird scarer for pigeons. If the problem has been going on for months and the birds are already habituated to the area, start with a kite but plan to add spikes or netting to areas where they actually land and roost.
Types of bird-scarer kites and buying guidance
Commercial bird-scarer kites come in a narrow range of designs, but the differences in materials and size matter quite a bit for how long they last and how well they perform.
Hawk and falcon silhouette kites
The most common type uses a flat or semi-3D hawk shape, usually printed on ripstop nylon or polyester. The wings are spread wide, the underside is printed with a realistic eye pattern, and some models include a reflective surface to add a flash effect in sunlight. These are the designs you will find most readily in garden centers and online. Ripstop nylon versions last 1–2 seasons with normal outdoor exposure. Cheaper polyester versions may UV-degrade faster.
3D / tube kites
Some higher-end kites use a semi-inflated tube construction that gives a more three-dimensional shape in flight. These are generally more durable and more convincing at close range, but they cost more (typically $40–$150) and require more wind to fly properly.
Size and target species
For pigeons and smaller garden birds, a kite with a wingspan of 24–36 inches is sufficient. For larger species like Canada geese, herons, or crows, go for a wingspan of 36–48 inches or more. Undersized kites are less convincing to larger birds, so match the kite to the bird you are targeting.
Poles and line
Most commercial kits include a telescopic fiberglass or aluminum pole (typically 6–16 feet) and a length of monofilament or braided line. For rooftop use, you need a weighted or clamping mount rather than a ground-stake pole. Check that any kit you buy includes a swivel connector at the bridle point, as this prevents the line from twisting and tangling in wind shifts.
Buying recommendations by site
- Garden and vegetable beds: any basic hawk-kite kit with a 6–10 ft telescopic pole; ripstop nylon is fine
- Pigeons specifically: look for a kite with a realistic underside print and an eye pattern; peregrine falcon designs are reportedly more effective for pigeons than generic hawk shapes
- Roof and chimney: choose a kit with a weighted roof-mount bracket or buy the kite separately and fabricate a mount; ensure the pole does not exceed the height at which local regulations require notification
- Solar panels and flat commercial roofs: a longer pole (12–16 ft) raises the kite above panel height so it is visible to approaching birds
- Smallholdings and large fields: buy two or three kites and rotate their positions every few days to reduce habituation
Materials, tools and safety gear
Whether you are building a kite from scratch or assembling a commercial kit, having the right materials ready before you start saves time and avoids substandard results. Below are two materials lists: one for a standard DIY hawk kite, and one for a tin-can and reflective-element variant.
Standard DIY hawk kite: materials and tools
- Ripstop nylon or heavy-duty mylar sheeting (at least 36 x 36 inches for a medium kite)
- Two fiberglass or carbon-fiber rods for the spar frame: one 32–36 inch spine (leading edge/body axis) and one 28–30 inch cross-spar (wing spread)
- Hawk or falcon silhouette template printed on paper, or drawn freehand at 1: 1 scale
- Scissors or rotary cutter and cutting mat
- Waterproof fabric glue or iron-on seam tape (for hemming)
- Strong needle and nylon thread (for reinforcing attachment points)
- Grommets or brass eyelets and setting tool (for bridle and tail attachment points)
- 40–80 lb braided Dyneema or polyester kite line (50–100 ft roll)
- Three-way swivel snap connector (to prevent line twist)
- Lightweight Mylar or reflective tape strips for wing decoration (optional but adds flash effect)
- Permanent outdoor-rated marker pens in dark brown, black, and white (for eye and feather detail)
- Small fishing weights or washers (for tail ballast)
- Safety glasses (when cutting fiberglass rods)
- Gloves (when handling cut rod ends)
Tin-can and reflective-element variant: additional materials
- 4–8 clean empty tin cans (different sizes for varied pitch)
- Hammer and nail or drill with 1/8-inch bit (for piercing holes in the can base and rim)
- Strong nylon cord or wire (for suspending cans from the kite tail)
- Strips of heavy-duty aluminum foil tape or Mylar emergency blanket cut into 3–4 inch streamers
- Small swivel clips for each can attachment (prevents line twist during wind rotation)
- Waterproof epoxy or weatherproof sealant (to seal cut metal edges and prevent rust)
- Cable ties or zip ties (for securing streamers to the tail line)
Safety note: cut fiberglass rod ends are sharp and produce fine splinters. Always wear safety glasses and gloves when cutting or sanding rods, and seal cut ends with a small drop of epoxy or a rod-end cap. When working on rooftops or at height to rig the kite, use appropriate fall protection and never work alone.
Step-by-step DIY kite build
This build produces a flat hawk-silhouette kite with a wingspan of approximately 32 inches, suitable for deterring pigeons, starlings, and smaller garden birds. The whole build takes about 2–3 hours including drying time.
Step 1: Cut the frame
- Mark and cut your spine rod to 34 inches and your cross-spar rod to 30 inches using a junior hacksaw. Sand the cut ends smooth and seal them with a drop of epoxy.
- Using electrical tape or a small drilled connector, attach the cross-spar to the spine at a point approximately 10 inches from the top (the head end). This positions the wings forward of center, which is where a hawk's wings sit in a glide.
Step 2: Make the sail
- Lay your ripstop nylon flat on a cutting mat. Place the frame on the fabric and trace the outline of a hawk silhouette around it: a pointed head at the top of the spine, broad swept wings following the cross-spar, and a forked or fan tail at the bottom.
- Add a 0.5-inch hem allowance all around and cut out the shape.
- Fold the hem over the frame perimeter and glue or iron-tape it in place. For the rod ends, fold the fabric tightly over the tip and stitch or glue for extra hold. The sail should be taut but not stretched to the point of bowing the rods.
Step 3: Add detail and reflective elements
- Using outdoor marker pens, draw a large round eye on the underside (the side birds see when the kite is overhead), a hooked beak at the head, and simple feather barring on the wings. Contrast is more important than artistic precision here.
- Stick strips of Mylar or reflective tape along the leading edges of both wings. In sunlight, these create a flash that adds a second deterrence mechanism on top of the silhouette shape.
- Set grommets at three points: the nose (head), and each wingtip. These are your bridle attachment points.
Step 4: Rig the bridle
- Cut three lengths of 30 lb monofilament: one from the nose grommet (approximately 16 inches), and one from each wingtip grommet (approximately 12 inches each).
- Tie all three lines to a central ring or snap swivel. The kite should hang at roughly a 20–30 degree angle from vertical when held by the bridle point. If it hangs too flat, shorten the nose line slightly. If it noses up too steeply, lengthen it.
- Clip your main flying line to the snap swivel.
Step 5: Make and attach the tail
- Cut a 3–6 foot length of nylon cord and attach it to the tail grommet. Tie small strips of Mylar or ribbon along the tail at 6-inch intervals. The tail adds drag stability in gusting wind and provides additional visual movement.
- Test the kite in a light breeze (8–12 mph ideally) before committing to installation. It should fly at 20–40 degrees above horizontal and exhibit gentle, unpredictable rocking motion. If it spins or dives, re-check the bridle balance and add a small fishing weight to the tail.
Tin-can and reflective-element variant
The tin-can variant adds an auditory deterrent to the visual one. Wind causes the cans to knock together and spin, producing irregular noise and light flashes. It is a budget-conscious option that overlaps with the DIY tin can bird scarer approach, adapted here to fly on a kite rather than hang statically.
Preparing the cans
- Wash and dry 4–6 tin cans thoroughly. Remove any sharp lid remnants and file or seal the rim edge with waterproof sealant to prevent injury when handling.
- Use a nail and hammer or a drill to pierce two holes opposite each other near the base of each can. These are for threading the suspension cord.
- Pierce one hole at the base center for a small drain hole to prevent water pooling inside the can (which adds weight and promotes rust).
- Thread a 6-inch loop of nylon cord through the two base holes and tie it off, creating a hanging loop for each can.
Balancing the assembly
- Attach the cans to the kite tail line using small swivel clips, spacing them 8–10 inches apart. Use 3–4 cans for a medium kite; more than 5 or 6 cans will add too much weight and drag, destabilizing the kite.
- Add Mylar streamers between the cans by zip-tying them to the tail cord. In daylight, these reflect sunlight in random directions as the tail moves.
- Test the weighted tail in a moderate breeze. The kite should still fly at a consistent angle. If it pulls the nose down or oscillates badly, remove one or two cans until the balance is restored.
Attaching reflective elements to the kite body
For the kite body itself, stick 2-inch strips of aluminum foil tape or Mylar emergency blanket material to the upper surface of the wing panels (the side facing the sky). This reflects light downward onto birds approaching from below and adds a glint visible at distance. Avoid covering more than 30% of the wing surface, as too much weight from tape will affect the kite's flight characteristics.
Rigging and deployment
Getting the rigging right is as important as the kite build itself. A poorly tethered kite will either crash constantly, tangle, or fail to reach the height where it is visible to approaching birds.
Line choice
Use 40–80 lb braided polyester or Dyneema kite line. Avoid monofilament fishing line for the main tether: it has stretch, degrades with UV exposure, and can snap unexpectedly. Dyneema has virtually no stretch and holds up well outdoors for a full season before inspection. Carry at least 50–100 feet of line so you can adjust flying height.
Anchor options
- Ground stake: a 12–18 inch steel spiral ground stake (the type used for dog runs) is excellent for garden and field use; it holds in most soils and is easy to relocate
- Telescopic pole mount: a 6–16 ft telescopic fiberglass pole with a ground spike raises the kite off the surface and is the standard option in most commercial kits
- Roof mount: a weighted sandbag base with a ratchet strap around a chimney stack, or a proprietary roof-rail clamp; never drill into roof materials without professional advice
- Rail or fence clamp: a 360-degree swivel clamp on a fence post or balcony rail works well for patios and small gardens; the swivel allows the line to pivot freely as wind direction changes
Wind range and flying height
Most hawk kites fly acceptably in winds of 7–25 mph (Beaufort 3–5). Below about 5–6 mph the kite will not maintain altitude; above 30 mph (Beaufort 7) it should be brought down, as the kite and tether are under stress and the anchor may fail. Do not leave a kite unattended in forecast storms or gusting conditions above 25 mph.
Flying height is a balance between visibility and regulations. For most residential deterrence purposes, 10–25 feet above the protected area is effective. The kite needs to be visible from the approach angles birds use, which is typically from above or at the same level as the site. For rooftop deterrence, the kite ideally needs to be 6–12 feet above the roofline.
Height limits and regulatory considerations
In the United States, 14 CFR Part 101 prohibits operating a kite within five miles of an airport boundary and requires advance notice to the nearest FAA ATC facility before operating a kite more than 150 feet above the surface. If you are near an airfield or in Class D or controlled airspace, contact your local FAA facility before flying any kite, regardless of purpose. In the UK, the CAA requires operators to notify or seek permission for kite operations above 60 metres (approximately 197 feet) AGL and has specific guidance for tethered kites near aerodromes.
For the vast majority of residential garden and rooftop uses, the kite will fly well below these thresholds. But if your property is close to an airport or airfield, check before you rig anything. Facility managers and airport-adjacent staff should consult the FAA Advisory Circular AC 70/7460-1 for obstruction marking and lighting requirements if they plan any kite deployment that could affect navigable airspace.
Swivels, tether management and preventing tangles
- Always use a ball-bearing swivel between the bridle and the main line; without it, repeated wind shifts will kink and weaken the line
- Use a second swivel at the anchor point if the anchor does not rotate freely
- Attach a short (6-inch) stiff leader of heavier line between the bridle swivel and the main line so that the kite's movement does not chafe the main line at the connection point
- Mark the line at 10-foot intervals with small colored cable ties so you can quickly gauge flying height
- When stowing the kite, wind the line onto a hand reel rather than loose-coiling it, to prevent the tangles that cause most in-field delays
Placement guidance for common site scenarios
Where you position the kite matters as much as the kite itself. The goal is to cover the approach vectors birds use and the landing areas they prefer. Below are placement recommendations for the most common sites.
Gardens and vegetable beds
Position the pole at the upwind edge of the bed so the kite flies over the protected area rather than away from it. For a standard 20 x 20 foot vegetable plot, one kite on a 10 ft pole at one corner is sufficient. For larger plots (over 50 feet in length), use two kites at opposite corners and alternate which one is deployed each day. Move the pole position by at least 10 feet every 3–4 days to prevent habituation.
Roofs and chimneys
For pigeons roosting on a roof ridge or chimney stack, mount the pole adjacent to the most-used roosting spot. A 12–16 ft pole mounted at the chimney base (weighted or clamped, not drilled) raises the kite to just above the ridge line. For options optimized for rooftop use, see our guide to the best bird scarer for roof. Supplement the kite with physical deterrents (anti-perch strips or spikes) on the actual landing edges, as the kite will deter approach but birds may still land out of the kite's direct sightline on the lee side of the roof.
Solar panels
Birds roosting under or on solar panels cause fouling and can damage wiring. Position the kite pole at the uphill or upwind end of the panel array so the kite flies across the face of the panels. For a domestic array (12–20 panels), one kite on a 12 ft pole at the ridge is usually sufficient. For a commercial rooftop array, space poles every 30–40 feet across the array width and consider rotating positions weekly.
Patios and balconies
A rail-clamp mount on the outer edge of a balcony or patio railing works well. Use a shorter pole (4–6 ft) to keep the kite within a manageable and legally unambiguous height. Pair with reflective tape or wind-activated streamers at railing level to deter birds that approach low. In enclosed or walled patios where wind is unpredictable, a static predator decoy combined with reflective tape may outperform a kite.
Smallholdings
For protecting fruit crops, grain stores, or livestock feed, use multiple kites on rotating positions. A field study in a tundra/mining-site context found that hawk kites combined with audio deterrents and flash tape gave effective short-term results, but required regular repositioning and maintenance. In a smallholding context, place kites at the four compass points of the area and rotate them clockwise by one position each week. This keeps the spatial novelty that prevents habituation.
Facility and airport-adjacent sites
At facilities near airports, kites must be used with great care. Regulatory restrictions under 14 CFR Part 101 (US) and CAA guidance (UK) mean that kite height and location must be confirmed with aviation authorities before deployment. In practice, airport wildlife managers rely on integrated bird management programs that combine habitat modification, physical exclusion, and active harassment. A kite can be a component of that program at sites away from active runways, but it should never be deployed near approach or departure paths without explicit ATC notification and, where required, a waiver. The Transport Canada evaluation of airport bird control methods notes that visual deterrents including kites provide useful novelty stimuli but lack long-term efficacy on their own and must be part of a broader integrated program.
Legal and wildlife protection considerations
Using a kite to scare birds is non-lethal, and in most jurisdictions non-lethal scaring of common pest birds is permitted without a license. In the United States, the Migratory Bird Treaty Act (implemented in 50 CFR Part 21) allows non-lethal scaring or harassment of most migratory bird species without a federal permit. However, special rules apply for bald and golden eagles and any federally listed threatened or endangered species: do not target these with any deterrent program without first consulting the US Fish & Wildlife Service. Lethal control of any migratory bird requires a depredation permit.
In the UK, GOV.UK wildlife management guidance (WML-GU01 and related documents) lists legally permitted non-lethal deterrents and recommends starting with exclusion before escalating to scaring methods. EU practitioners should check their national transposition of the Birds Directive (2009/147/EC), as member states implement species-protection rules differently. The RSPB and similar conservation organizations advise using humane, species-appropriate methods and caution that persistent harassment of protected species could attract legal scrutiny even if the method is technically non-lethal.
In practice, for common pest species (pigeons, starlings, crows, gulls) on private property, flying a hawk kite is legally straightforward in the US, UK, and most EU countries. Just keep it below regulatory height thresholds and away from airports without prior authorization.
Troubleshooting and maintenance
Even a well-built kite will need attention after a few weeks of outdoor use. Here are the most common problems and how to fix them.
| Problem | Likely cause | Fix |
|---|---|---|
| Kite nose-dives repeatedly | Bridle nose line too long or tail too light | Shorten the nose bridle line by 1 inch at a time; add weight to the tail |
| Kite spins or rotates on the line | Missing swivel or swivel is seized | Replace the ball-bearing swivel at the bridle connection |
| Kite does not lift in light wind | Sail material too heavy or bridle angle too flat | Adjust bridle to increase angle of attack; switch to lighter ripstop nylon |
| Line tangles around the pole | Wind dropped and kite fell onto the pole | Use a longer pole or add a spreader arm to keep the line clear of the pole tip |
| Birds no longer responding | Habituation from fixed position | Move the pole position by at least 10 feet and add a second deterrent type |
| Sail fabric UV-faded or torn | Weather degradation | Replace the sail; apply UV-resistant spray to new sail before deployment |
| Tin cans rusting or cracking | Moisture and freeze-thaw cycling | Replace cans seasonally; use sealed aluminum cans rather than steel if available |
Inspect the tether, swivels, and anchor every two weeks during active deployment. Replace any line that shows kinking, fraying, or visible UV whitening. Field research into hawk-kite deterrent programs has noted that replacement costs for kites and line are a real operational expense: budget for one full kite replacement per season for outdoor use in a typical UK or northern-US climate.
Cost expectations
A commercial hawk-kite kit (kite, telescopic pole, and line) costs roughly US$10–$50 for a basic garden version and up to US$100–$150 for a larger or more durable model. For reviews and top-rated options, see our guide to the best bird scarer. Retail Kites and Bird Scarer listings (Walmart product category examples) show commercial hawk‑kite kits priced from around $5 to $150 Retail Kites and Bird Scarer listings (Walmart product category examples) show commercial hawk‑kite kits priced from around $5 to $150.. A DIY build using purchased fabric and rods costs under US$10–$15 for materials if you source them from a craft or hardware store. The tin-can variant adds almost nothing in material cost if you recycle household cans.
For comparison, a basic set of roof spikes covers about 10 feet of ridge for $15–$25, and a solar-panel bird-exclusion netting kit for a domestic array costs $50–$150 installed as a DIY job. A kite is the cheapest entry point of any active deterrent, though its medium effectiveness and habituation risk mean you may end up combining it with other solutions anyway, raising your overall spend.
For large-scale deployment (smallholdings, commercial rooftops), factor in pole hardware, additional swivels, and labor time for weekly repositioning. The peer-reviewed tundra field study that evaluated hawk kites as part of a combined deterrent program itemized equipment and person-hours as real ongoing costs: for any program larger than a single domestic garden, treat maintenance time as a genuine operating cost alongside hardware.
FAQ
What is a bird‑scarer kite and when is it appropriate to use one?
A bird‑scarer kite is a tethered kite designed to look like a predator (hawks, falcons) or to present movement and reflection that birds find aversive. It’s appropriate for deterring perching and roosting on gardens, roofs, patios, small commercial sites and around solar arrays as a non‑lethal, low‑cost tool. Expect short‑ to medium‑term reductions in bird activity; kites work best as one part of an integrated program (habitat modification, exclusion, and other deterrents) because birds commonly habituate to a single visual stimulus over time.
What legal and safety rules should I check before deploying a kite?
Check local aviation rules: in the U.S. 14 CFR Part 101 restricts kite operations near airports (typically a 5‑mile advisory zone and notification/waiver requirements for kites above 150 ft). UK CAA guidance requires notification for tethered kites above 60 m AGL. If you are near an aerodrome or flight paths, contact the relevant aviation authority or ATC and follow obstacle‑lighting guidance (FAA AC 70/7460 when applicable). Also follow wildlife laws: scaring migratory birds is generally allowed, but special protections exist for eagles, listed species and some local protected birds—check your national wildlife agency before acting. Finally, consider public safety—avoid placing kites over roads, power lines, or public rights‑of‑way and use marked tethers and visible anchors.
What materials and tools do I need to build a basic predator kite?
Materials: ripstop nylon or lightweight polyester fabric (kite body), carbon or fiberglass spars, kite line (30–200 lb test depending on size and site), swivel snap for the kite throat, tail materials for stability (streamers), reinforced D‑rings or webbing for bridles. Tools: measuring tape, scissors or rotary cutter, sewing machine or heavy‑duty needle and strong polyester thread, rivet/set tool or reinforcing tape, lighter or heat‑sealer for fabric edges. For rooftop/solar deployments add ground‑anchors (sandbags, screw anchors, weighted bases), quick‑release shackles and a telescoping pole if you plan a mast mount.
How do I build a simple DIY hawk kite (step‑by‑step)?
1) Cut two wings and a body from ripstop fabric using a hawk silhouette template. 2) Reinforce wing roots and throat with webbing and stitch securely. 3) Install fiberglass/carbon spars along the leading edge and a cross‑spar at the keel; pocket or sleeve the spars and secure. 4) Attach a bridle: a three‑point bridle (left wing root, right wing root, keel) tied to a central swivel snap; adjust lengths so the kite flies at 30–45° angle. 5) Add a tail (long streamers) to increase movement and instability for birds. 6) Attach flying line to the swivel; keep visible flagging on the line and a secure anchor. Test in moderate wind and tweak bridle until stable.
How do I make a low‑cost reflective/tin‑can variant?
Materials: empty clean tin cans or plastic containers, reflective tape (or Mylar/thermal blanket strips), lightweight cord, swivels or split rings, and monofilament or thin kite line. Steps: 1) Punch a hole near the base rim of each can and thread cord or split ring through with a swivel so cans can spin freely. 2) Adhere reflective tape or strips of Mylar to the outside face of the can for flashes. 3) String multiple cans on a line with spacing (0.5–1 m) and attach to a kite or pole assembly so the cans spin and reflect light. 4) Mount the can string on a short support or to the kite bridle so it moves independently. This variant is cheap and highly reflective, but less realistic than hawk kites and more prone to noise; always deburr metal edges and secure fastenings to prevent littering.
How should I rig and tether a kite for different scenarios (garden, roof, solar panels, airport‑adjacent)?
General rules: use a proper bridle and swivel at the kite throat; inspect line and knots before each use. Gardens/patios: low anchors (0.5–3 m), use light to medium line (30–80 lb), fly kites close to the area (5–30 m) so birds see movement overhead. Roofs/solar panels: mount on a mast or pole anchored to roof structure or ballast; use non‑abrasive line routing and protected attachment points; keep clearance from panel frames and PV wiring. Large open sites/fields: higher line length and heavier anchor. Near airports/flight paths: do not operate without checking aviation rules; limit altitude (below local notification thresholds) or notify authorities and mark tether with lights/flags per regulations. In windy conditions reduce height and use heavier anchors; in low wind use lighter, larger kites or larger tails. Always use a breakaway or safe‑release if the kite approaches hazards.